How to Analyze a Property's Natural Flow Paths: A Complete Guide
Water is relentless. It never stops searching for the lowest point on a landscape, carving its way through soil, pooling against foundations, and exploiting every subtle dip in your yard. Understanding flow path analysis — the process of tracing where water travels across your property during and after rainfall — is the single most important step you can take to protect your home from water damage, foundation erosion, and chronic drainage problems.
Every property has a story written in its terrain. Ridgelines, swales, subtle grade changes, and soil composition all combine to create drainage flow patterns that determine where stormwater concentrates and where it drains away. Whether you're a homeowner investigating a wet basement, a contractor planning a grading project, or an inspector evaluating a property's drainage health, learning to read and map these natural flow paths gives you the intelligence you need to make informed decisions.
In this guide, we'll walk through the complete process of analyzing your property's natural flow paths — from reading the land with your own eyes to leveraging elevation data and digital tools for precise water flow mapping.
What Is Flow Path Analysis and Why Does It Matter?
Flow path analysis is the systematic process of determining the routes that surface water follows as it moves across a landscape under the influence of gravity. At its core, it's a simple concept: water flows downhill. But in practice, the interplay of micro-topography, soil permeability, vegetation, and man-made structures creates complex drainage flow patterns that are far from obvious.
On a residential property, flow path analysis answers critical questions: Where does rainwater go when it hits your roof, driveway, and lawn? Does it sheet-flow away from your foundation or collect against it? Are there convergence points where multiple flow paths merge, creating concentrated runoff that erodes soil or overwhelms drainage infrastructure? Does your property receive runoff from neighboring lots or uphill terrain?
The consequences of ignoring these questions are well-documented. According to insurance industry data, water damage is consistently one of the most common and costly homeowner claims. Foundation repairs related to poor drainage can cost anywhere from $5,000 to $50,000 or more. Hydrostatic pressure from pooling water can crack basement walls, and persistent moisture creates conditions for mold growth that threatens both structural integrity and indoor air quality.
Flow path analysis matters because it shifts your approach from reactive to proactive. Instead of waiting for water to reveal a problem — a flooded crawlspace, a saturated yard, a crumbling retaining wall — you identify the problem before it manifests. You see the vulnerability in the terrain and address it with grading corrections, drainage installations, or landscape modifications designed to work with the natural flow of water rather than against it.
Get Your Drainage Intelligence Report™
Start a free trial and generate reports on demand.
Reading the Landscape: Visual Flow Path Assessment
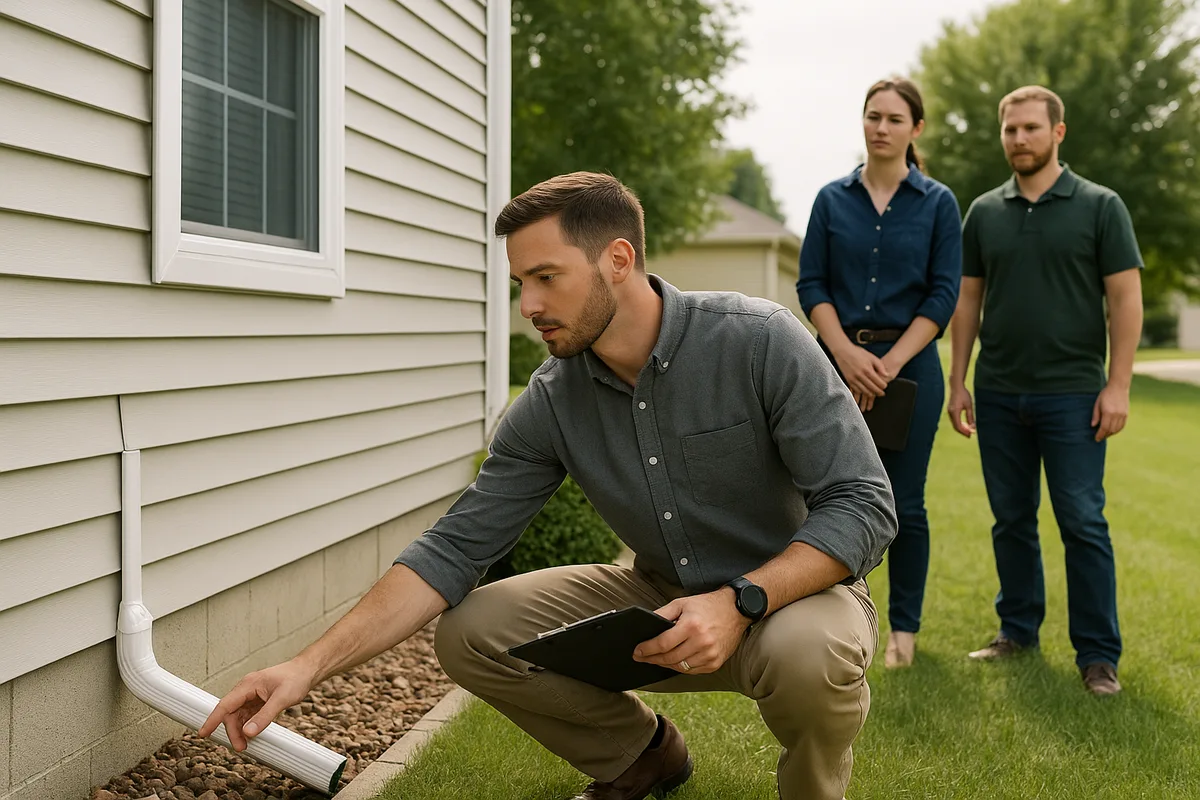
Before you open any software or study any elevation dataset, the first step in flow path analysis is to walk your property with educated eyes. The landscape holds an enormous amount of information about where water travels, and much of it is visible if you know what to look for.
Identifying Natural Swales and Ridgelines
Swales are shallow, linear depressions in the ground that function as natural drainage channels. They may be subtle — sometimes just a few inches lower than the surrounding terrain — but they represent the primary highways that water follows during a rain event. Walk your property slowly and look for elongated low areas, especially those that run between higher ground features. Grass in swales is often greener and thicker because it receives more moisture. You may also notice sediment deposits, small erosion channels, or debris lines that mark the path of flowing water.
Ridgelines are the opposite: the high points or crests that divide one drainage area from another. On a residential lot, a ridgeline might be as subtle as the crown of your front yard that sends water toward the street on one side and toward the backyard on the other. Identifying these dividing lines is essential because they define your property's watershed boundaries — the areas that contribute runoff to specific low points.
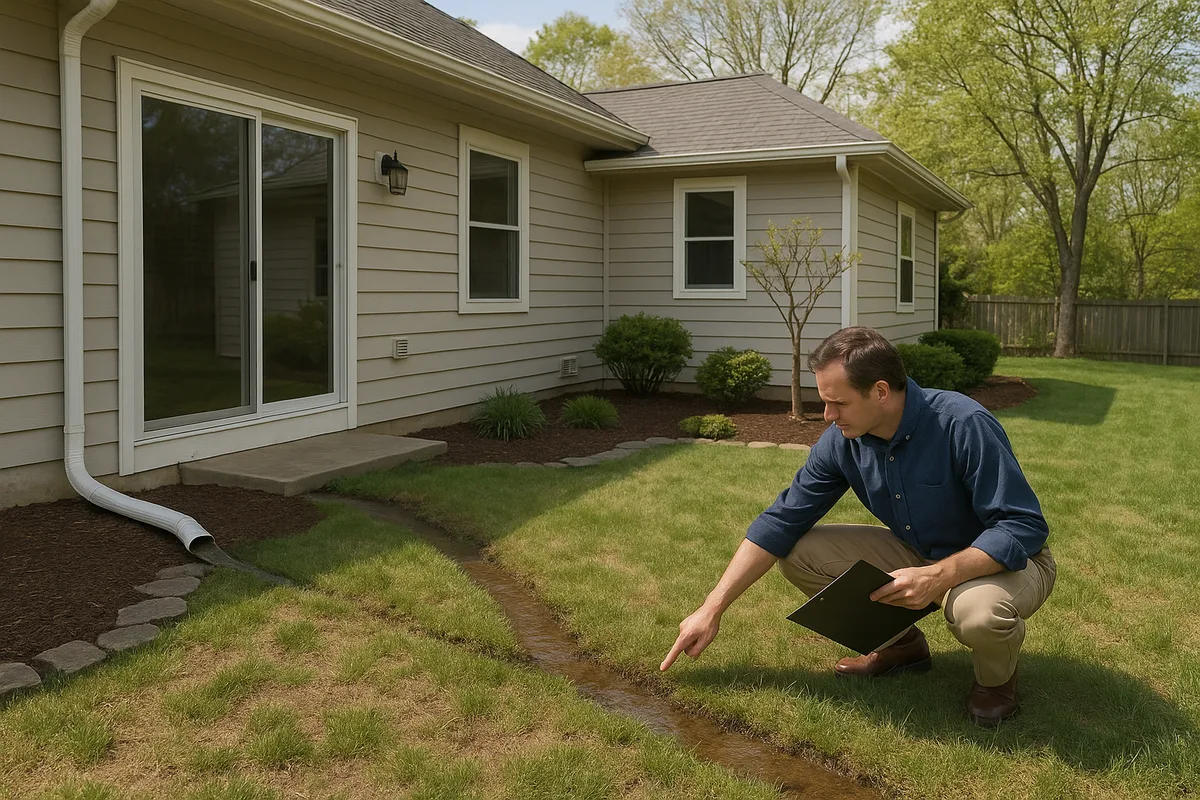
Looking for Evidence of Water Movement
Water leaves evidence everywhere it travels. Look for these telltale signs during your visual assessment:
- Erosion rills and gullies: Small channels carved into bare soil indicate concentrated flow paths. The deeper and wider the channel, the more water volume it carries.
- Sediment fans: Where flowing water slows down — at the base of a slope, at the edge of a flat area — it deposits the sediment it was carrying. These fan-shaped deposits mark the terminus of active flow paths.
- Staining on hardscapes: Water lines on foundation walls, retaining walls, or pavement show you exactly how high water has risen in specific locations.
- Moss and algae growth: Persistent moisture promotes biological growth. Areas with heavy moss or algae on the ground, on fences, or at the base of structures indicate chronic wetness from converging flow paths.
- Mulch displacement: If your landscape mulch has migrated from its original position, it was carried by flowing water. The direction of displacement reveals the flow direction.
Timing Your Assessment
The best time to perform a visual flow path assessment is during or immediately after a significant rain event — ideally a storm that produces at least half an inch of rainfall within an hour. This is when the landscape reveals its true drainage behavior. Stand at a high point on your property and watch how water moves. Note where it sheets across the lawn, where it concentrates into streams, where it pools, and where it exits your property. Take photos and videos. This real-time observation is invaluable data that no amount of desktop analysis can fully replace.
If you can't observe during active rainfall, visit your property 12 to 24 hours after a storm. Areas that are still saturated, puddles that haven't drained, and soft spots in the lawn all indicate locations where flow paths converge or where drainage is impeded.
Understanding Watershed Analysis at the Property Scale
The term watershed analysis might conjure images of massive river basins, but the same principles apply at the scale of a single residential lot. Every property is a micro-watershed — or more accurately, it contains multiple micro-watersheds — each with its own contributing area, flow paths, and discharge point.
Delineating Your Property's Micro-Watersheds
A watershed is simply the area of land that drains to a common point. On your property, you might have several: the front yard drains to the street, the left side yard drains to a swale along the property line, the back yard drains to a low corner near the fence. Each of these is a distinct micro-watershed with its own characteristics.
To delineate these watersheds, start at the low points — the places where water collects or exits the property. Then trace uphill in all directions, following the ridgelines that divide one drainage area from another. Everything inside those ridgeline boundaries contributes runoff to that specific low point. Sketch these boundaries on a simple site plan or aerial photo of your property.
The size of each micro-watershed matters because it determines runoff volume. A larger contributing area means more water flowing to the discharge point. If your backyard low point receives runoff from 3,000 square feet of lawn, that's one thing. If it also receives runoff from your neighbor's 5,000-square-foot lot uphill, that's a dramatically different — and potentially problematic — situation.
Calculating Runoff Volume
Once you've delineated your micro-watersheds, you can estimate how much water each one generates during a storm. The Rational Method, commonly used in civil engineering, provides a straightforward formula:
Q = C × I × A
Where:
- Q = peak runoff rate (cubic feet per second)
- C = runoff coefficient (a value between 0 and 1 representing how much rainfall becomes runoff)
- I = rainfall intensity (inches per hour for a given storm frequency and duration)
- A = drainage area (acres)
Runoff coefficients vary by surface type: impervious surfaces like roofs and driveways have coefficients of 0.85–0.95 (nearly all rainfall becomes runoff), while well-maintained lawns on flat ground might have coefficients of 0.10–0.25. For rainfall intensity values specific to your location, NOAA Atlas 14 provides precipitation frequency estimates for any point in the United States, allowing you to determine design storm intensities for various return periods.
This calculation helps you understand not just where water flows, but how much water is flowing — critical information for sizing drainage solutions like French drains, catch basins, or dry wells.
Using Elevation Data for Precise Water Flow Mapping
Visual assessment and watershed delineation give you a strong qualitative understanding of your property's drainage behavior. But for precise water flow mapping, you need elevation data — and modern tools make this more accessible than ever.
Sources of Elevation Data
The foundation of any digital flow path analysis is a Digital Elevation Model (DEM) — a grid of elevation values that represents the shape of the terrain. Several sources provide DEM data at varying resolutions:
- LiDAR-derived DEMs: Light Detection and Ranging (LiDAR) surveys produce the highest-resolution elevation data available, often with vertical accuracy of 10–15 centimeters and horizontal resolution of 1 meter or better. The USGS 3D Elevation Program (3DEP) is systematically collecting LiDAR data across the entire United States, and much of this data is freely available for download. For residential flow path analysis, LiDAR data is the gold standard because it captures the subtle grade changes — even just a few inches — that determine where water flows on a flat lot.
- Photogrammetric DEMs: Derived from aerial photography, these models are typically lower resolution than LiDAR but still useful for understanding general drainage patterns.
- Survey-grade data: A licensed surveyor can produce the most accurate elevation data for your specific property using GPS equipment or total stations. This is the best option when you need sub-inch accuracy for grading plans or drainage design.
How Flow Accumulation Models Work
Once you have a DEM, the process of generating flow paths is algorithmic. Geographic Information System (GIS) software uses a sequence of operations to model how water moves across the terrain:
- Fill sinks: The DEM is preprocessed to remove small depressions (artifacts or real features) that would trap water and prevent continuous flow modeling.
- Calculate flow direction: For each cell in the DEM grid, the algorithm determines which of its eight neighboring cells has the lowest elevation. Water is assumed to flow in that direction. This is known as the D8 (deterministic eight-node) algorithm.
- Calculate flow accumulation: The algorithm then counts how many upstream cells drain through each cell. Cells with high flow accumulation values represent locations where many flow paths converge — these are your natural drainage channels and concentration points.
- Extract flow paths: By setting a threshold on the flow accumulation grid (e.g., cells where more than 100 upstream cells contribute), you can extract a network of flow paths that represent the property's primary drainage channels.
The result is a map showing exactly where water concentrates on your property, how it gets there, and where it goes. This is the essence of water flow mapping, and it transforms vague concerns about drainage into precise, actionable intelligence.
Tools for Homeowners and Professionals
You don't need to be a GIS specialist to perform basic flow path analysis. Several tools make this accessible:
- QGIS: This free, open-source GIS platform includes terrain analysis tools that can generate flow direction, flow accumulation, and watershed delineation from DEM data. There's a learning curve, but extensive tutorials are available online.
- Online terrain analysis services: Several web-based platforms allow you to upload or access DEM data and perform basic drainage analysis without installing software.
- Professional drainage assessment services: Companies like Low Point Labs specialize in translating raw elevation data into clear, actionable drainage intelligence for residential properties, removing the technical barriers entirely.
Analyzing Flow Path Convergence and Problem Areas
Identifying flow paths is only half the battle. The real value of flow path analysis comes from understanding where those paths create problems — and that means focusing on convergence points, obstructions, and areas where the natural drainage system breaks down.
Flow Path Convergence Zones
Convergence zones are locations where multiple flow paths merge, concentrating runoff into a smaller area. These are the highest-risk locations on any property because they experience the greatest water volume and velocity. Common convergence zones on residential properties include:
- Inside corners of L-shaped or U-shaped houses: The architecture funnels roof runoff and surface water into a confined area.
- Low corners of fenced yards: Fences, walls, and other barriers can redirect flow paths and force convergence at specific points.
- Bases of slopes: Where a hillside meets flat ground, sheet flow from the entire slope converges along the toe of the slope.
- Driveway and walkway intersections: Impervious surfaces channel water efficiently, and their intersections create convergence points.
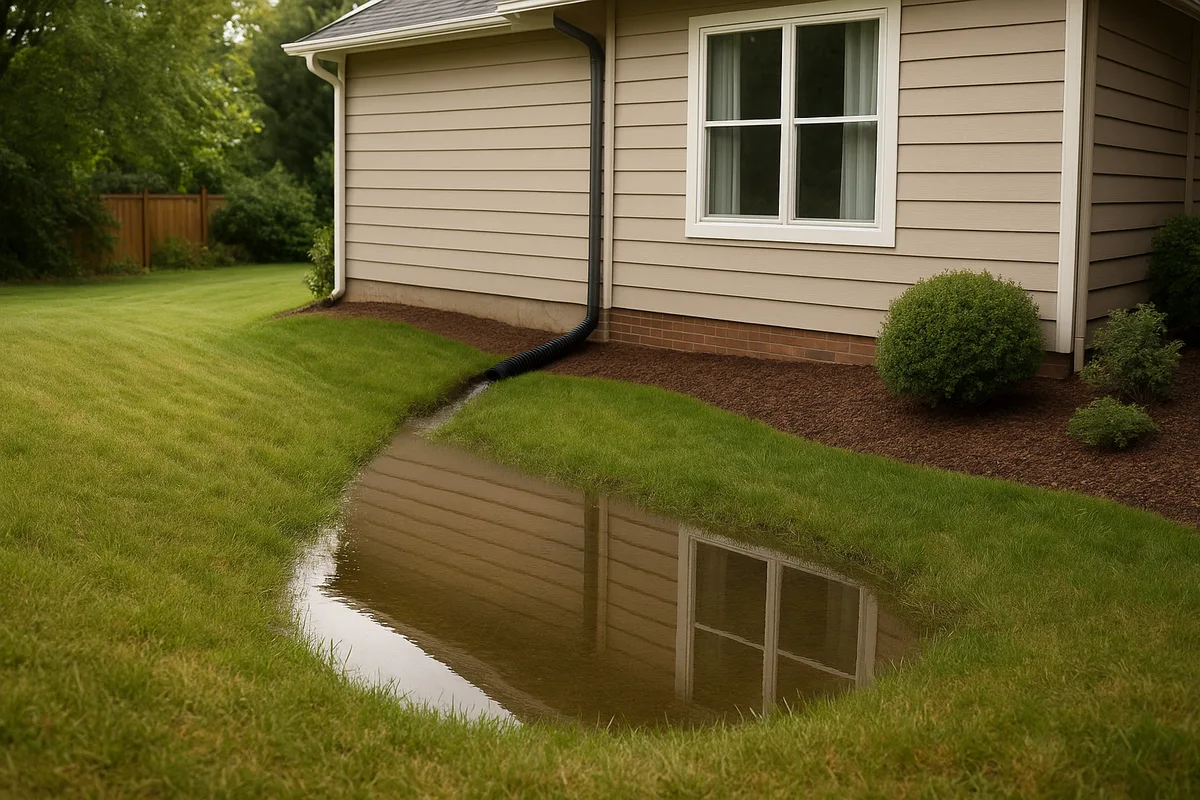
At each convergence zone, assess whether the existing drainage infrastructure — gutters, downspout extensions, French drains, catch basins, swales — is adequate to handle the concentrated flow. Signs of inadequacy include standing water more than 24 hours after rain, soil erosion, foundation staining, or water intrusion into basements or crawlspaces.
Obstructions and Diversions
Man-made features frequently alter natural drainage patterns in ways that create problems. A common scenario: a homeowner builds a shed, patio, or raised garden bed that blocks a natural swale, forcing water to find a new path — often directly toward the foundation. Other common obstructions include:
- Retaining walls without adequate drainage: A retaining wall that blocks a flow path without providing weep holes or a French drain behind it will trap water, creating hydrostatic pressure that can eventually cause the wall to fail.
- Compacted soil from construction: Heavy equipment compacts soil, dramatically reducing its permeability and converting areas that once absorbed rainfall into de facto impervious surfaces that generate runoff.
- Raised landscaping beds: Berms and raised beds can inadvertently dam flow paths, creating ponding areas on their uphill side.
- Neighbor's grading changes: If an adjacent property regraded their lot, it may have redirected runoff onto your property — a common source of neighbor disputes and drainage complaints.
For each obstruction you identify, trace the original natural flow path and determine where the water is going instead. This analysis often reveals the root cause of drainage problems that have been misdiagnosed or treated with band-aid solutions.
Assessing Soil Infiltration Along Flow Paths
Not all water that enters a flow path reaches the discharge point as surface runoff. Along the way, some infiltrates into the soil, and the rate of infiltration significantly affects how much water reaches downstream areas. Soil type is the primary factor:
- Hydrologic Soil Group A (sand, loamy sand): High infiltration rate (>0.30 inches/hour). These soils absorb water quickly and generate minimal runoff.
- Hydrologic Soil Group B (silt loam, loam): Moderate infiltration rate (0.15–0.30 inches/hour).
- Hydrologic Soil Group C (sandy clay loam): Low infiltration rate (0.05–0.15 inches/hour).
- Hydrologic Soil Group D (clay, silty clay): Very low infiltration rate (<0.05 inches/hour). These soils generate the most runoff and create the most challenging drainage conditions.
You can look up your property's soil type and hydrologic soil group using the NRCS Web Soil Survey, a free online tool that provides detailed soil data for any location in the United States. Understanding your soil's infiltration capacity helps you predict how much runoff your flow paths will carry and whether infiltration-based solutions (like rain gardens or dry wells) are viable on your property.
Mapping Flow Paths: Creating Your Property Drainage Plan
With all of this observational and analytical data in hand, the next step is to consolidate it into a coherent drainage plan — a map that documents your property's drainage flow patterns and identifies areas requiring attention.
Building Your Flow Path Map
Start with a base map of your property. This can be a printed survey plat, a satellite image from Google Earth, or a simple hand-drawn sketch to scale. Then layer on the following information:
- Property boundaries and structures: House footprint, garage, sheds, patios, driveways, walkways, fences, retaining walls.
- Elevation reference points: If you have survey data, mark spot elevations at key locations — corners of the house, high and low points of the yard, top and bottom of slopes. If you don't have survey data, use relative indicators (arrows showing downhill direction, notes like "6-inch drop over 20 feet").
- Flow path arrows: Draw arrows showing the direction of water flow across the property. Use thicker arrows for primary flow paths (high volume) and thinner arrows for secondary paths.
- Watershed boundaries: Draw dashed lines along ridgelines that divide your property into distinct drainage areas.
- Convergence zones: Mark locations where multiple flow paths merge with a circle or star symbol.
- Problem areas: Highlight areas with standing water, erosion, foundation moisture, or other drainage-related issues.
- Existing drainage infrastructure: Note the location of gutters, downspouts, downspout extensions, French drains, catch basins, culverts, and any other drainage features.
- Off-site contributions: Mark locations where runoff enters your property from neighboring lots or public rights-of-way.
Interpreting Your Map
Once complete, your flow path map reveals the drainage narrative of your property. Look for these key patterns:
- Flow paths directed toward the foundation: The number one drainage rule is that the ground should slope away from the foundation at a minimum of 2% grade (approximately 1/4 inch per foot) for at least the first 6 to 10 feet. If your flow path map shows water moving toward the house from any direction, this is a critical issue that needs correction.
- Orphan areas with no outlet: If a section of your yard has no clear discharge path — water flows in but has no way out — you've identified a ponding zone that will hold water after every rain event.
- Overloaded flow paths: If a single swale or drainage channel is receiving runoff from a disproportionately large area, it may be overwhelmed during heavy storms, leading to overflow and uncontrolled flooding.
- Disconnected drainage infrastructure: Downspouts that discharge directly at the foundation, French drains that terminate in low spots with no outlet, or catch basins that aren't connected to anything — these are common failures that your map will reveal.
Advanced Techniques: Digital Flow Path Analysis
For homeowners and professionals who want to go beyond visual assessment and hand-drawn maps, digital watershed analysis techniques provide a higher level of precision and insight.
LiDAR-Based Analysis
LiDAR data, when available for your area, enables remarkably detailed flow path analysis. At 1-meter resolution, a LiDAR-derived DEM can capture grade changes of just a few centimeters — enough to detect the subtle crown of a lawn, the lip of a curb, or the depression left by a buried utility trench. When processed through flow direction and flow accumulation algorithms, this data produces a high-fidelity map of every flow path on and around your property.
The key advantage of LiDAR-based analysis is that it reveals flow paths you might never detect visually. A 2-inch depression that extends across 50 feet of lawn is nearly invisible to the eye, but it shows up clearly in LiDAR data — and it may be channeling hundreds of gallons of water toward your foundation during every storm.
Drone-Based Photogrammetry
If LiDAR data isn't available for your area, or if you need more current data (LiDAR surveys may be several years old and won't reflect recent grading changes), drone-based photogrammetry is an excellent alternative. A drone equipped with a high-resolution camera can capture overlapping aerial photos that are processed into a DEM using photogrammetric software. The resulting elevation model typically has a resolution of 1–3 centimeters per pixel, providing even more detail than most LiDAR datasets.
This approach is particularly valuable for properties that have undergone recent construction, landscaping, or grading changes that aren't reflected in publicly available elevation data.
Modeling Scenarios
Digital flow path analysis also enables scenario modeling — the ability to ask "what if" questions about your property's drainage. What if you add a patio in the backyard? What if you build a retaining wall along the side yard? What if the 100-year storm hits? By modifying the DEM to reflect proposed changes and re-running the flow analysis, you can predict how those changes will affect drainage flow patterns before you break ground.
This predictive capability is enormously valuable for avoiding costly drainage mistakes. Many homeowners have learned the hard way that a beautiful new patio created a drainage disaster because it redirected flow paths toward the house. Scenario modeling prevents these surprises.
Putting Flow Path Analysis Into Action
Understanding your property's natural drainage patterns is the foundation — but the ultimate goal is to use that understanding to solve problems and prevent future ones. Here's how to translate your analysis into action.
Grading Corrections
The most fundamental drainage solution is also the most effective: reshape the ground to direct water where you want it to go. Positive drainage away from the foundation — a minimum 2% slope for the first 6 to 10 feet — is the first priority. Beyond that, grading corrections can establish or enhance swales to channel water toward appropriate discharge points, eliminate low spots that trap water, and create subtle berms that redirect flow paths away from vulnerable areas.
Grading is most effective when it works with the property's natural drainage tendencies rather than fighting them. Your flow path analysis tells you what those tendencies are. If the natural grade already moves water toward the southeast corner of your lot, design your grading plan to reinforce that pattern and ensure the southeast corner has adequate capacity and an outlet to handle the flow.
Strategic Drainage Infrastructure
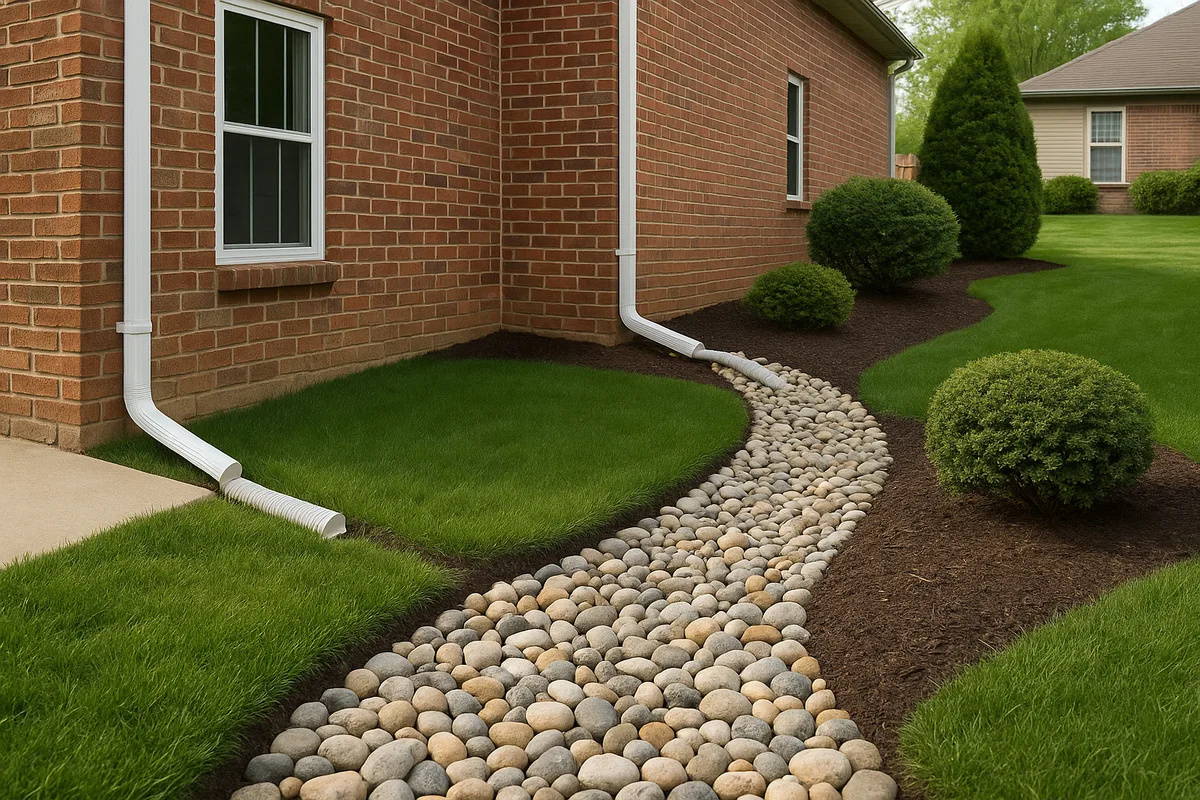
Where grading alone can't solve the problem — because of space constraints, existing structures, or extreme grade conditions — drainage infrastructure fills the gap. Your flow path map tells you exactly where to place these systems for maximum effectiveness:
- French drains: Install along flow paths that carry water toward the foundation, intercepting it before it arrives.
- Catch basins: Place at convergence zones where multiple flow paths merge, capturing concentrated runoff and routing it through underground piping.
- Channel drains: Install across driveways or patios where sheet flow from impervious surfaces creates a flow path toward the house.
- Dry wells: Position at the terminus of flow paths in areas with permeable soils (Hydrologic Soil Groups A or B), allowing collected water to infiltrate into the ground.
- Rain gardens: Locate in natural low spots along flow paths, using engineered soil mixes and native plants to slow, filter, and infiltrate runoff.
Ongoing Monitoring
Drainage conditions are not static. Soil settles over time, roots grow and die, landscapes are modified, and neighboring properties change. A flow path analysis performed today may not fully represent conditions five years from now. Establish a habit of observing your property during heavy rain events at least twice a year. Compare what you see to your flow path map and note any changes. Soil settlement around the foundation is particularly common in the first few years after construction and can reverse the positive grading that was established during building.
When to Call a Professional
While homeowners can perform a meaningful flow path analysis using the techniques described in this guide, some situations call for professional expertise. If your property has complex topography, multiple structures, significant elevation changes, or receives substantial off-site runoff, a professional drainage assessment provides the precision and engineering judgment needed to develop effective solutions. Similarly, if you've already tried DIY drainage fixes that haven't worked, a professional analysis often reveals the root cause that was missed.
At Low Point Labs, we specialize in exactly this kind of analysis — translating complex topographic data into clear, actionable drainage intelligence for residential properties. Our assessments combine high-resolution elevation data, soil analysis, and flow path modeling to give you a complete picture of how water moves across your property and what you can do about it. If you're dealing with drainage concerns or simply want to understand your property's natural flow patterns before they become problems, we invite you to explore our drainage assessment services and take the first step toward smarter, data-driven drainage management.
Get Your Drainage Intelligence Report™
Start a free trial and generate reports on demand.
Frequently Asked Questions
Related Articles
How Water Actually Flows Across Your Property: A Complete Guide
How Terrain Determines Where Water Will Pool on Your Property