How to Spot Negative Grading Without a Transit Level
Every year, thousands of homeowners discover water damage in their basements and crawl spaces — damage that could have been prevented if they had recognized one critical problem early: negative grading. The terrain immediately surrounding your home is your first line of defense against water intrusion, and when the ground slopes toward your foundation instead of away from it, the consequences can be severe and expensive.
The good news is that you don't need a transit level, a total station, or any professional surveying equipment to perform a meaningful foundation grading inspection. With a few simple tools, a basic understanding of what to look for, and the techniques outlined in this guide, you can identify negative grading conditions around your home before they escalate into structural nightmares. At Low Point Labs, we analyze topographic drainage patterns for properties across the country, and we've found that the most damaging grading problems are often ones homeowners could have caught themselves — if they knew where and how to look.
What Is Negative Grading and Why It Matters
Negative grading is a condition where the ground surface slopes toward a building's foundation rather than away from it. In a properly graded yard, the terrain should direct surface water away from the structure, carrying rainwater and snowmelt toward designated drainage areas, swales, or stormwater infrastructure. When the grade is negative — meaning it tilts inward toward the foundation — water collects against the foundation walls and footing, creating hydrostatic pressure and dramatically increasing the risk of moisture infiltration.
The standard recommendation from building codes and foundation experts is a minimum slope of 6 inches of fall over the first 10 feet from the foundation wall. This translates to roughly a 5% grade, though many jurisdictions accept a minimum of 2% in constrained situations. The International Residential Code (IRC) Section R401.3 specifies this 6-inch-in-10-feet requirement, and it exists for a very good reason: it's the minimum slope needed to reliably move surface water away from a structure under typical rainfall conditions.
Negative grading develops for a variety of reasons. Soil settlement is one of the most common — the backfill placed against foundation walls during construction compacts over time, creating a depression or reverse slope. Landscaping changes, garden bed installation, root growth from mature trees, and even foot traffic patterns can alter the grade over years. Erosion from improperly directed downspouts is another frequent culprit. Whatever the cause, the result is the same: water flows toward the foundation instead of away from it, and every rainstorm becomes a potential damage event.
The consequences of uncorrected negative grading extend far beyond a damp basement. Persistent moisture against foundation walls can lead to efflorescence, mold growth, concrete deterioration, rebar corrosion, and in severe cases, lateral wall displacement from hydrostatic pressure. Expansive clay soils that cycle between wet and dry states can exert tremendous force on foundation walls. Foundation repairs can cost anywhere from $5,000 to $50,000 or more, while correcting a grading problem early often costs a fraction of that.
Get Your Drainage Intelligence Report™
Start a free trial and generate reports on demand.
The Visual Walk-Around: Your First and Most Powerful Tool
The most effective foundation grading inspection technique requires nothing more than your eyes, a notepad, and a systematic approach. A deliberate walk around your home's perimeter — what professionals call a "visual walk-around" — can reveal negative grading conditions that even some home inspectors miss during rushed evaluations.
Start at any corner of your house and walk slowly along each wall, observing the ground surface as it meets the foundation. You're looking for terrain that appears to slope inward toward the house, areas where soil or mulch is piled against the siding or foundation wall, and any visible signs of water staining or erosion patterns that suggest water flows toward the structure. Pay particular attention to the following red flags:
- Soil contact with siding or wood framing. The foundation wall should be exposed and visible for at least 4-6 inches above grade. If soil or mulch covers the transition from foundation to framing, the grade is likely too high and possibly negative.
- Staining or discoloration on foundation walls. Horizontal tide marks, mineral deposits (white efflorescence), or algae/moss growth on foundation walls indicate persistent moisture contact — a strong indicator that water is collecting rather than draining away.
- Erosion channels pointing toward the house. Small rills or wash patterns in the soil that lead toward the foundation are direct evidence of water flow in the wrong direction.
- Ponding or saturated soil near the foundation. If you notice areas where water sits or where the soil remains perpetually damp close to the house, negative grading is a likely contributor.
Conduct this walk-around during or immediately after a rainstorm if possible. Observing how water actually behaves on your property is worth more than any static measurement. Watch where puddles form, which direction water sheets across the surface, and whether your downspout discharge is flowing away from or back toward the foundation. These real-time observations provide diagnostic information that even professional survey equipment can't capture in a single snapshot.
Documenting What You Find
As you walk the perimeter, sketch a rough overhead diagram of your home and annotate it with your observations. Mark areas where the grade appears negative, where you see staining, where downspouts discharge, and where water pools. Note the compass orientation of each wall — north-facing walls tend to stay damp longer and may show more biological growth even with adequate grading, so you'll want to differentiate between moisture from poor drainage and moisture from limited sun exposure. This documentation becomes invaluable if you later need to communicate with a contractor or drainage professional.
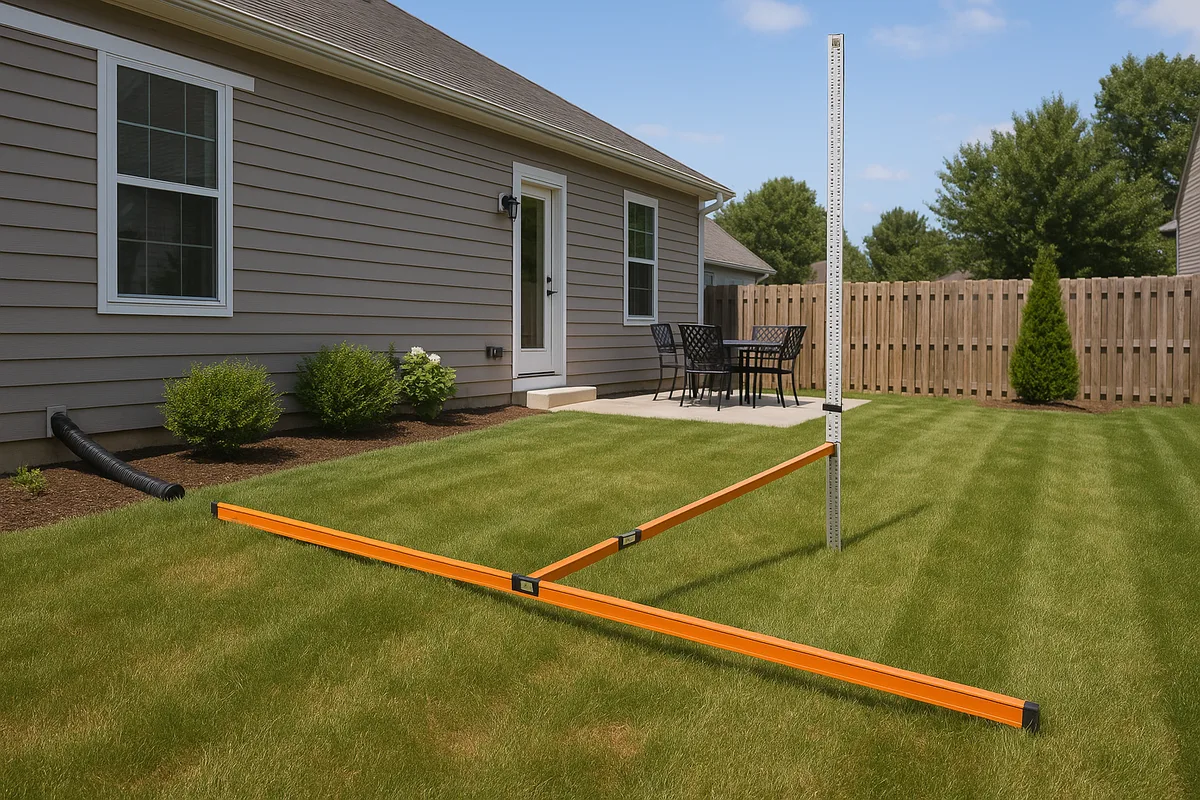
The String Line Method: Measuring Slope With Basic Materials
When you need to go beyond visual observation and actually quantify the slope around your foundation, the string line method is remarkably effective and requires only a few dollars' worth of materials. This technique has been used by builders and landscapers for centuries, and it remains one of the most reliable ways to check grade without a transit level.
What You'll Need
- A ball of mason's line or any non-stretch string
- Two wooden stakes (or any sturdy posts you can drive into the ground)
- A line level (a small, inexpensive bubble level that clips onto the string — available at any hardware store for $3-5)
- A tape measure
- A hammer or mallet
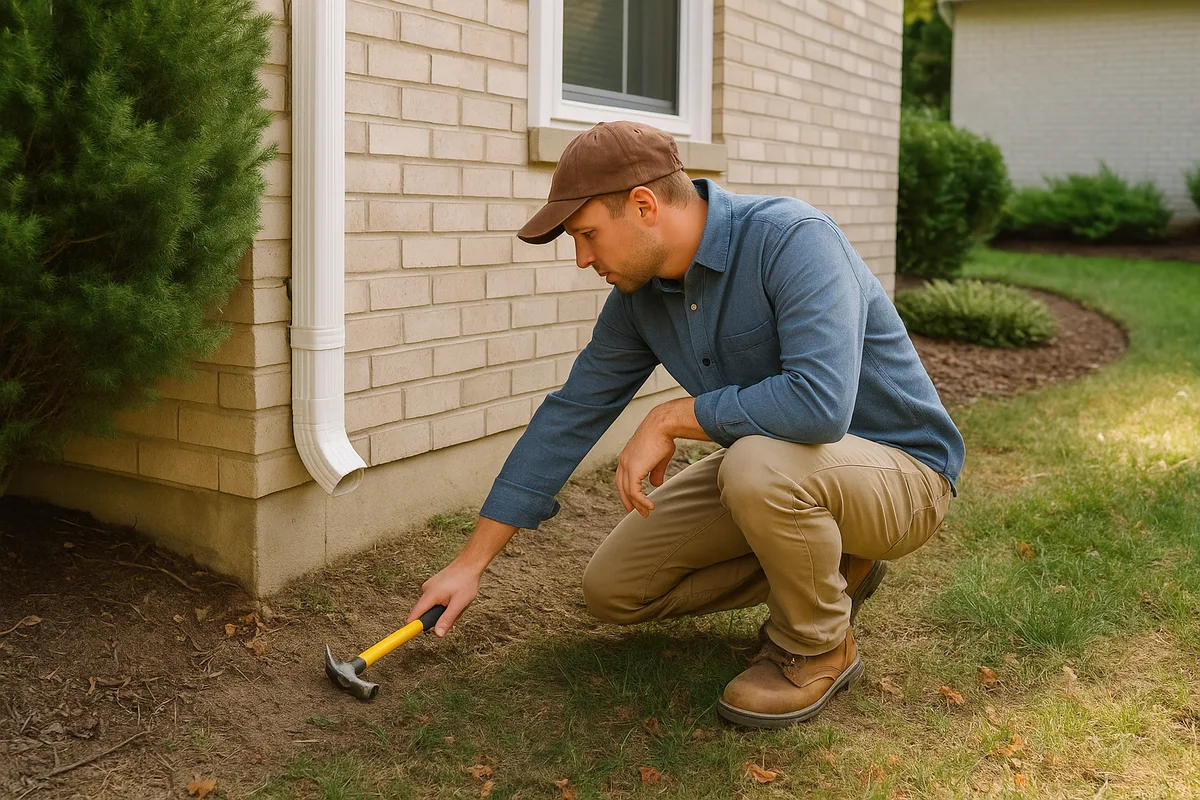
Step-by-Step Process
- Drive the first stake at the base of the foundation wall, right where the wall meets the ground surface. The string attachment point on this stake should be at ground level.
- Drive the second stake 10 feet out from the foundation, perpendicular to the wall. This is your reference distance — matching the IRC's 6-inches-in-10-feet standard.
- Tie the string to the first stake at ground level (at the foundation). Run it to the second stake and tie it loosely — you'll adjust it in a moment.
- Attach the line level to the center of the string. Adjust the string height on the outer stake until the bubble reads perfectly level.
- Measure the distance from the string down to the ground at the outer stake. This measurement tells you everything.
If the string is above the ground at the outer stake, the ground slopes downhill away from the foundation — this is positive grading. The distance between the string and the ground is your total fall over 10 feet. You want to see at least 6 inches.
If the string is at or below the ground at the outer stake, you have flat or negative grading. The ground is level with or higher than the foundation base, meaning water will pool against the house or flow toward it.
Repeat this process every 6-8 feet along each wall of your home. Grading conditions can change dramatically over short distances — you might have adequate slope along most of a wall but a significant depression near a downspout or at a corner where two rooflines converge.
Tips for Accuracy
Make sure your string is taut enough to minimize sag but not so tight that it pulls the stakes. Even a small amount of string sag will give you a false reading, making the grade appear more positive than it actually is. Using a non-stretch material like mason's line (rather than nylon rope, which stretches) improves accuracy. Also, take your measurements on a calm day — wind can deflect the string and throw off your line level reading.
The Water Test: Let Physics Show You the Problem
Sometimes the most convincing diagnostic tool is the simplest one. The water test involves deliberately introducing water near your foundation and watching where it goes. This method doesn't give you precise slope measurements, but it reveals the functional reality of your grading — which is ultimately what matters.
The Garden Hose Method
Place a running garden hose on the ground approximately 8-10 feet from your foundation wall, with the nozzle set to a gentle flow (not a spray). Let the water run for 2-3 minutes and observe the flow pattern. On properly graded terrain, the water should sheet away from the house or at least flow parallel to it. If the water migrates toward the foundation, you have a functional negative grade in that area — regardless of what a level might show.
This test is particularly valuable because it accounts for variables that static measurements miss. Compacted soil, thatch layers in grass, subtle undulations in the terrain, and the presence of hardscape features like sidewalks and patios all influence how water actually moves across your property. A string line might show adequate slope on paper, but if a compacted soil layer is directing water laterally toward a low spot against the foundation, the water test will reveal it.
The Rainfall Observation Method
Even better than the garden hose test is direct observation during a moderate to heavy rainfall. Put on a rain jacket and walk your property during the next significant storm. Watch where water flows off the roof, how it behaves when it exits downspouts, where it sheets across hardscape surfaces, and where it accumulates. Take photos and video — smartphone footage of water flowing toward your foundation is compelling documentation that can motivate action and guide remediation efforts.
Pay special attention to areas where roof valleys concentrate water into heavy streams. A single roof valley can channel hundreds of gallons during a storm, and if the downspout receiving that flow discharges onto negatively graded terrain, the volume of water directed against the foundation can be enormous.
The Long Level and Board Method: Precision on a Budget
For homeowners who want more precision than the string line method but still don't want to invest in survey equipment, the long level and board technique offers an excellent middle ground. This method is especially useful for checking grade across hard surfaces like patios, driveways, and sidewalks — areas where you can't easily drive stakes.
How It Works
You'll need a straight board (a 2x4 or similar dimensional lumber works well) that's at least 8 feet long, and a standard carpenter's level that's at least 4 feet long. Place the board on the ground surface, extending outward from the foundation. Set the level on top of the board.
If the bubble shows level, your grade is flat — which is insufficient for drainage. Raise the end of the board nearest the foundation until the bubble centers, then measure the gap between the raised end and the ground. This gap represents the amount of negative grade over the length of the board.
Conversely, if you need to raise the far end of the board (away from the foundation) to achieve level, you have positive grade, and the gap measurement tells you how much fall you have over that distance.
For a standard 8-foot board, you want to see the foundation end sitting naturally higher than the far end by at least 4.8 inches (applying the 6-inches-per-10-feet standard proportionally: 6 inches × 8/10 = 4.8 inches). If you're using a 10-foot board, you're looking for the full 6 inches.
Checking Hardscape Surfaces
This method excels at evaluating concrete patios, stoops, and sidewalks that abut the foundation. These hardscape surfaces are common culprits in negative grading situations because they're rigid — unlike soil, they can't be easily re-graded, and they often settle unevenly over time. A patio that was properly sloped when poured 15 years ago may have settled toward the house as the underlying fill material compacted.
Place your board and level across the patio surface in multiple directions. Check the slope perpendicular to the house (it should fall away), but also check for lateral slope that might be channeling water toward a low corner where the patio meets the foundation. Concrete patios should slope away from the structure at a minimum of 1/8 inch per foot (approximately 1%), though 1/4 inch per foot is preferred.
Using Your Smartphone as a Diagnostic Tool
Modern smartphones contain accelerometers and gyroscopes that can function as surprisingly accurate inclinometers. While they're not survey-grade instruments, they're more than adequate for identifying negative grading conditions and estimating slope percentages.
Smartphone Level Apps
Both iOS and Android devices come with built-in level/measure apps, and numerous free third-party apps offer inclinometer functionality. To use your phone as a slope gauge, place it on a flat, rigid surface (like the board from the previous method) resting on the ground, and read the angle or percentage displayed. Most apps can show slope in degrees, percentage, or ratio — for grading purposes, percentage is the most intuitive unit.
A reading of -2% or steeper (meaning the surface drops at least 2% moving away from the house) is the minimum acceptable grade. A reading of -5% matches the IRC standard. Any positive reading (indicating uphill slope away from the house) confirms negative grading.
Limitations to Understand
Smartphone sensors are typically accurate to within ±0.5-1.0 degrees, which translates to roughly ±1-2% slope. This means they're reliable for identifying clearly negative or clearly positive grades, but they may not distinguish between a marginal 1% positive grade and a flat condition. For borderline situations, use the string line method for greater precision. Also, phone sensors can be affected by magnetic interference from foundation rebar and nearby metal objects, so take readings at multiple points and look for consistency.
Leveraging Elevation Data
For a broader view of how your property's topography relates to drainage patterns, publicly available elevation data can provide valuable context. The USGS 3D Elevation Program (3DEP) provides high-resolution topographic data for much of the United States, including LiDAR-derived elevation models that can reveal drainage patterns, low points, and flow accumulation areas on and around your property. While this data typically doesn't have the resolution to evaluate the first 10 feet around your foundation, it can show you the bigger picture — whether your property sits in a natural drainage path, whether surrounding terrain directs water toward your home, and where water ultimately goes after it leaves your immediate yard.
Common Negative Grading Patterns and Where to Find Them
Negative grading doesn't occur randomly. Certain areas around a home are far more susceptible than others, and knowing where to focus your foundation grading inspection efforts can save you significant time and help you catch problems before they cause damage.
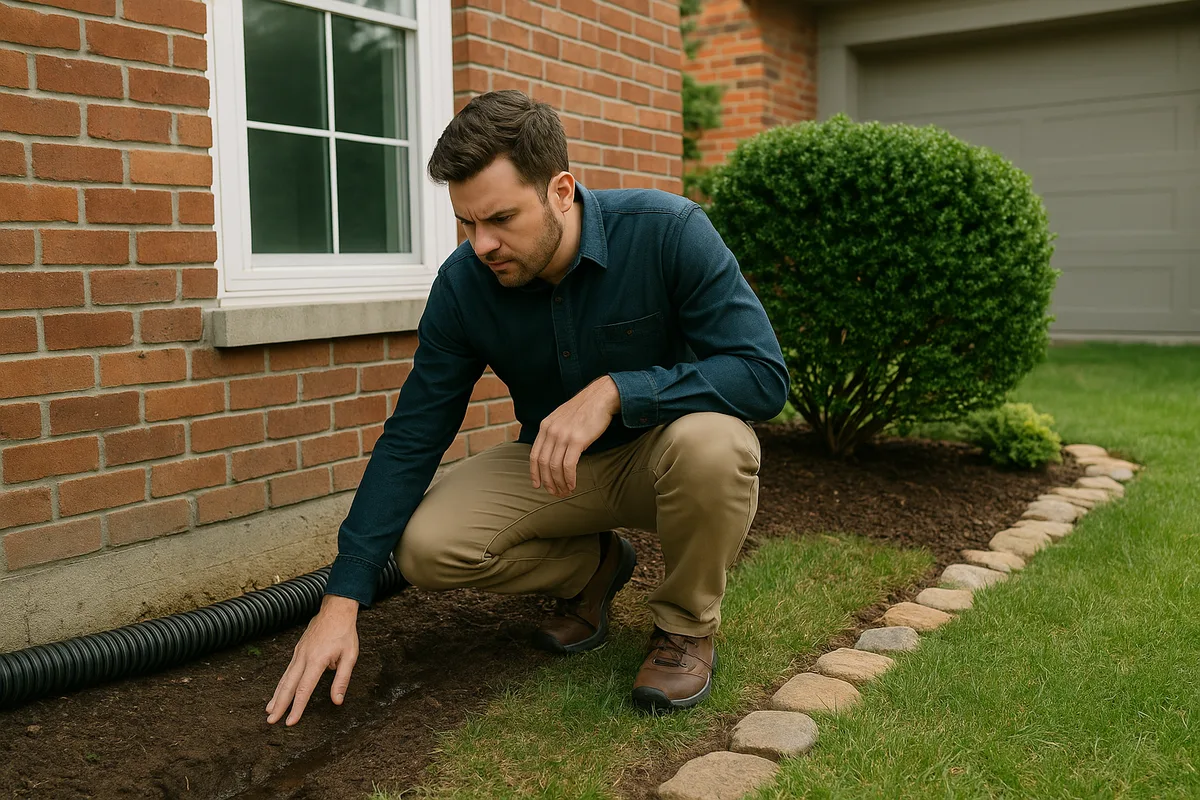
At Downspout Discharge Points
This is the single most common location for negative grading. Downspouts concentrate enormous volumes of roof runoff into a small area, and the force of that water erodes soil and creates depressions over time. If your downspouts discharge directly at the foundation base without extensions, the soil within a 3-foot radius of each downspout is almost certainly eroded below the surrounding grade. Even with splash blocks or short extensions, the discharge point often develops a depression that traps water against the house.
The fix is straightforward: extend downspouts at least 4-6 feet from the foundation (10 feet is better), and ensure the discharge point is on positively graded terrain. But first, you need to identify the problem — and the techniques in this article will help you do exactly that.
Along Backfilled Foundation Walls
When a home is built, the excavation around the foundation is backfilled with soil after the walls are poured. This backfill is rarely compacted to the same density as the undisturbed native soil, and it continues to settle for years — sometimes decades — after construction. The result is a subtle but persistent depression running along the foundation wall, creating a trough that collects and holds water.
This settlement is most pronounced on homes built on clay soils, which undergo significant volume changes with moisture cycling. Check for this pattern by running your string line or board-and-level test along each wall, and compare the grade at the foundation to the grade 3-4 feet out. If there's a noticeable dip right at the wall, backfill settlement is likely the cause.
At Grade Transitions and Material Changes
Where a lawn meets a garden bed, where a patio meets soil, or where a driveway meets the yard — these transition zones frequently develop negative grading. Different materials settle at different rates, and the interface between them often creates a lip or channel that traps water. Mulched garden beds are particularly problematic because homeowners tend to build up mulch layers year after year, eventually raising the bed grade above the surrounding terrain and directing water toward the foundation.
At Corners Where Walls Intersect
Inside corners of a home (where two walls meet to form an L-shape or similar configuration) are natural collection points for both roof runoff and surface water. These corners often have compound negative grading — the terrain slopes inward from two directions simultaneously, concentrating water at the worst possible location. If your home has any inside corners, prioritize those areas during your inspection.
On the Uphill Side of Sloped Lots
If your property has an overall slope, the uphill side of the house receives surface runoff from the higher terrain. Even if the grade immediately around the foundation was properly established during construction, the volume of water flowing down from the uphill area can overwhelm the drainage capacity and cause erosion that eventually creates negative grading. Look for signs of sheet flow, erosion channels, or saturated soil on the uphill side of your home.
Seasonal Timing and Long-Term Monitoring
The accuracy and usefulness of your foundation grading inspection depends significantly on when you perform it. Seasonal factors affect soil conditions, vegetation, and water behavior in ways that can either reveal or conceal negative grading problems.
Best Times to Inspect
Early spring is arguably the best time for a comprehensive grading inspection. Snow has melted, the ground is thawing, and spring rains are beginning — but vegetation hasn't fully grown in yet, giving you clear visibility of the soil surface. Soil that has been through a freeze-thaw cycle may also show exaggerated settlement, making depressions more visible.
Late fall, after leaves have dropped and before the first hard freeze, is another excellent window. You can see the ground surface clearly, and you're inspecting after a full season of rainfall and irrigation have had their effect on the soil.
During or after heavy rain is the single best moment for a functional assessment. Nothing tells you more about your grading than watching water move across your property in real time.
What to Avoid
Mid-summer inspections can be misleading. Dense vegetation can hide depressions and erosion channels. Dry soil conditions may make the ground appear firm and well-graded even in areas that become saturated troughs during wet weather. If summer is your only option, water the area thoroughly with a hose before inspecting.
Frozen ground conditions make grading inspection nearly impossible. Frost heave can temporarily alter the surface profile, and frozen soil won't show the ponding and saturation signs that indicate negative grading.
Establishing a Baseline
Consider performing a thorough grading inspection annually and documenting your findings with photos and measurements. Over time, this creates a baseline record that reveals trends — gradual settlement, progressive erosion, or the slow migration of garden bed material toward the foundation. Problems that develop slowly are easy to miss in the moment but become obvious when you compare this year's measurements to last year's.
Mark your measurement points with inconspicuous markers (small landscape stakes, for example) so you can take readings at the same locations each year. Consistency in measurement location is essential for detecting changes over time.
When DIY Assessment Isn't Enough
The techniques described in this article are effective for identifying obvious and moderate negative grading conditions, and they empower homeowners to take proactive steps before problems escalate. However, there are situations where professional assessment becomes necessary.
If your string line measurements show borderline conditions — say, 3-4 inches of fall over 10 feet instead of the recommended 6 — you may need more precise data to determine whether remediation is warranted. If you're seeing water intrusion symptoms (basement dampness, efflorescence, mold) but can't identify a clear grading problem with DIY methods, there may be subsurface drainage issues that require professional investigation. And if your property has complex topography — multiple slope directions, retaining walls, subsurface drainage systems, or significant elevation changes — a comprehensive topographic analysis will provide insights that manual spot-checking simply cannot.
Modern drainage assessment goes far beyond what a transit level can offer. At Low Point Labs, we use high-resolution topographic data and advanced analysis techniques to map drainage patterns across entire properties, identifying not just negative grading at the foundation but also upstream flow paths, accumulation zones, and drainage bottlenecks that contribute to water problems. This kind of comprehensive drainage intelligence gives homeowners and contractors the information they need to solve problems permanently rather than chasing symptoms.
Whether you're performing your own foundation grading inspection with a string line and a garden hose or seeking professional topographic analysis, the most important step is the first one: recognizing that the ground around your home is an active, dynamic system that requires attention. Negative grading doesn't announce itself with alarms — it develops quietly, often over years, and the damage it causes is cumulative. The techniques in this guide give you the tools to catch it early.
Ready to go beyond DIY and get a complete picture of your property's drainage? Explore Low Point Labs' drainage assessment services to discover how topographic intelligence can protect your home's foundation and give you peace of mind — before the next big storm puts your grading to the test.
Get Your Drainage Intelligence Report™
Start a free trial and generate reports on demand.
Frequently Asked Questions
Related Articles
How to Identify Hidden Drainage Failures Before They Become Expensive
How to Diagnose Surface vs. Subsurface Water Problems on Your Property