Sizing a French Drain System by Contributing Drainage Area
A french drain that's too small will overflow during heavy storms, saturate your soil, and potentially damage your foundation. A french drain that's oversized wastes money on materials and excavation. The difference between getting it right and getting it wrong comes down to one critical calculation: understanding the contributing drainage area that feeds into your system.
French drain sizing isn't guesswork—it's a process grounded in hydrology, soil science, and pipe hydraulics. Whether you're a homeowner planning a weekend project, a contractor bidding a residential job, or an inspector evaluating an existing installation, understanding how to perform a proper drainage area calculation is the foundation of every successful french drain system. In this guide, we'll walk through the complete process from mapping your contributing area to selecting the right pipe diameter, trench width, and aggregate.
What Is a Contributing Drainage Area and Why It Matters
A contributing drainage area—sometimes called a catchment area or watershed—is the total land surface that directs water toward a specific point. For a french drain, this is every square foot of ground, roof, hardscape, and slope that channels surface or subsurface water into the drain's path. Accurately delineating this area is the single most important step in french drain sizing because every other decision—pipe diameter, trench depth, gravel volume—flows directly from this number.
Many homeowners make the mistake of measuring only the area immediately adjacent to their french drain trench. In reality, your contributing drainage area may extend well beyond your property line. Water doesn't respect fence lines. If your neighbor's yard slopes toward yours, that runoff becomes part of your calculation. A 2,000-square-foot backyard might actually have a 5,000-square-foot contributing drainage area once you account for roof downspouts, driveway runoff, and uphill neighboring properties.
The consequences of underestimating your drainage area are significant. An undersized french drain becomes a bottleneck during storm events, causing water to back up, surface, and flow in unintended directions—often toward your foundation. Conversely, understanding your true contributing area allows you to design a system with appropriate capacity and even build in a safety factor for increasingly intense rainfall events driven by climate variability.
Surface vs. Subsurface Contributing Areas
It's important to distinguish between surface contributing areas and subsurface contributing areas. Surface water follows visible topography—slopes, swales, curbs, and berms. You can often trace these flow paths by watching where water moves during a rainstorm or by studying the microtopography of your yard.
Subsurface contributing areas are harder to identify but equally important. Underground water moves through permeable soil layers along the path of least resistance, often following bedrock contours or clay layer boundaries that don't mirror surface topography. If your french drain is designed to intercept a high water table or subsurface seepage, you need to account for the underground catchment feeding that flow. Soil borings, seasonal water table observations, and local soil survey data can help you estimate subsurface contributions.
Get Your Drainage Intelligence Report™
Start a free trial and generate reports on demand.
Step-by-Step Drainage Area Calculation
Calculating your contributing drainage area requires a systematic approach. Here's the process that drainage professionals use, adapted for residential applications.
Step 1: Obtain or Create a Topographic Map
You need an accurate representation of the terrain surrounding your property. For a rough residential estimate, you can use a long level and measuring tape to identify high points and low points in your yard. For more precision, a laser level or transit can establish spot elevations across a grid pattern.
For properties with complex terrain, digital elevation data can be invaluable. The USGS 3D Elevation Program (3DEP) provides high-resolution LiDAR-derived elevation data for much of the United States, often at 1-meter resolution or better. This data can reveal subtle grade changes that are invisible to the naked eye but significant for drainage calculations.
Step 2: Identify the Drainage Divide
The drainage divide is the boundary line that separates water flowing toward your french drain from water flowing elsewhere. Think of it as a ridge line—water on one side flows toward your drain, water on the other side flows away. Walk your property and identify the highest points surrounding the low area where you plan to install the drain. Connect these high points to form a closed boundary. Everything inside this boundary is your contributing drainage area.
Pay special attention to:
- Roof areas that discharge toward the drain via downspouts or sheet flow
- Driveways and patios that slope toward the drain location
- Adjacent properties at higher elevation
- Berms, retaining walls, or curbs that redirect flow
- Existing swales or channels that concentrate flow
Step 3: Measure the Area
Once you've identified the drainage divide, measure the enclosed area in square feet. For simple rectangular areas, multiply length by width. For irregular shapes, break the area into triangles and rectangles, calculate each, and sum them. If you're working from aerial imagery or a site plan, you can use free GIS tools or even graph paper to estimate area.
Record this number carefully—it's the foundation of every subsequent calculation. For a typical residential french drain project, contributing drainage areas range from 1,000 to 15,000 square feet, though properties at the base of slopes or in low-lying areas can see much larger values.
Step 4: Classify Surface Types
Not all surfaces contribute water equally. An asphalt driveway sends nearly 100% of rainfall into runoff, while a well-established lawn on sandy soil might absorb 60-80% of a moderate rainfall. This difference is captured by the runoff coefficient (C), a decimal value between 0 and 1 that represents the fraction of rainfall that becomes runoff.
Common runoff coefficients for residential surfaces:
| Surface Type | Runoff Coefficient (C) |
|---|---|
| Rooftops | 0.85–0.95 |
| Asphalt/Concrete | 0.85–0.95 |
| Gravel driveways | 0.40–0.60 |
| Lawn (sandy soil, flat) | 0.10–0.20 |
| Lawn (clay soil, flat) | 0.20–0.35 |
| Lawn (clay soil, steep) | 0.30–0.50 |
| Wooded areas | 0.10–0.25 |
| Garden beds (mulched) | 0.15–0.30 |
If your contributing drainage area includes multiple surface types, calculate a weighted runoff coefficient by multiplying each sub-area by its coefficient, summing the products, and dividing by the total area.
Example: Your 4,000 sq ft contributing area includes 1,000 sq ft of roof (C=0.90), 500 sq ft of patio (C=0.90), and 2,500 sq ft of clay-soil lawn (C=0.30).
Weighted C = [(1,000 × 0.90) + (500 × 0.90) + (2,500 × 0.30)] / 4,000 Weighted C = [900 + 450 + 750] / 4,000 = 2,100 / 4,000 = 0.525
Using the Rational Method for Peak Flow Estimation
With your drainage area and runoff coefficient in hand, you can now estimate the peak flow rate your french drain must handle. The standard method for small drainage areas (under 200 acres) is the Rational Method, expressed as:
Q = C × I × A
Where:
- Q = Peak runoff flow rate (cubic feet per second, cfs)
- C = Runoff coefficient (dimensionless)
- I = Rainfall intensity (inches per hour) for your design storm
- A = Contributing drainage area (acres; divide square feet by 43,560)
This elegant formula is the workhorse of residential drainage design. Let's break down the rainfall intensity component, which is the variable most homeowners overlook.
Selecting Your Design Storm and Rainfall Intensity
Rainfall intensity (I) depends on two factors: the return period (how severe a storm you're designing for) and the time of concentration (how long it takes water to travel from the farthest point of your drainage area to the french drain inlet).
For residential french drains, a 10-year return period is the standard design storm. This means the system is designed to handle a storm intensity that has a 10% probability of occurring in any given year. Some jurisdictions or high-consequence applications (near foundations, finished basements) may warrant a 25-year or even 50-year design storm.
To find rainfall intensity values for your location, the NOAA Atlas 14 Precipitation Frequency Data Server provides site-specific rainfall data. Enter your coordinates, and you'll receive intensity-duration-frequency (IDF) data that tells you exactly how many inches per hour to expect for various storm durations and return periods.
For most residential drainage areas under half an acre, the time of concentration is typically 5 to 15 minutes. At a 10-year return period with a 10-minute duration, rainfall intensities across the continental U.S. generally range from about 3 inches per hour in arid western regions to 7+ inches per hour in the Gulf Coast states.
Running the Calculation
Let's complete our example. We have:
- Contributing area: 4,000 sq ft = 0.092 acres
- Weighted runoff coefficient: 0.525
- Rainfall intensity (10-year, 10-minute): 5.0 in/hr (example mid-Atlantic location)
Q = 0.525 × 5.0 × 0.092 = 0.242 cfs
Converting to gallons per minute: 0.242 cfs × 448.8 = 108.6 GPM
This means your french drain system needs to convey at least 108.6 gallons per minute during the design storm event. This number drives every downstream decision about pipe size, trench dimensions, and outlet capacity.
French Drain Pipe Sizing: Matching Capacity to Flow
With your peak flow rate calculated, you can now select the appropriate pipe diameter. French drains typically use corrugated perforated HDPE pipe or rigid PVC with perforations. The flow capacity of a pipe depends on its diameter, slope, and roughness.
Manning's Equation for Pipe Flow
Engineers use Manning's equation to calculate the flow capacity of pipes:
Q = (1.49 / n) × A × R^(2/3) × S^(1/2)
Where:
- Q = Flow capacity (cfs)
- n = Manning's roughness coefficient (0.015 for smooth PVC; 0.020–0.024 for corrugated HDPE)
- A = Cross-sectional flow area of the pipe
- R = Hydraulic radius (area / wetted perimeter)
- S = Slope of the pipe (ft/ft)
Rather than running Manning's equation yourself, here's a practical capacity table for pipes flowing full at common slopes:
| Pipe Diameter | Slope 0.5% | Slope 1.0% | Slope 2.0% |
|---|---|---|---|
| 4 inch | 12 GPM | 17 GPM | 24 GPM |
| 6 inch | 35 GPM | 50 GPM | 70 GPM |
| 8 inch | 80 GPM | 113 GPM | 160 GPM |
| 10 inch | 148 GPM | 210 GPM | 296 GPM |
| 12 inch | 245 GPM | 347 GPM | 490 GPM |
Values approximate for corrugated HDPE pipe (n=0.022). Smooth-wall PVC will carry 15-25% more flow at the same slope.
Returning to our example: we need 108.6 GPM capacity. At a 1% slope, a 6-inch pipe handles about 50 GPM—not enough. An 8-inch pipe at 1% slope handles approximately 113 GPM, which just barely meets our requirement. A drainage professional would likely recommend the 8-inch pipe and might even suggest stepping up to 10-inch for a safety margin, or increasing the trench slope if site conditions allow.
Why 4-Inch Pipe Is Often Inadequate
The most common mistake in residential french drain installations is defaulting to 4-inch perforated pipe regardless of the drainage area. As the table above shows, a 4-inch pipe at 1% slope carries only about 17 GPM. That's adequate for a contributing drainage area of roughly 600-800 square feet in moderate rainfall zones—essentially a small side-yard application.
For any french drain protecting a foundation, intercepting hillside runoff, or managing water from multiple downspouts, 4-inch pipe is almost certainly undersized. The pipe itself becomes the limiting factor, and water backs up into the gravel trench, saturates the surrounding soil, and defeats the purpose of the entire system. Proper french drain sizing demands that you calculate first and select pipe diameter second—never the other way around.
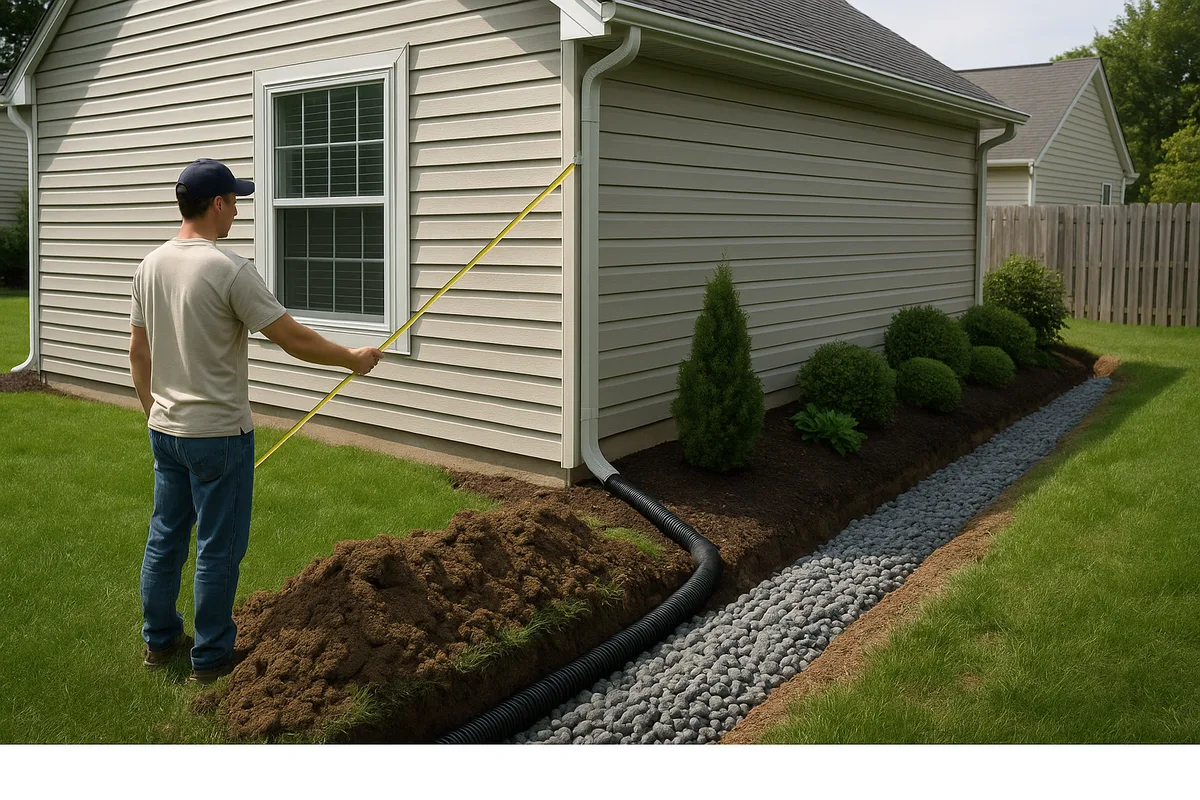
Trench Design: Width, Depth, and Aggregate Selection
The pipe is only one component of a french drain system. The gravel-filled trench itself provides significant water storage and conveyance capacity. In many residential applications, the trench's storage volume is just as important as the pipe's flow capacity.
Trench Dimensions
A standard french drain trench is 12 inches wide and 18–24 inches deep. However, these dimensions should be adjusted based on your drainage area calculation:
- Trench width: 12 inches is the minimum for most applications. For larger drainage areas (over 5,000 sq ft), consider 18- to 24-inch-wide trenches. Wider trenches provide more gravel storage volume and a larger infiltration surface area.
- Trench depth: Must be deep enough to intercept the water you're targeting. For surface runoff management, 18 inches is often sufficient. For subsurface water table interception, the trench must extend below the seasonal high water table—sometimes 36 inches or deeper.
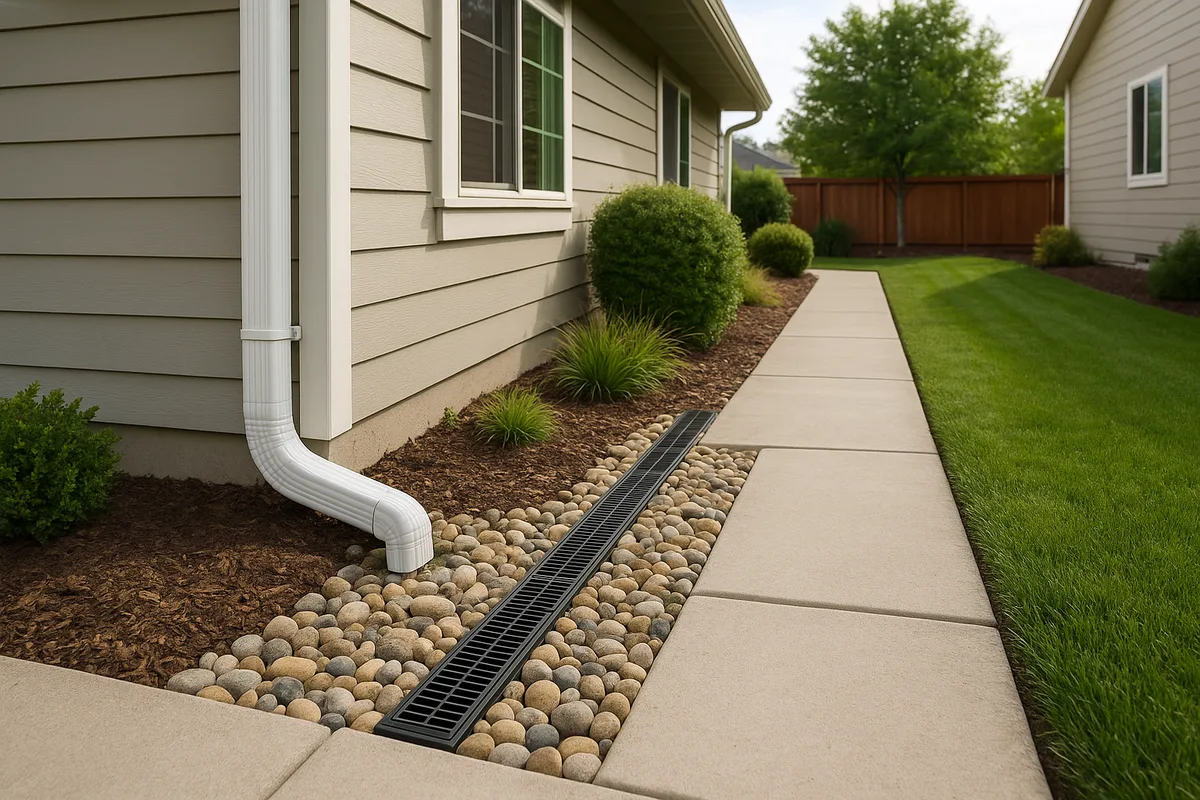
- Pipe placement: The perforated pipe should sit at the bottom of the trench, on a 2-inch bed of clean gravel, with the perforations facing down (for groundwater collection) or in the 4 and 8 o'clock positions. The pipe is then surrounded by gravel to within 2-4 inches of the surface.
The Critical Role of Aggregate
The gravel surrounding your pipe serves three functions: it provides structural support for the pipe, creates void space for water storage, and acts as a filter to prevent fine soil particles from clogging the system.
Void ratio is the key concept here. Clean, washed, angular gravel (typically 3/4-inch to 1.5-inch stone) has a void ratio of approximately 35-40%. This means that for every cubic foot of gravel in your trench, roughly 0.35-0.40 cubic feet is available for water storage.
For a trench that is 12 inches wide, 24 inches deep, and 50 feet long:
- Total trench volume: 1 ft × 2 ft × 50 ft = 100 cubic feet
- Pipe volume (6-inch pipe): approximately 1 cubic foot per 50 linear feet
- Net gravel volume: ~99 cubic feet
- Water storage capacity: 99 × 0.38 = 37.6 cubic feet ≈ 281 gallons
This storage capacity acts as a buffer during peak rainfall, temporarily holding water while it slowly drains through the pipe and percolates into surrounding soil. For systems that rely partly on infiltration (where soil permeability allows), this storage is essential.
Geotextile Fabric: When and How to Use It
Filter fabric (non-woven geotextile) prevents fine soil particles from migrating into the gravel and clogging the void spaces over time. It should wrap the entire gravel column—not just the pipe. A common error is wrapping only the pipe in fabric (a "sock"), which can actually accelerate clogging by concentrating fines at the pipe surface.
The recommended approach:
- Line the trench (bottom and sides) with non-woven geotextile fabric, leaving enough excess to fold over the top
- Place the gravel bed and pipe
- Fill with gravel to within 2-4 inches of grade
- Fold the fabric over the top of the gravel
- Cover with topsoil or sod
In sandy soils with minimal fines, some installers omit the fabric entirely, arguing that the risk of fabric clogging exceeds the risk of soil migration. In silty or clayey soils, fabric is essential for long-term performance.
Accounting for Soil Type in Your French Drain Design
Soil type profoundly influences both your drainage area calculation and your french drain design. Soils are classified into four Hydrologic Soil Groups (HSGs) by the NRCS, each with dramatically different infiltration characteristics:
- Group A (Sandy): High infiltration rate (>0.30 in/hr). Low runoff potential. These soils absorb water readily, reducing the effective contributing area.
- Group B (Silty Loam): Moderate infiltration rate (0.15–0.30 in/hr). Moderate runoff potential.
- Group C (Sandy Clay Loam): Low infiltration rate (0.05–0.15 in/hr). Moderately high runoff potential.
- Group D (Clay): Very low infiltration rate (<0.05 in/hr). High runoff potential. Nearly all rainfall becomes runoff.
You can look up your property's soil type using the NRCS Web Soil Survey, which provides detailed soil maps and hydrologic soil group classifications for any location in the United States.
Soil type affects french drain sizing in two ways:
- Runoff coefficient: Clay soils (Group D) generate far more runoff than sandy soils (Group A), increasing the peak flow your drain must handle.
- Exfiltration rate: If your french drain relies on water percolating out of the trench and into surrounding soil (rather than flowing entirely to a daylight outlet), the soil's permeability determines how quickly the trench can empty. In Group D clay soils, exfiltration is negligible—your system must be designed to convey 100% of the water to an outlet.
The Clay Soil Challenge
Properties with heavy clay soils face a double challenge: they generate more runoff (requiring larger pipe and trench capacity) and they can't rely on infiltration to empty the trench (requiring a positive outlet). This is why french drains in clay soils must be designed with particular care.
For clay soil installations:
- Use a higher runoff coefficient (0.30–0.50 for lawns)
- Size the pipe for full conveyance to an outlet—don't assume any infiltration credit
- Consider a wider trench (18-24 inches) for additional storage volume
- Ensure a positive-slope outlet to daylight, a storm sewer, or a dry well in a permeable stratum
- Install robust geotextile fabric, as clay fines will aggressively migrate into gravel voids
Outlet Design and System Integration
A french drain is only as effective as its outlet. The most perfectly sized pipe and trench are worthless if the water has nowhere to go. Outlet design must be considered during the sizing process because outlet capacity can become the limiting factor in the entire system.
Types of Outlets
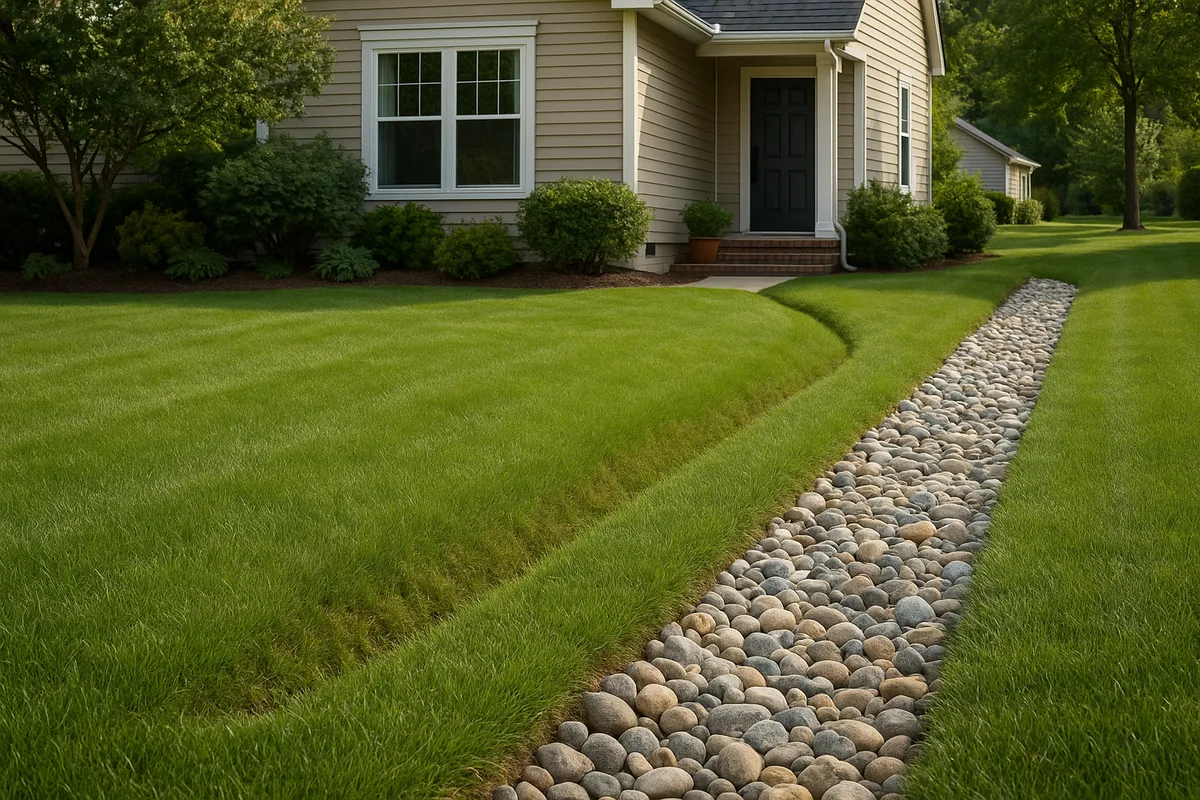
Daylight outlet: The pipe emerges at a lower elevation on the property, allowing water to discharge at the surface. This is the simplest and most reliable outlet type. The daylight point must be far enough from structures and property lines to prevent creating problems elsewhere. Many local codes require a minimum setback.
Storm sewer connection: In some municipalities, you can connect your french drain to the public storm sewer system. This requires a permit and must comply with local stormwater regulations. Never connect a french drain to a sanitary sewer.
Dry well (infiltration chamber): Where no surface outlet is available, water can be directed to a dry well—a buried chamber filled with gravel or proprietary storage units that allows water to infiltrate into the surrounding soil. Dry wells must be sized based on the same drainage area calculations, and they only work in soils with adequate permeability (Groups A and B).
Sump pump discharge: In some cases, particularly for below-grade french drains around basements, a sump pump is required to lift water to an outlet. The pump must be sized to match or exceed the peak flow rate calculated from your drainage area.
Slope Requirements
The french drain pipe must maintain a continuous downward slope toward the outlet. The minimum recommended slope is 0.5% (1/16 inch per foot), though 1% (1/8 inch per foot) is preferred for corrugated pipe because the corrugations create additional friction. A 2% slope is ideal where site conditions allow it.
For a 100-foot-long french drain at 1% slope, you need 1 foot of elevation drop from inlet to outlet. If your site doesn't provide this natural fall, you'll need to either deepen the trench at the outlet end or raise the inlet end—both of which affect excavation costs and may impact the drain's ability to intercept water at the desired depth.
Common French Drain Sizing Mistakes and How to Avoid Them
After years of analyzing residential drainage systems, we've identified the most frequent errors that lead to underperforming french drains. Each of these relates directly to improper drainage area calculation or pipe sizing.
Mistake 1: Ignoring Roof Contributions
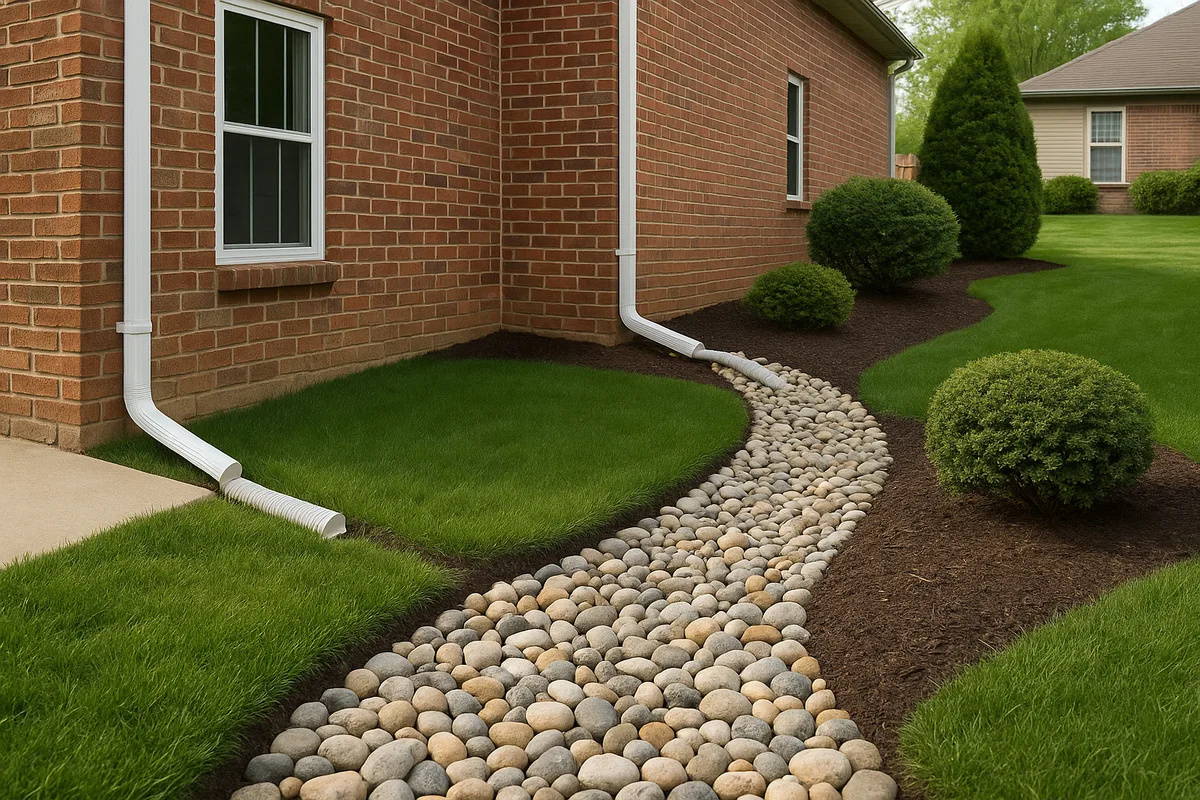
A 2,000-square-foot roof with a runoff coefficient of 0.95 contributes almost as much runoff as an acre of lawn. If your downspouts discharge near your french drain—or if sheet flow from the roof reaches the drain's contributing area—you must include the roof area in your calculation. Many homeowners install a french drain to solve a wet yard problem without realizing that their roof is the primary water source.
Solution: Map every downspout discharge point. If any downspout discharges within the contributing drainage area of your french drain, include that portion of roof area in your calculation. Better yet, route downspouts through solid (non-perforated) pipe directly to the outlet, bypassing the french drain entirely and reserving its capacity for ground-level and subsurface water.
Mistake 2: Using a Single Pipe Size for a Long Run
A french drain that runs 150 feet along the back of a property collects water along its entire length. The upstream end handles only a small fraction of the total flow, while the downstream end must carry the cumulative flow from the entire system. Using the same pipe diameter for the full length means either oversizing the upstream section (wasting money) or undersizing the downstream section (risking overflow).
Solution: Consider stepping up pipe diameter along the run. Start with 4-inch pipe at the upstream end where the contributing area is small, transition to 6-inch at the midpoint, and finish with 8-inch at the outlet. Alternatively, size the entire run for the total contributing area and accept the upstream oversizing as a safety factor.
Mistake 3: Neglecting Future Changes
That wooded lot next door with a runoff coefficient of 0.15 might become a house with a driveway and a coefficient of 0.70. A patio addition on your own property can dramatically increase impervious surface area within your contributing drainage area.
Solution: Apply a safety factor of 1.25 to 1.5 to your calculated peak flow rate to account for future land use changes, increasingly intense rainfall patterns, and calculation uncertainties. This modest increase in pipe size is cheap insurance against future problems.
Mistake 4: Forgetting About Maintenance Access
Over time, even well-designed french drains accumulate sediment and require flushing. Systems without cleanout access points become disposable—when they clog, the only option is complete excavation and replacement.
Solution: Install cleanout risers (capped vertical pipes connected to the main drain) every 50-75 feet and at every change in direction. These allow you to flush the system with a garden hose or pressure washer to restore capacity. Factor cleanout locations into your design from the beginning.
Mistake 5: No Outlet or Inadequate Outlet
We cannot overstate this: a french drain without a properly sized outlet is just a buried gravel pit. It will fill during the first significant storm and provide no further benefit until it slowly drains—which, in clay soils, could take days or weeks.
Solution: Every french drain must have a positive outlet. The outlet's capacity must equal or exceed the pipe's capacity. If you're discharging to a dry well, the dry well must be sized to store the design storm volume and infiltrate it within 24-48 hours.
Putting It All Together: A Complete Sizing Example
Let's walk through a complete french drain sizing exercise for a realistic residential scenario.
Scenario: A homeowner in Charlotte, North Carolina has persistent water pooling along the back of their home. The backyard slopes gently toward the house from a wooded hillside. They want to install a french drain 5 feet from the foundation, running 80 feet along the back of the house, with a daylight outlet at the side yard.
Step 1: Delineate Contributing Area
- Backyard from house to hillside crest: 40 ft × 80 ft = 3,200 sq ft (clay-loam lawn, moderate slope)
- Rear roof section draining toward backyard: 30 ft × 40 ft = 1,200 sq ft (roof)
- Patio adjacent to house: 15 ft × 20 ft = 300 sq ft (concrete)
- Total contributing area: 4,700 sq ft = 0.108 acres
Step 2: Calculate Weighted Runoff Coefficient
- Lawn (clay soil, moderate slope): 3,200 sq ft × 0.35 = 1,120
- Roof: 1,200 sq ft × 0.90 = 1,080
- Patio: 300 sq ft × 0.90 = 270
- Weighted C = (1,120 + 1,080 + 270) / 4,700 = 0.526
Step 3: Determine Rainfall Intensity
- Using NOAA Atlas 14 for Charlotte, NC
- 10-year return period, 10-minute duration: approximately 5.8 in/hr
Step 4: Calculate Peak Flow (Rational Method)
- Q = C × I × A = 0.526 × 5.8 × 0.108 = 0.329 cfs = 147.7 GPM
Step 5: Apply Safety Factor
- 147.7 GPM × 1.25 = 184.6 GPM design capacity
Step 6: Select Pipe Size
- Available slope: 1.5% (verified by survey—1.2 ft of fall over 80 ft)
- 8-inch corrugated HDPE at 1.5% slope: ~139 GPM — not quite enough
- 10-inch corrugated HDPE at 1.5% slope: ~257 GPM — adequate with margin
- Selected: 10-inch perforated corrugated HDPE pipe
Step 7: Design Trench
- Width: 18 inches (to accommodate 10-inch pipe with adequate gravel surround)
- Depth: 24 inches (intercepts surface and shallow subsurface flow)
- Geotextile: Non-woven, 4 oz/sq yd, lining full trench
- Aggregate: 3/4-inch washed angular stone
- Cleanouts: At each end and at the midpoint (3 total)
Step 8: Verify Outlet
- Daylight outlet at side yard, 1.2 ft below inlet elevation
- Transition to solid pipe for last 15 ft before daylight
- Splash pad and riprap at outlet to prevent erosion
This systematic approach—starting with drainage area calculation and working through to outlet design—produces a french drain system that will perform reliably for decades.
When to Call a Professional
While the principles of french drain sizing are straightforward, several situations warrant professional involvement:
- Contributing drainage areas exceeding 10,000 square feet
- Properties with complex topography or multiple drainage divides
- Sites with high water tables requiring subsurface interception
- Connections to municipal storm sewer systems (typically requires engineering and permits)
- French drains near foundations on expansive clay soils
- Any project requiring a grading permit or stormwater management plan
A qualified drainage contractor or civil engineer can perform detailed site surveys, run hydraulic models, and design systems that account for site-specific conditions that generalized calculations may miss.
At Low Point Labs, we specialize in topographic drainage intelligence that gives homeowners and professionals the data they need to make informed decisions about drainage system design. Our assessments map contributing drainage areas, identify flow paths, and quantify the water your property must manage—providing the foundation for properly sized french drains and other drainage solutions. If you're planning a french drain installation or evaluating an existing system's performance, explore our drainage assessment services to ensure your project starts with accurate data.
Get Your Drainage Intelligence Report™
Start a free trial and generate reports on demand.
Frequently Asked Questions
Related Articles
Designing a Swale vs French Drain: How to Choose the Right System
How Water Actually Flows Across Your Property: A Complete Guide