How to Document Site Conditions to Protect Your Contractor Business
Every contractor has a story about the project that went sideways—not because of poor workmanship, but because of a dispute over what the site looked like before work began. A homeowner claims the grading was fine until you touched it. A neighbor alleges your excavation redirected stormwater onto their property. An inspector flags a drainage deficiency that predated your involvement by a decade. Without rigorous site documentation, you're left defending your reputation with nothing but your word.
The reality is that thorough site documentation isn't just a best practice—it's a business survival strategy. Contractors who systematically record pre-existing conditions, ongoing work phases, and final deliverables dramatically reduce their exposure to liability claims, insurance disputes, and legal costs. In the drainage and grading world especially, where water behavior is influenced by subtle elevation changes measured in fractions of an inch, the stakes are even higher. This guide provides a comprehensive, actionable framework for documenting site conditions that will protect your business, strengthen your client relationships, and give you an unshakable evidentiary foundation.
Why Site Documentation Is Your First Line of Defense
Contractor liability claims frequently hinge on one question: What was the condition of the property before work started? If you can't answer that question with documented evidence, you're at a severe disadvantage. Courts, arbitrators, and insurance adjusters all favor the party with the clearest records. A 2023 survey by the Construction Financial Management Association found that documentation deficiencies were a contributing factor in over 60% of construction dispute cases that went to litigation.
The drainage and grading space is particularly vulnerable to these disputes. Water damage is cumulative and often invisible until it becomes catastrophic. A homeowner might not notice that their yard has been draining poorly for years until foundation cracks appear—and if you were the last contractor to touch the site, you become the default target. Comprehensive site records created before, during, and after your engagement establish a clear timeline that separates pre-existing conditions from your scope of work.
Beyond dispute resolution, strong documentation practices improve your operational efficiency. When your crews know that every phase will be photographed and logged, workmanship quality tends to rise. Documentation also creates institutional knowledge—if a client calls three years later with a concern, you can pull up the complete project history in minutes rather than relying on fading memories. It transforms your business from reactive to proactive and signals professionalism that wins repeat clients and referrals.
Get Your Drainage Intelligence Report™
Start a free trial and generate reports on demand.
Pre-Construction Site Documentation: Setting the Baseline
The most critical documentation you'll ever create is the record of what exists before you begin. This pre-construction baseline is your insurance policy against claims that your work caused pre-existing problems. Treat this phase with the same rigor you'd apply to the construction itself.
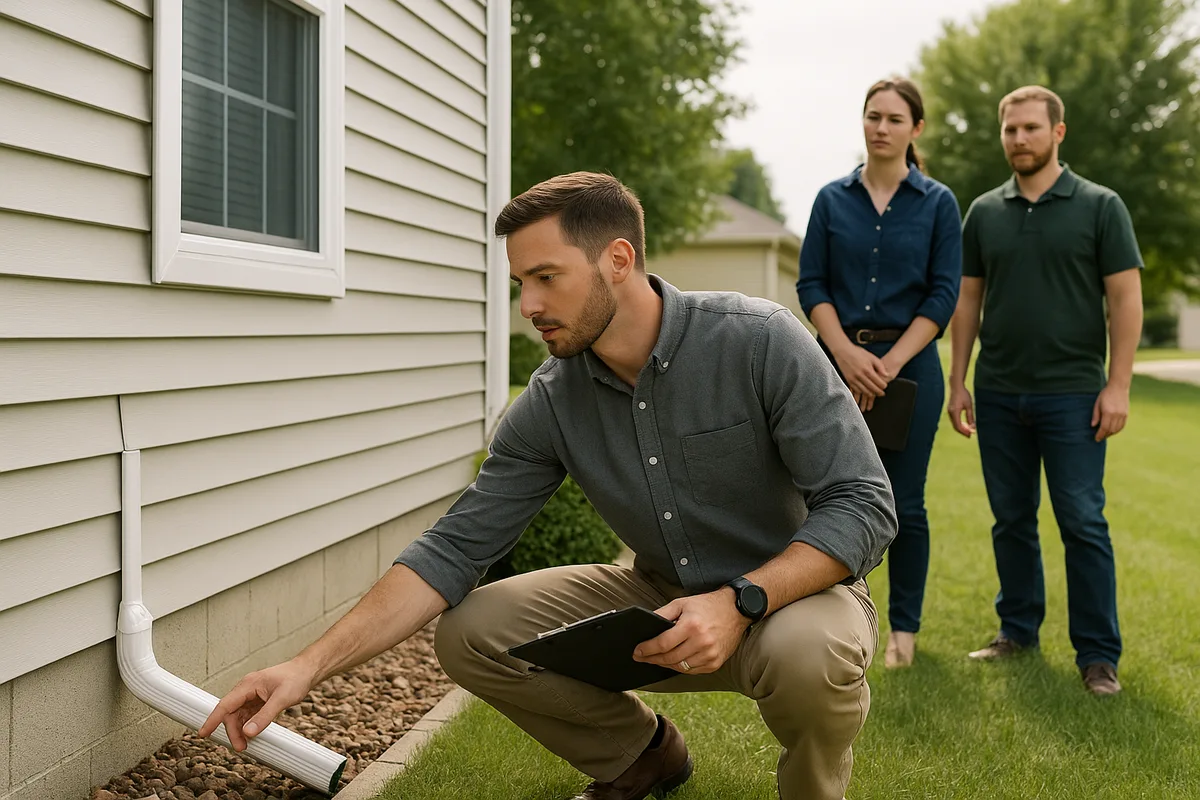
The Pre-Construction Site Walk
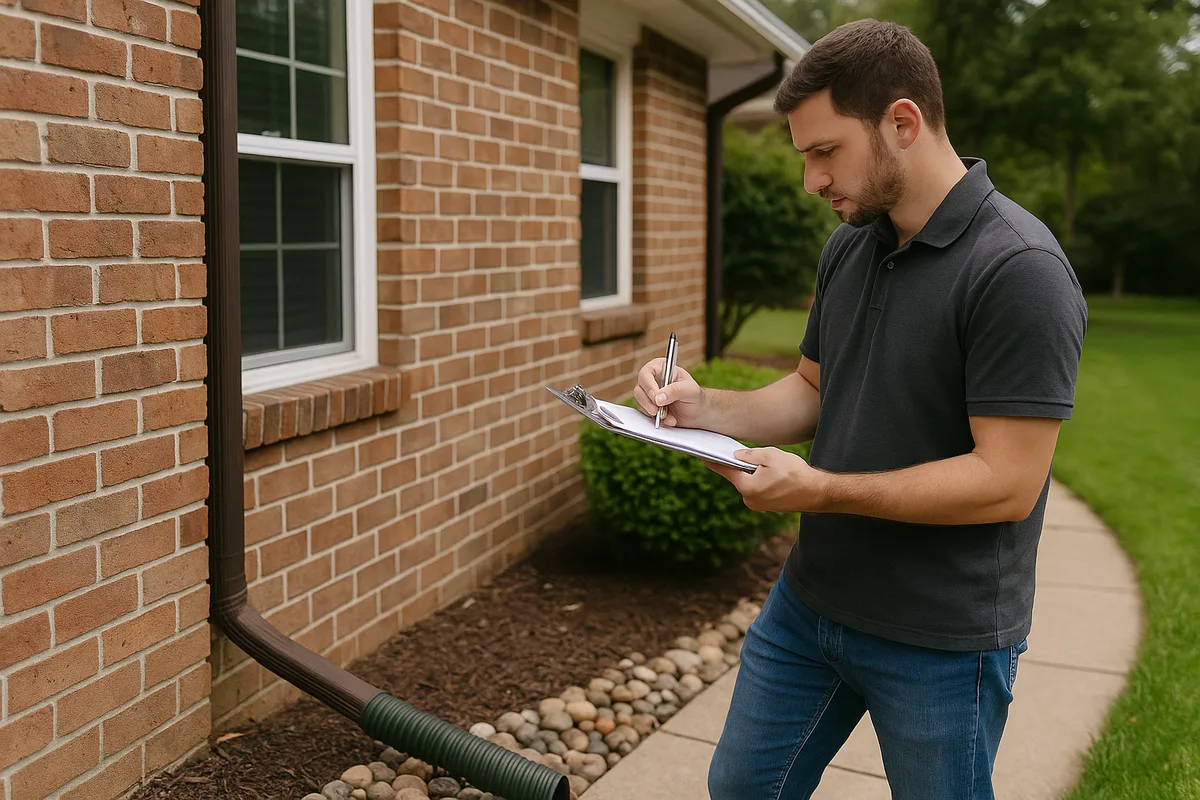
Before any equipment arrives, conduct a thorough site walk with the property owner present whenever possible. Having the owner physically present during documentation serves two purposes: it ensures they're aware of existing conditions, and it makes it harder for them to later claim ignorance of those conditions. During the walk, note and record every relevant feature:
- Existing drainage patterns: Where does water currently flow? Are there visible erosion channels, standing water areas, or saturated zones? Note the direction and approximate slope of all graded surfaces adjacent to your work area.
- Foundation condition: Document any existing cracks, efflorescence, staining, or moisture intrusion on foundation walls. Measure and photograph crack widths with a crack comparator card.
- Hardscape condition: Record the state of driveways, sidewalks, retaining walls, and patios. Note any heaving, settling, cracking, or displacement.
- Vegetation health: Stressed, dying, or waterlogged vegetation can indicate subsurface drainage problems that predate your involvement.
- Neighboring properties: Document the grading and drainage conditions at property boundaries, especially where water flows between properties.
- Utilities and infrastructure: Mark and photograph the locations of downspout discharge points, sump pump outlets, French drains, catch basins, and any visible underground utility markers.
Written Condition Reports
Photos alone aren't sufficient. Create a written Pre-Construction Condition Report that narratively describes every observation. This report should be dated, signed by your project lead, and ideally acknowledged in writing by the property owner. Include specific measurements: "The grade along the east foundation wall slopes toward the house at approximately -1.5% for a distance of 12 feet from the foundation, contrary to the recommended minimum of +2% away from the structure." Quantified observations carry far more weight than subjective descriptions like "the grading was bad."
Your condition report should also reference any information provided by the homeowner about the property's history—previous drainage work, known water intrusion events, past insurance claims, or neighbor disputes about water flow. This oral history, documented in writing at the time it's shared, can be invaluable if disputes arise later.
Photo Documentation Standards That Hold Up in Disputes
Photographic evidence is the backbone of effective site documentation, but not all photos are created equal. A blurry, undated image with no context is nearly useless in a dispute. Professional-grade photo documentation follows specific standards that maximize evidentiary value.
Technical Requirements for Defensible Photos
Every site photo should meet these minimum standards:
- Timestamp and geolocation: Use a camera app or dedicated construction documentation app that embeds date, time, and GPS coordinates in the image metadata (EXIF data). This makes it extremely difficult for anyone to argue the photo was taken at a different time or location.
- Scale reference: Include a measuring tape, ruler, grade rod, or other scale reference in photos of specific defects or conditions. A crack in a foundation wall looks very different when you can see it's 1/16" wide versus 1/4" wide.
- Context shots: For every close-up detail photo, take a wider establishing shot that shows where that detail exists in relation to the overall site. A photo of ponding water means little if the viewer can't tell where on the property it's located.
- Consistent orientation: Photograph from the same vantage points during pre-construction, mid-construction, and post-construction phases. This creates a visual timeline that clearly shows the progression of work and changes to site conditions.
- Overlap and redundancy: Take more photos than you think you need. Storage is cheap; litigation is not. A good rule of thumb is 50-100 photos for a typical residential drainage or grading project's pre-construction documentation alone.
Organizing Your Photo Library
A thousand photos are worthless if you can't find the right one when you need it. Establish a consistent file naming and folder structure:
/ProjectName_Address/
  /01_Pre-Construction/
    /Foundation/
    /Grading/
    /Drainage-Features/
    /Adjacent-Properties/
  /02_Demolition/
  /03_Construction/
    /Phase1_Excavation/
    /Phase2_Installation/
    /Phase3_Backfill/
  /04_Final-Completion/
  /05_Post-Project/
Use cloud-based storage with automatic backup. Construction documentation apps like CompanyCam, Procore, or even well-organized Google Drive folders ensure that your records survive a lost phone, stolen laptop, or hard drive failure. The key is that records must be retrievable years after project completion—most statutes of limitation for construction defect claims range from 4 to 10 years depending on your state, and statutes of repose can extend even further.
Documenting Drainage and Grading Conditions with Precision
For contractors working in the drainage and grading space, generic documentation isn't enough. Water behavior is governed by physics—specifically by elevation differences measured in inches over distances of feet. Your documentation needs to capture these subtleties with engineering-level precision.
Elevation and Slope Measurements
Before altering any grades, take spot elevation readings across the project area using a laser level, transit, or total station. At minimum, record elevations at:
- Each corner of the structure
- Every 10 feet along the foundation perimeter
- At the edges of all hardscaped surfaces
- At property boundary lines
- At existing drainage structures (catch basins, drain inlets, swale inverts)
- At any identified low points or ponding areas
Record these readings on a simple site sketch or, ideally, on a scaled site plan. This creates a topographic snapshot of the property at a specific moment in time. When you take the same measurements after your work is complete, you have irrefutable evidence of exactly what you changed—and what you didn't.
The industry standard for positive drainage away from residential foundations is a minimum fall of 6 inches over the first 10 feet (approximately a 5% slope), as recommended by most building codes and the International Residential Code. Documenting that the pre-existing grade was only 2 inches over 10 feet—or worse, sloping toward the foundation—establishes that the drainage deficiency predated your work.
Soil and Subsurface Conditions
Soil type profoundly affects drainage behavior, and subsurface conditions are invisible once you've backfilled. Document soil conditions encountered during excavation:
- Soil classification: Is it clay, silt, sand, loam, or a mix? Clay soils (hydrologic soil group D) drain at rates below 0.06 inches per hour, while sandy soils (group A) can exceed 1.20 inches per hour. This distinction matters enormously when evaluating drainage system performance.
- Water table depth: If you encounter groundwater during excavation, record the depth and date. Seasonal water table fluctuations can explain moisture issues that have nothing to do with surface grading.
- Fill vs. native soil: Note where you encounter previously placed fill material, which often settles unpredictably and drains differently than native soil.
- Buried debris or structures: Old foundations, buried stumps, abandoned pipes, and construction debris are common on residential sites and can create underground dams that redirect water in unexpected ways.
The NRCS Web Soil Survey is an excellent resource for understanding the mapped soil types on any property before you arrive on site. Cross-referencing your field observations with the published soil survey data adds another layer of credibility to your documentation.
Video Documentation for Dynamic Conditions
Some conditions are best captured on video rather than in still photos. Water flow during a rain event, the operation of a sump pump, the discharge rate from a downspout—these are dynamic processes that photos can't fully convey. Walk the site during or immediately after a significant rain event and narrate what you observe: "Standing water approximately 3 inches deep extending 8 feet from the northeast corner of the foundation. Water is flowing from the neighbor's property across the property line at a rate of approximately 2 gallons per minute through a low point in the fence line."
Date-stamped video paired with local rainfall data from weather records creates compelling evidence. If the area received 1.5 inches of rain and the yard is holding 3 inches of standing water, that tells a clear story about inadequate drainage—one that predates your involvement if captured before construction begins.
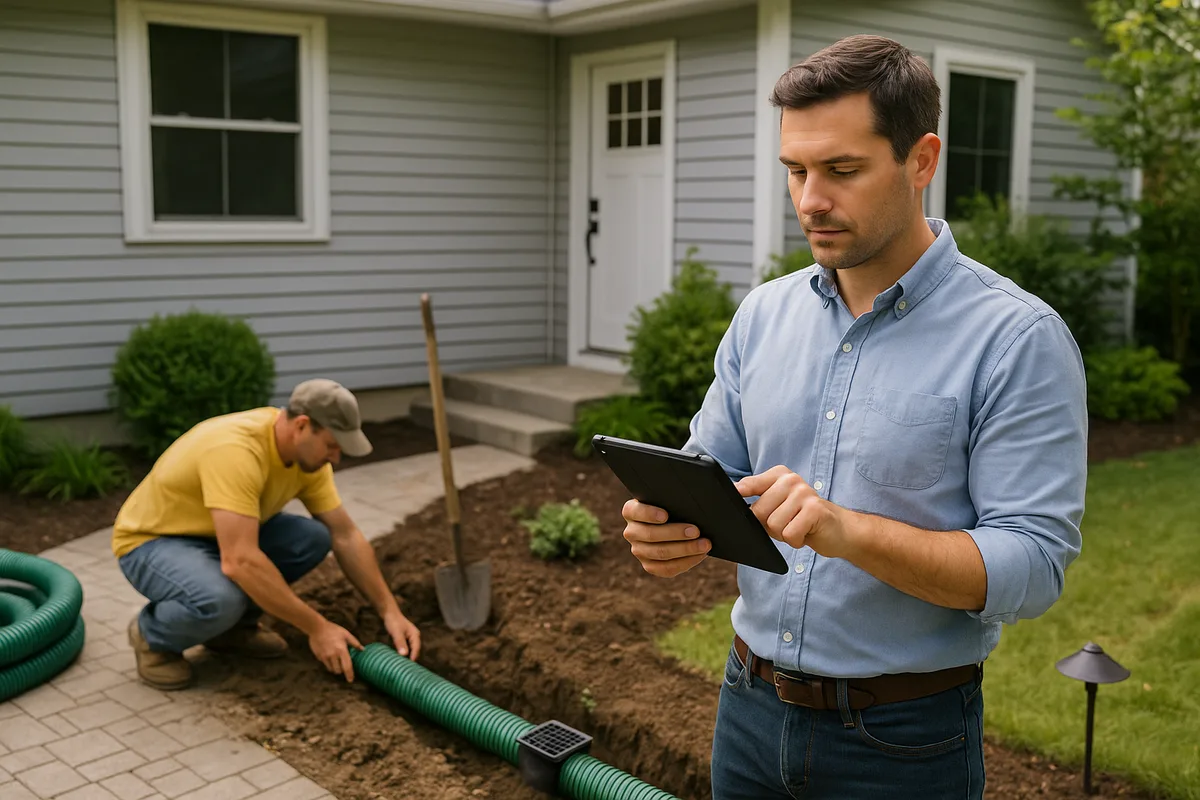
Construction-Phase Documentation: Protecting the Process
Once work begins, your documentation needs shift from baseline recording to process verification. Every phase of construction should be documented to demonstrate that work was performed according to specifications, manufacturer requirements, and applicable codes.
Daily Logs and Progress Reports
Maintain a daily project log that records:
- Date and weather conditions: Temperature, precipitation, wind. Weather affects soil compaction, concrete curing, adhesive bonding, and many other processes. If a product fails later, weather records can demonstrate that installation conditions were within manufacturer specifications.
- Personnel on site: Who was working, including subcontractors. This establishes accountability and allows you to identify who performed specific tasks if questions arise.
- Work performed: Specific description of tasks completed, materials used, and quantities installed. "Installed 120 linear feet of 4-inch perforated HDPE pipe at 1% minimum slope, bedded in 3/4-inch washed stone, wrapped in filter fabric" is far more useful than "installed French drain."
- Inspections: Record any municipal inspections, their results, and the inspector's name and badge or license number.
- Deviations and change orders: Any departure from the original scope must be documented in writing with the owner's acknowledgment. Undocumented changes are the single most common source of contractor disputes.
- Observations and concerns: If you discover unexpected conditions—a buried oil tank, contaminated soil, root intrusion into existing drain lines—document them immediately and notify the owner in writing.
Critical Coverage Points
Certain construction phases are especially important to document because they'll be concealed by subsequent work:
- Subgrade preparation: Before placing pipe, stone, or any drainage material, photograph the prepared subgrade. Show the trench depth, width, and slope. Include a level or slope indicator in the photo.
- Pipe installation: Document pipe material, diameter, connections, slope, and bedding. Photograph every connection point, every transition fitting, and every cleanout location.
- Backfill and compaction: Show the backfill material and document compaction methods. If compaction testing is performed, retain the test results.
- Waterproofing and membranes: Any below-grade waterproofing must be photographed before being covered. Include product labels showing manufacturer and specification compliance.
- Tie-ins to existing systems: Where new work connects to existing drainage infrastructure, document the condition of the existing system at the connection point.
These "covered work" photos are irreplaceable. Once the trench is backfilled and the sod is laid, the only evidence of what's underground is your documentation. Contractors who skip this step are essentially gambling that nothing will ever go wrong—or that no one will ever question their work.
Legal and Contractual Documentation Strategies
Physical site documentation works hand-in-hand with contractual protections. Your paperwork should create a legal framework that reinforces your field documentation and clearly defines responsibilities.
Scope of Work Clarity
The most protective document you can create is a crystal-clear scope of work. Ambiguity in scope is the fertile ground where disputes grow. For drainage and grading projects, your scope should explicitly state:
- What you will do: Specific areas to be graded, specific systems to be installed, specific elevations or slopes to be achieved.
- What you will not do: Explicitly exclude work outside your scope. If you're installing a French drain along the south foundation but not addressing the north side, say so. If you're regrading the backyard but not modifying the driveway drainage, state that clearly.
- Pre-existing conditions disclaimer: Include language acknowledging known pre-existing conditions and stating that your work does not warrant or guarantee correction of conditions outside your scope.
- Performance standards: Define what constitutes successful completion. For drainage work, this might be "positive drainage away from the foundation at a minimum 2% slope" or "no standing water within 24 hours of a 1-inch rainfall event."
- Limitations and exclusions: Note that subsurface conditions may differ from what's visible, that neighboring property drainage is beyond your control, and that extreme weather events may exceed the design capacity of any residential drainage system.
Owner Acknowledgment Forms
Create a Pre-Construction Condition Acknowledgment form that the property owner signs before work begins. This form should reference your Pre-Construction Condition Report and photo documentation, and include language such as: "Owner acknowledges that the conditions described in the attached report and depicted in the referenced photographs represent the existing state of the property as of [date], prior to the commencement of any work by [Contractor Name]."
This single document has saved countless contractors from frivolous claims. When a homeowner signs an acknowledgment that their foundation already had a 1/4-inch crack before you started grading, it becomes extraordinarily difficult for them to later claim your work caused that crack.
Communication Records
Maintain written records of all significant communications with the property owner, subcontractors, inspectors, and neighbors. Email is your friend—it's automatically dated and creates a permanent record. If important conversations happen by phone or in person, follow up with a confirmation email: "Per our conversation today, you've agreed to the additional cost of $1,200 for extending the drain line an additional 30 feet to reach the existing storm inlet."
Text messages are increasingly accepted as evidence in construction disputes, but they're easy to lose when you change phones. Use a system that automatically archives text communications related to projects, or periodically screenshot and file important text exchanges.
Post-Construction Documentation and Long-Term Record Keeping
Your documentation obligations don't end when the last piece of sod is laid. Post-construction records complete the story and provide long-term contractor protection against claims that may not surface for years.
Final Completion Documentation
At project completion, create a comprehensive close-out package:
- As-built drawings: Show the actual installed locations of all drainage features, including pipe runs, depths, slopes, cleanout locations, and connection points. As-built drawings are the single most valuable document for future maintenance and troubleshooting.
- Final grade survey: Take the same elevation measurements you recorded pre-construction, demonstrating the grades you achieved. Side-by-side comparison of before and after elevations tells a powerful story.
- Final photo set: Photograph the completed work from the same vantage points used in pre-construction documentation. This visual comparison is immediately compelling to anyone reviewing the project.
- Material specifications: Retain product data sheets, warranty information, and receipts for all materials installed. If a pipe manufacturer issues a recall five years from now, you'll need to know exactly what product you used.
- Maintenance instructions: Provide the owner with written maintenance requirements for all installed systems. This is both good customer service and legal protection—if a French drain fails because the owner never cleaned the cleanouts, your maintenance instructions demonstrate that they were informed of their responsibilities.
Record Retention Policies
How long should you keep project records? The answer depends on your state's statute of limitations and statute of repose for construction defect claims, but a conservative approach is to retain all project documentation for a minimum of 10 years after project completion. Some states have statutes of repose extending to 12 or even 15 years for certain types of construction.
Digital storage makes long-term retention practical and affordable. A complete project file—including hundreds of photos, written reports, contracts, and correspondence—typically occupies less than 2 GB of storage space. At current cloud storage prices, that's pennies per year to maintain. Compare that to the cost of a single lawsuit where you can't produce documentation, and the return on investment is astronomical.
Organize your archive so that any project can be retrieved by address, client name, or date. Periodically verify that your backup systems are functioning and that older files remain accessible. File format obsolescence is a real concern over decade-long retention periods—stick with universally supported formats like JPEG for photos, PDF for documents, and MP4 for video.
Technology and Tools for Modern Site Documentation
The documentation standards described above might sound overwhelming, but modern technology makes them achievable even for small contracting operations. The key is selecting tools that integrate documentation into your existing workflow rather than adding burdensome extra steps.
Construction Documentation Apps
Dedicated construction photo documentation apps have transformed the industry. These platforms automatically tag photos with date, time, GPS coordinates, and project identifiers. Many allow you to annotate photos on-site, add voice notes, and organize images by project phase. The best options also provide cloud backup, team sharing, and client access portals.
The critical feature to look for is immutability—the ability to prove that photos haven't been altered after the fact. Some platforms use blockchain-style verification or tamper-evident metadata to ensure that images maintain their evidentiary integrity. This matters if your documentation ever needs to be presented in legal proceedings.
Drone and Aerial Documentation
Drones have become invaluable for site documentation, particularly for drainage and grading projects where the overall topographic picture matters. A single aerial photo can show drainage patterns, grade changes, and water flow paths across an entire property in a way that ground-level photos cannot. Aerial before-and-after comparisons are especially compelling.
If you're using drones commercially, ensure compliance with FAA Part 107 regulations, including pilot certification and airspace authorization. Document your flight parameters (altitude, date, time, GPS coordinates) alongside the imagery.
LiDAR and Elevation Mapping
For contractors who want to take their documentation to the highest level, consumer-grade LiDAR scanning (now available on certain smartphones and tablets) can create detailed 3D models of site topography. These models capture elevation data at centimeter-level resolution, providing an objective, measurable record of surface grades that no photograph can match.
At the enterprise level, the USGS 3DEP (3D Elevation Program) provides publicly available high-resolution elevation data that can serve as a regional baseline for your site-specific measurements. Cross-referencing your field data with published elevation datasets adds another layer of credibility to your documentation.
Digital Signatures and Timestamps
When obtaining owner acknowledgments, consider using digital signature platforms that provide legally binding signatures with embedded timestamps and IP address verification. These create a stronger evidentiary record than a scanned wet signature and are easier to store and retrieve.
Building a Documentation Culture in Your Organization
The best documentation system in the world fails if your team doesn't use it consistently. Building a documentation culture requires training, accountability, and making the process as frictionless as possible.
Start by designating a documentation lead for each project—typically the site supervisor or foreman. This person is responsible for ensuring that all required photos, measurements, and reports are completed at each project phase. Create simple checklists that walk through the required documentation at each stage: pre-construction, demolition, rough installation, covered work, backfill, and final completion.
Conduct periodic audits of project files to ensure compliance. When you find gaps, address them immediately and use them as training opportunities. Celebrate projects with exemplary documentation—share them as examples during team meetings. When your crew understands that documentation protects them personally (not just the company), buy-in increases dramatically.
Finally, make documentation part of your project pricing. The time required for thorough site documentation—typically 2-4 hours for pre-construction documentation on a residential project—should be included in your bid as a line item or built into your overhead. Clients who balk at paying for documentation are often the same clients who create disputes later. Professional documentation is a hallmark of a professional operation, and clients who value quality will recognize and respect it.
At Low Point Labs, we understand that the foundation of every successful drainage and grading project is knowing exactly what you're working with before you start. Our topographic drainage intelligence services provide contractors with detailed, data-driven assessments of site conditions that serve as authoritative baseline documentation. Whether you're looking to strengthen your pre-construction records, verify post-construction grades, or resolve a drainage dispute with objective data, explore how Low Point Labs can become your documentation partner and your strongest line of defense.
Get Your Drainage Intelligence Report™
Start a free trial and generate reports on demand.
Frequently Asked Questions
Related Articles
How to Train Teams to Assess Drainage Sites Consistently Every Time
Using Technology to Streamline Your Office and Field Workflow
