Modern Construction Techniques for Drainage & Foundation Work
Water is the single greatest threat to residential foundations, and the construction industry's approach to managing it has evolved dramatically over the past two decades. Modern drainage construction techniques now combine advanced materials, precision engineering, and even sensor technology to move water away from structures more effectively than ever before. Whether you're building new, retrofitting an aging foundation, or evaluating a property's drainage infrastructure, understanding these methods is essential for long-term structural integrity.
At Low Point Labs, we analyze topographic and drainage data for thousands of residential properties. What we consistently find is that the homes with the fewest water-related issues aren't necessarily on the highest ground — they're the ones where foundation drainage was designed and installed using modern best practices. This article walks you through exactly what those practices look like in 2026, from excavation to final grading.
The Evolution of Foundation Drainage: From Clay Tiles to Engineered Systems
The term "drain tile" is still widely used in the construction industry, but it's a relic of an earlier era. Original drain tile systems — literally clay tiles laid end-to-end in trenches — date back to the early 20th century. These systems relied on gaps between tiles to allow water entry, then gravity to carry it to a discharge point. They worked, but they were fragile, prone to root intrusion, and nearly impossible to maintain once backfilled.
By the 1970s and 1980s, perforated PVC and corrugated polyethylene pipes had largely replaced clay tiles. This was a significant improvement in durability and cost, but the fundamental design philosophy remained the same: dig a trench, lay pipe, cover with gravel, and hope for the best. Installation quality varied wildly, and many systems from this era are now failing due to sediment clogging, pipe collapse, or inadequate slope.
Today's modern drainage methods represent a paradigm shift. Rather than treating drainage as a simple plumbing exercise, contemporary approaches treat the entire foundation envelope as an integrated water management system. This means coordinating subsurface drainage, waterproofing membranes, vapor barriers, surface grading, and discharge management into a single cohesive design. The result is dramatically improved performance and longevity — systems designed to function for 50 years or more with minimal maintenance.
The key drivers of this evolution include better understanding of hydrostatic pressure, improved polymer science for membranes and pipes, and the availability of high-resolution topographic data that allows engineers to model water flow with unprecedented accuracy. Tools like the USGS 3D Elevation Program have made it possible to understand site-level drainage patterns before a single shovel hits the ground.
Modern Foundation Waterproofing: Layers of Defense
Effective foundation waterproofing in modern construction is never a single product — it's a system of complementary layers, each addressing a different mechanism of water intrusion. Understanding these layers is critical for homeowners evaluating their own properties and for contractors aiming to deliver lasting results.
Dampproofing vs. Waterproofing
These terms are often used interchangeably, but they describe fundamentally different levels of protection. Dampproofing is a moisture-resistant coating — typically a spray-applied asphalt emulsion — that resists moisture migration through concrete but cannot withstand hydrostatic pressure. Most building codes require dampproofing as a minimum standard for habitable below-grade spaces, but in any area with moderate to high water tables or clay-heavy soils, it's insufficient.
True waterproofing involves a continuous, fully adhered or mechanically fastened membrane that can resist sustained hydrostatic pressure. Modern options include:
- Rubberized asphalt membranes (peel-and-stick sheets): These self-adhering sheets create a continuous waterproof barrier. They're typically 40-60 mils thick and can bridge small cracks that develop as concrete cures.
- Fluid-applied membranes: Spray or roller-applied polyurethane or polymer-modified asphalt coatings that cure into a seamless, elastomeric film. These excel at conforming to irregular surfaces and penetrations.
- Bentonite clay systems: Panels or sheets containing sodium bentonite clay that swells when hydrated, creating a self-sealing waterproof barrier. These are particularly effective in high water table conditions because they actually perform better when wet.
- Crystalline waterproofing admixtures: Added directly to the concrete mix, these chemicals react with moisture and unhydrated cement particles to form insoluble crystals within the concrete matrix, effectively making the concrete itself waterproof. This technology has matured significantly and is now widely used in commercial and increasingly in residential construction.
Drainage Boards and Composite Systems
Even the best waterproofing membrane benefits from pressure relief. Modern drainage installation almost always includes a drainage board — a dimpled high-density polyethylene (HDPE) sheet that creates an air gap between the membrane and the backfill. This air gap serves three critical functions: it relieves hydrostatic pressure against the membrane, provides a channel for water to flow downward to the footing drain, and protects the membrane from damage during backfilling.
Composite drainage boards take this a step further by integrating a filter fabric on the soil-facing side. This geotextile prevents fine soil particles from migrating into the drainage channel while allowing water to pass freely. Premium products also include an insulation layer, combining drainage, protection, and thermal performance in a single installation step.
The performance difference is measurable. A properly installed drainage board can reduce hydrostatic pressure against a foundation wall by 80-90%, dramatically extending the service life of the waterproofing membrane behind it.
Subsurface Drainage Installation: Best Practices for 2026
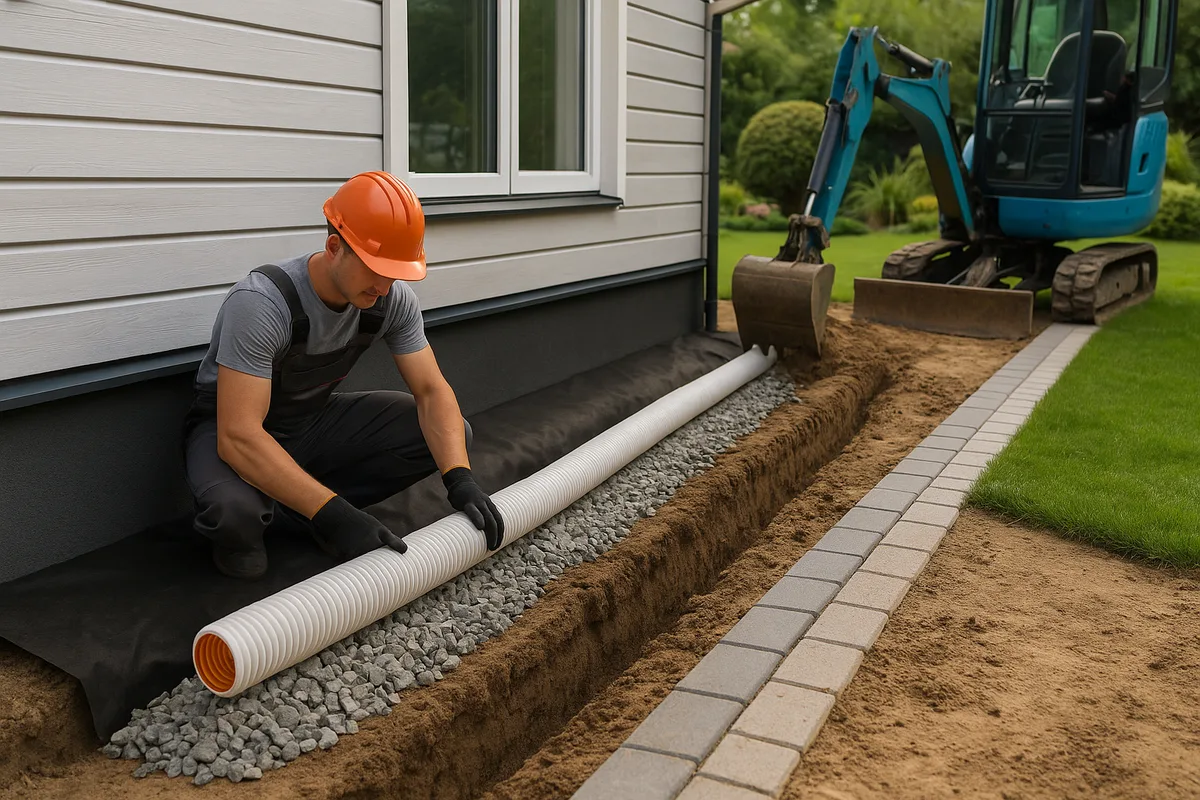
The footing drain — the perforated pipe installed at the base of the foundation — remains the workhorse of any foundation drainage system. But how that pipe is selected, installed, and protected has changed substantially.
Pipe Selection and Sizing
Modern footing drains typically use one of two pipe types:
Rigid PVC (Schedule 40 or SDR 35): 4-inch diameter perforated pipe is the standard for residential applications. Rigid PVC resists crushing, maintains its shape over decades, and can be cleaned with a sewer snake if necessary. Perforations should face downward (the 4 and 8 o'clock positions) to collect water rising from below rather than catching sediment falling from above.
HDPE smooth-wall dual-wall pipe: This newer option offers the flexibility of corrugated pipe with a smooth interior wall that reduces friction and resists sediment buildup. It's increasingly preferred for longer runs where maintaining consistent slope is critical.
Corrugated single-wall pipe — the black flexible tubing available at hardware stores — should be avoided for footing drain applications. Its ribbed interior traps sediment, its walls are prone to crushing under backfill loads, and its lifespan in below-grade applications is typically 15-25 years compared to 50+ years for rigid PVC or dual-wall HDPE.
Pipe sizing depends on the drainage area and expected flow. For most single-family residential foundations, 4-inch pipe is adequate. However, homes with large footprints (over 3,000 square feet), high water table conditions, or heavy clay soils may benefit from 6-inch pipe. The key calculation is ensuring the pipe can handle peak flow without surcharging — a condition where the pipe runs full and pressure builds in the system.
The Gravel Envelope
The aggregate surrounding the footing drain is not just fill — it's a critical component of the drainage system. Modern best practices call for:
- Washed, angular crushed stone in the 3/4-inch to 1-1/2-inch range. Round river gravel compacts less effectively and provides fewer void spaces for water flow.
- A minimum of 6 inches of stone below the pipe and 12 inches above it, extending at least 12 inches outward from the foundation wall.
- The entire gravel envelope wrapped in non-woven geotextile filter fabric to prevent soil migration into the aggregate. This single step — often skipped in older installations — is perhaps the most important factor in long-term system performance. Without it, fine soil particles gradually fill the voids between stones, turning your drainage system into a dam.
Slope and Discharge
Gravity is the engine of any passive drainage system, and maintaining adequate slope is non-negotiable. The minimum recommended slope for footing drains is 1/8 inch per foot (approximately 1% grade), though 1/4 inch per foot is preferred where site conditions allow.
Discharge options have also evolved. Traditional approaches simply daylight the pipe at the lowest point of the lot, but modern systems increasingly incorporate:
- Sump pits with battery-backup pumps for sites where gravity discharge isn't feasible
- Pop-up emitters that open under pressure to discharge water at grade level, then close to prevent debris entry
- Dry wells or infiltration chambers that allow collected water to percolate back into the soil at a safe distance from the foundation
- Connection to municipal storm sewers where permitted by local codes
The discharge point is where many otherwise well-designed systems fail. Water must be moved far enough from the foundation — a minimum of 10 feet, preferably 20 feet or more — to prevent it from cycling back through the soil to the footing drain. This is where surface grading and topographic analysis become essential complements to subsurface drainage.
Surface Grading and Drainage Construction Integration
No amount of subsurface drainage construction can compensate for poor surface grading. The International Residential Code (IRC) specifies a minimum grade of 6 inches of fall within the first 10 feet from the foundation (approximately 5% slope). This seemingly simple requirement is violated on a staggering number of residential properties — our analysis at Low Point Labs consistently finds that 40-60% of homes have at least one area where grading directs water toward rather than away from the foundation.
Precision Grading Techniques
Modern grading has moved well beyond the eyeball-and-rake approach. GPS-guided equipment, laser levels, and drone-based topographic surveys allow contractors to achieve precise grades across complex terrain. For new construction, the process typically follows this sequence:
- Pre-construction topographic survey: Establishes existing grades, identifies natural drainage patterns, and locates low points where water will naturally collect.
- Grading plan development: Engineers design finish grades that direct all surface water away from the structure while respecting property boundaries, setback requirements, and neighboring drainage patterns.
- Rough grading: Heavy equipment shapes the site to approximate final grades, typically leaving the surface 4-6 inches above finish grade to account for topsoil and settlement.
- Foundation construction and backfill: The foundation is built, waterproofed, and backfilled with controlled fill material compacted in 6-8 inch lifts.
- Fine grading: Final surface shaping achieves design grades within a tolerance of +/- 0.1 feet. This is where laser-guided equipment pays for itself.
- Landscape and hardscape installation: Careful attention to maintaining designed grades during planting, mulching, and paving.
Swales and Berms
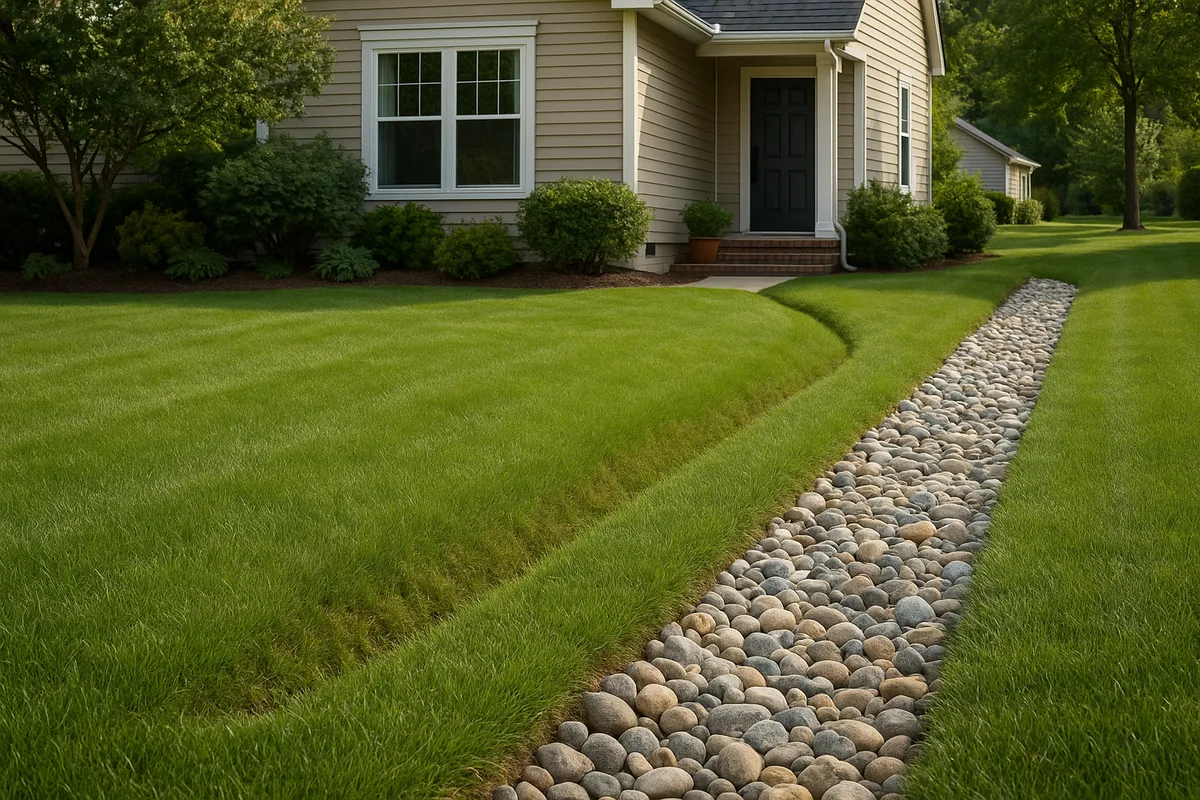
Where natural topography doesn't provide adequate drainage away from the structure, engineered swales and berms create artificial drainage pathways. A swale is a shallow, vegetated channel designed to collect and convey surface water. Modern swale design incorporates:
- Parabolic cross-sections rather than V-shapes, which concentrate flow and promote erosion
- Minimum longitudinal slopes of 1-2% to ensure positive drainage without excessive velocity
- Turf reinforcement mats or erosion control blankets in areas where flow velocity might exceed the erosion resistance of vegetation
- Check dams (small stone barriers across the swale) on steeper slopes to slow flow and promote infiltration
Berms — raised earthen ridges — serve as barriers to redirect surface flow. They're particularly useful along property boundaries where neighboring drainage might otherwise flow toward your foundation. A well-constructed berm should have side slopes no steeper than 3:1 (horizontal to vertical) for mowability and stability, and should be built with compacted fill topped with 4-6 inches of topsoil.
Advanced Drainage Technologies in Modern Construction
The last five years have seen a wave of innovation in residential drainage installation that goes beyond incremental improvements in materials. These technologies are changing how systems are designed, installed, and monitored.
Geocomposite Strip Drains
For retrofit applications where full excavation isn't feasible, geocomposite strip drains offer a compelling alternative. These prefabricated drainage elements consist of a high-flow polymer core wrapped in filter fabric, and they can be installed in narrow trenches — sometimes as narrow as 2 inches — rather than the 12-24 inch trenches required for traditional gravel-and-pipe systems.
Strip drains are particularly useful for:
- Interior basement perimeter drainage systems
- Retaining wall drainage where space behind the wall is limited
- Under-slab drainage in new construction
- Landscape drainage in areas where mature trees or hardscaping make excavation impractical
Flow capacities for modern strip drains range from 15-25 gallons per minute per linear foot, which is adequate for most residential applications. They won't replace a properly engineered footing drain in high-water-table conditions, but for surface and near-surface water management, they're an excellent tool.
Smart Monitoring Systems
One of the most significant advances in modern drainage methods is the ability to monitor system performance in real time. Wireless moisture sensors, water level monitors, and flow meters can now be installed at key points in a drainage system and connected to a home's Wi-Fi network. These systems can:
- Alert homeowners when sump pit water levels exceed normal thresholds
- Track pump run times and cycling frequency to detect changes in groundwater conditions
- Monitor moisture levels in foundation walls and slabs to catch waterproofing failures before they cause visible damage
- Log data over time to identify seasonal patterns and predict maintenance needs
The cost of these monitoring systems has dropped dramatically — a basic setup with 4-6 sensors and a hub can be installed for $500-$1,000, a trivial investment compared to the $10,000-$50,000 cost of foundation water damage repair.
Permeable Paving and Infiltration Systems
Modern stormwater management increasingly emphasizes infiltration — allowing water to soak into the ground where it falls rather than concentrating it in pipes and channels. This approach reduces peak flows, recharges groundwater, and can significantly reduce the load on a property's drainage infrastructure.
Permeable paving options for residential applications include:
- Permeable interlocking concrete pavers (PICP): These pavers have widened joints filled with small aggregate that allows water to pass between them. Properly installed PICP systems can infiltrate 100+ inches of rainfall per hour.
- Porous asphalt and pervious concrete: These materials have an open aggregate structure that allows water to flow directly through the pavement surface. They require a carefully designed stone base reservoir to store and infiltrate the water.
- Grass pavers: Grid systems (plastic or concrete) that support vehicle loads while allowing grass to grow in the openings. These are ideal for overflow parking areas, fire lanes, and access roads where full impervious coverage isn't necessary.
The critical caveat with all infiltration systems is soil suitability. They work well in sandy or loamy soils with infiltration rates above 0.5 inches per hour, but can fail in clay soils where water has nowhere to go. The NRCS Web Soil Survey is an invaluable free resource for checking your property's soil type and hydrologic soil group before investing in infiltration-based solutions.
Interior Drainage Systems: When Exterior Access Isn't Possible
Not every foundation drainage problem can be solved from the outside. Dense urban lots, finished landscaping, attached structures, and budget constraints often make exterior excavation impractical. Modern interior drainage systems have evolved to address these situations effectively.
Sub-Slab Drainage Systems
The most common interior approach involves cutting a channel around the interior perimeter of the basement floor, installing drainage pipe or strip drain in the channel, and routing it to a sump pit. The channel is then covered with new concrete, leaving the system invisible and accessible only through cleanout ports.
Key design considerations include:
- Channel placement: The channel should be located at the junction of the floor and wall, where hydrostatic pressure forces water through the cold joint (the natural seam where the floor meets the footing).
- Vapor management: Modern systems incorporate a vapor barrier that extends from the wall, over the drainage channel, and under the replacement concrete to prevent moisture vapor from entering the living space.
- Sump pit sizing: The pit should be a minimum of 18 inches in diameter and 24 inches deep, with a lid that seals against radon and moisture vapor intrusion. Dual-pump configurations (primary plus battery backup) are strongly recommended.
- Discharge routing: The pump discharge line should include a check valve to prevent backflow and should exit the building above the frost line with proper insulation or a weep hole to prevent freeze damage.
Wall Drainage Systems
For foundation walls that are actively leaking through cracks or porous concrete block, interior wall drainage systems provide a second line of defense. These typically involve:
- Drainage membranes: Dimpled plastic sheets installed against the interior face of the foundation wall, creating an air gap that channels water downward to the perimeter drain.
- Wall anchors or carbon fiber reinforcement: If the wall is bowing or cracking due to lateral soil pressure, structural repair should be completed before or concurrent with drainage work.
- Interior waterproof coatings: Cementitious or epoxy-based coatings applied to the interior wall surface can resist modest hydrostatic pressure (typically up to 10 psi) and are useful as a supplementary measure, though they should never be relied upon as the sole waterproofing strategy.
Quality Control and Inspection During Drainage Construction
The best materials and designs in the world are worthless if installation is sloppy. Modern drainage construction standards emphasize quality control at every stage, and homeowners should know what to look for — or what to ask their inspector to verify.
Critical Inspection Points
During new construction or major retrofit projects, the following should be verified before backfilling:
- Waterproofing membrane continuity: No gaps, tears, or unbonded areas. All penetrations (pipes, conduits, tie-rod holes) should be sealed with compatible sealant or boot details.
- Footing drain slope: Verified with a laser level or surveyor's instrument. Even a short section of reverse slope (a belly in the pipe) can trap sediment and eventually block the entire system.
- Gravel envelope completeness: The pipe should be fully surrounded by clean stone, with filter fabric wrapped around the entire assembly. No native soil should be in contact with the pipe or stone.
- Cleanout access: Cleanout risers should be installed at every change of direction and at maximum intervals of 100 feet. These risers should extend to finish grade and be capped with accessible, labeled covers.
- Backfill material and compaction: Backfill against foundation walls should be free of organic material, large rocks, and construction debris. It should be placed in controlled lifts (6-8 inches) and compacted to 90-95% of standard Proctor density to minimize future settlement.
- Surface grade verification: Final grades should be surveyed and documented to confirm compliance with the grading plan. This documentation is invaluable for future reference and dispute resolution.
Common Installation Mistakes
Even experienced contractors make errors that compromise drainage system performance. The most frequent problems we encounter in our assessments include:
- Footing drain installed above the footing: The pipe should be positioned alongside the footing with its centerline at or below the top of the footing. Installing it too high allows water to build up against the footing before reaching the drain.
- Using pea gravel instead of crushed stone: Pea gravel's rounded particles don't interlock and can migrate through filter fabric, eventually clogging the system.
- Omitting the filter fabric: This single omission is responsible for more footing drain failures than any other factor. Within 5-10 years, soil migration will render an unprotected system non-functional.
- Connecting downspouts to footing drains: Roof runoff should be managed in a separate piping system. Connecting it to the footing drain introduces massive volumes of water and debris into a system designed for slow, steady groundwater collection.
- Inadequate compaction of backfill: Poorly compacted backfill settles over time, creating a trough against the foundation that collects surface water — exactly the opposite of what you want.
Choosing the Right Approach for Your Property
Selecting the optimal foundation drainage strategy depends on several site-specific factors that must be evaluated before any work begins.
Site Assessment Factors
Soil type is perhaps the most important variable. Clay soils hold water and create high hydrostatic pressure against foundations, demanding robust drainage systems with generous gravel envelopes and possibly supplemental pumping. Sandy soils drain naturally and may require only basic dampproofing and surface grading. Silty soils fall somewhere in between and are particularly challenging because their fine particles can clog drainage systems.
Water table depth determines whether you're managing occasional surface water or constant groundwater pressure. Properties with seasonal high water tables within 4 feet of the basement floor need aggressive subsurface drainage and may require permanent sump pump installations.
Topographic position — where your property sits relative to surrounding terrain — influences how much surface and subsurface water flows toward your foundation from uphill areas. Properties at the bottom of slopes or in natural drainage convergence zones face significantly higher water loads than properties on ridgelines or upper slopes.
Existing conditions matter enormously for retrofit projects. The age and type of the existing foundation, the presence of finished interior spaces, the condition of existing drainage infrastructure, and the accessibility of the foundation exterior all influence which techniques are feasible and cost-effective.
Cost Considerations
Modern drainage systems represent a significant investment, but the cost of inaction is almost always higher. Typical cost ranges for residential projects in 2026 include:
- Exterior footing drain (new construction): $3,000-$8,000, depending on foundation perimeter and site conditions
- Exterior footing drain (retrofit with excavation): $8,000-$20,000, reflecting the added cost of excavation, shoring, and landscape restoration
- Interior perimeter drain with sump: $5,000-$15,000, depending on basement size and finish level
- Full exterior waterproofing system (membrane + drainage board + footing drain): $15,000-$35,000 for retrofit; significantly less as part of new construction
- Surface grading and swale construction: $2,000-$10,000, depending on scope and equipment access
These costs should be weighed against the potential consequences of inadequate drainage: foundation cracking ($5,000-$25,000 to repair), basement flooding (average insurance claim of $10,000-$30,000), mold remediation ($5,000-$30,000), and reduced property value (studies suggest water-damaged homes sell for 10-25% less than comparable dry homes).
Building for the Future: Climate Adaptation and Drainage Design
Modern drainage construction must account for changing precipitation patterns. Across much of the United States, rainfall events are becoming more intense even as overall annual totals remain relatively stable. This means drainage systems designed to historical standards may be undersized for future conditions.
Forward-thinking design practices include:
- Upsizing pipe and storage: Designing for the 25-year or 50-year storm event rather than the traditional 10-year standard
- Incorporating redundancy: Dual discharge paths, backup pumps, and overflow provisions that activate during extreme events
- Designing for maintenance: Accessible cleanouts, inspectable sump pits, and system layouts that can be serviced without excavation
- Preserving natural drainage features: Working with existing topography rather than against it, maintaining natural swales and drainage corridors where possible
- Using adaptive materials: Selecting products rated for the temperature extremes and UV exposure expected in your climate zone over the system's design life
The homes that will perform best over the next 50 years are the ones being built or retrofitted today with these principles in mind. Drainage is not a glamorous topic, but it is arguably the most important system in any residential structure — because when it fails, everything else fails with it.
Understanding your property's unique drainage characteristics is the essential first step toward effective water management. Low Point Labs provides detailed topographic drainage assessments that reveal exactly how water moves across and around your property, identifying vulnerabilities before they become problems. Whether you're planning new construction, evaluating a potential purchase, or troubleshooting an existing water issue, our data-driven approach gives you the intelligence you need to make informed decisions about drainage installation and foundation protection. Explore our assessment services to see how topographic drainage intelligence can protect your most important investment.
See Drainage Intelligence in Practice
Talk with our team or request an invitation to the platform.
Frequently Asked Questions
A properly installed modern foundation drainage system using rigid PVC or HDPE pipe, washed crushed stone, and geotextile filter fabric can last 50 years or more. The most common cause of premature failure is omitting the filter fabric, which allows soil to clog the system within 5-15 years.
Dampproofing is a moisture-resistant coating that blocks water vapor but cannot resist hydrostatic pressure from standing water. Waterproofing uses a continuous membrane (rubberized asphalt, fluid-applied polymer, or bentonite clay) that can withstand sustained water pressure. Homes with basements below the water table need true waterproofing, not just dampproofing.
No. Roof downspouts should never be connected to the footing drain system. Downspouts carry large volumes of water and debris that can overwhelm and clog a footing drain designed for slow groundwater collection. Downspouts should discharge into a separate piping system that carries water at least 10-20 feet from the foundation.
The International Residential Code requires a minimum of 6 inches of fall within the first 10 feet from the foundation, which equals approximately a 5% slope. This grade should be maintained on all sides of the structure to ensure surface water flows away from the foundation rather than pooling against it.
While simple surface grading and downspout extensions are reasonable DIY projects, subsurface footing drain installation and waterproofing are best left to experienced professionals. Improper installation — such as incorrect pipe slope, missing filter fabric, or inadequate gravel — can actually make drainage problems worse and is extremely costly to correct after backfilling.
Common signs include water stains or efflorescence (white mineral deposits) on basement walls, musty odors, visible cracks with moisture seepage, a sump pump that runs constantly or never runs at all, and standing water in window wells. A professional drainage assessment can identify failing systems before they cause significant damage.
Related Articles
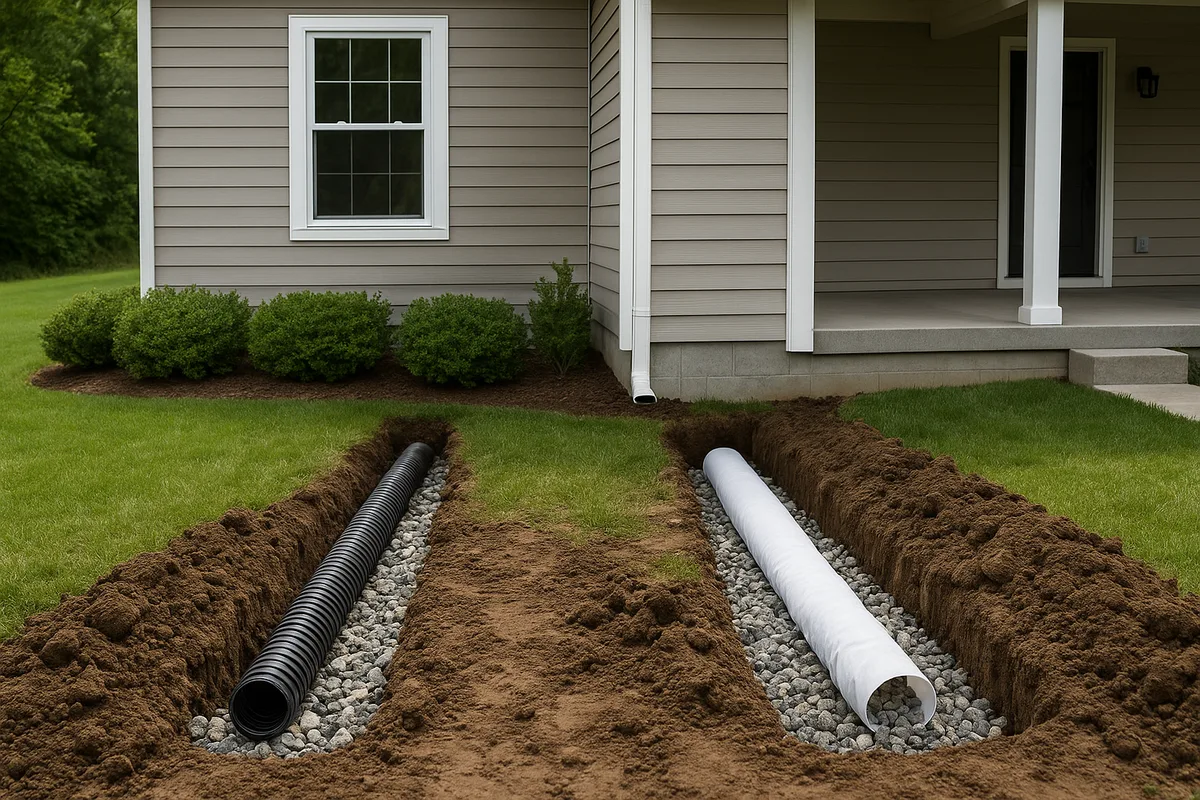
Curtain Drains vs. Footing Drains: What's the Difference?
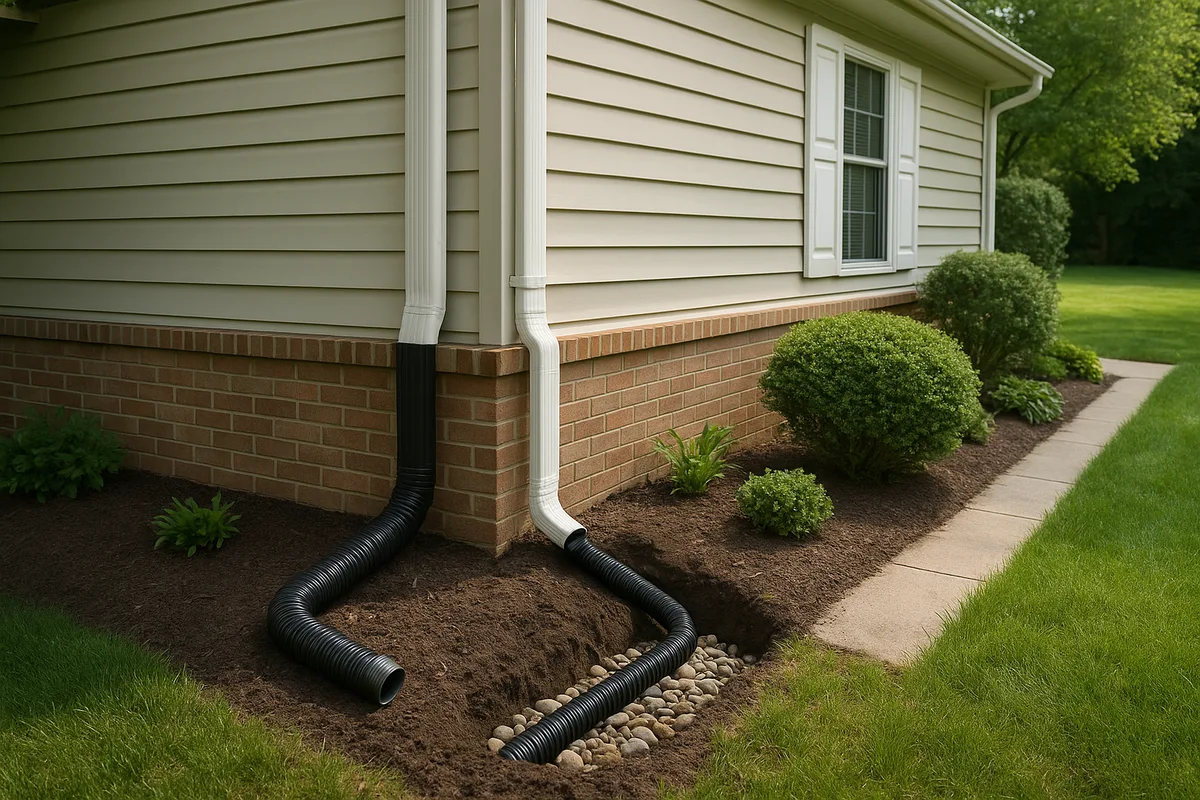
Buried Downspouts: How to Route Roof Water Away From Your Foundation