Sump Pump Basics: When Your Property Needs One and What It Costs
A sump pump is one of those home systems you never think about—until water is pooling on your basement floor at 2 a.m. during a downpour. For millions of homeowners across the United States, a properly installed sump pump is the last line of defense between a dry foundation and catastrophic water damage. Yet deciding whether your property actually needs one, choosing the right type, and understanding sump pump installation cost can feel overwhelming. This guide breaks down every element of the decision so you can protect your home with confidence.
At Low Point Labs, we analyze topographic drainage patterns for residential properties every day. We've seen firsthand how the interplay between lot grading, soil type, water table depth, and local precipitation determines whether a sump pump is a luxury or a necessity. By the end of this article, you'll understand exactly where your property falls on that spectrum—and what it will take to get the right system in place.
What Is a Sump Pump and How Does It Work?
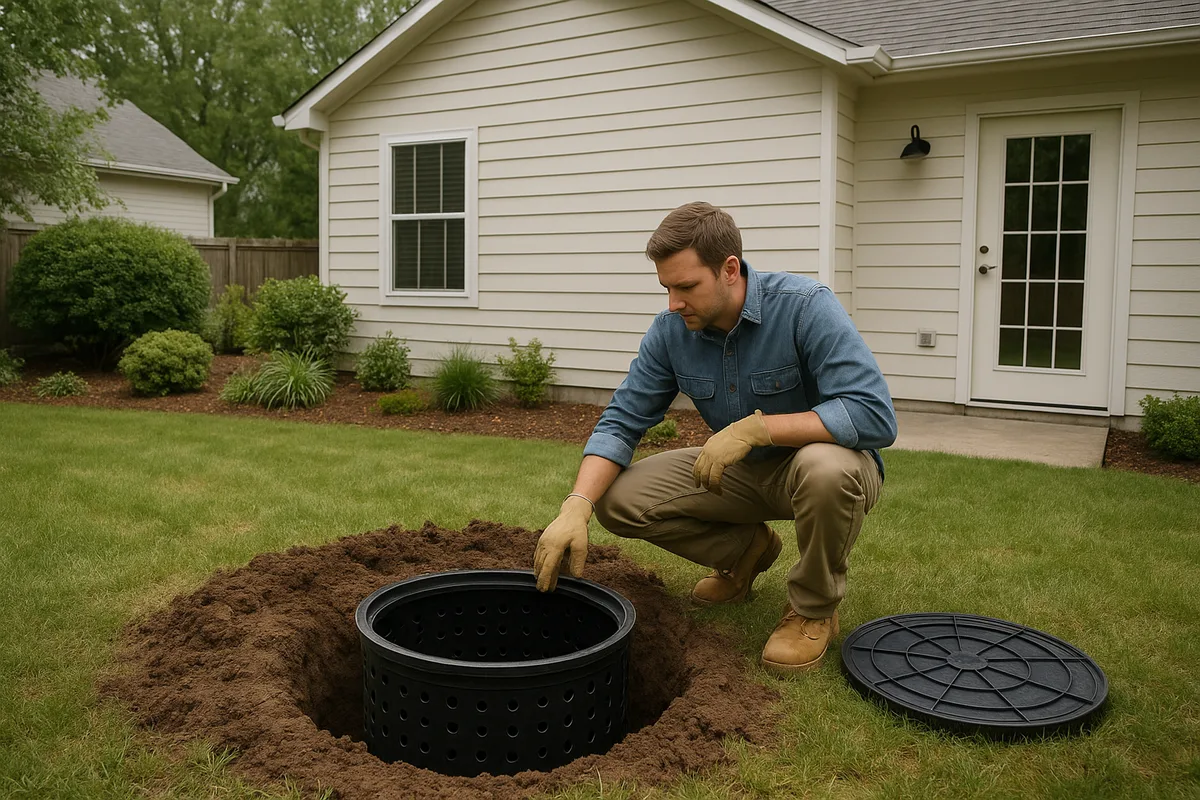
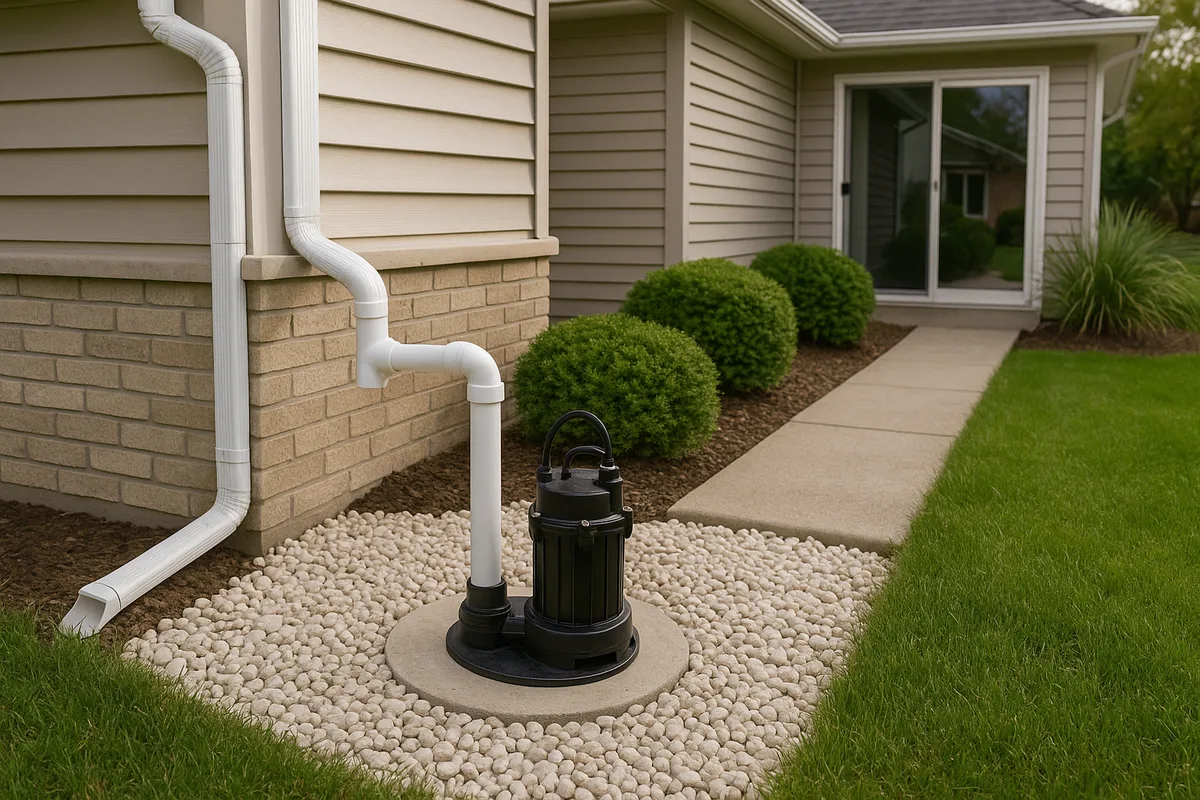
A sump pump is a submersible or pedestal-mounted electric pump installed inside a sump pit (also called a sump basin or crock) that collects groundwater and surface water infiltrating below a structure. When water in the pit reaches a preset level, a float switch activates the pump, which pushes water through a discharge pipe and away from the foundation. The cycle repeats automatically every time the water level rises.
The sump pit itself is typically 18 to 24 inches in diameter and 22 to 36 inches deep, lined with a perforated plastic or fiberglass basin. In most installations, a perimeter drain system—often called an interior French drain or drain tile—channels water from along the foundation footing into the pit. This means the sump pump doesn't just react to flooding; it actively intercepts water before it ever reaches your finished floor.
The discharge line carries water from the pump to a termination point outside the home, usually at least 10 to 20 feet from the foundation. Local building codes often specify minimum discharge distances and prohibit direct connections to municipal sanitary sewer systems. Some jurisdictions allow discharge into storm sewers, while others require water to be released onto the property surface or into a dry well.
Understanding this basic mechanics is critical because every component—pit depth, pump capacity, discharge routing, and backup power—must be matched to your property's specific drainage conditions. A system that's undersized for your water table or improperly discharged can fail precisely when you need it most.
Warning Signs Your Property Needs a Sump Pump
Not every home requires a sump pump. Properties built on well-drained sandy soils with positive grading and low water tables may never see a drop of unwanted water below grade. But certain conditions make a sump pump not just advisable but essential.
Visible Water Intrusion
The most obvious indicator is water appearing in your basement or crawl space. This can range from damp spots and efflorescence (white mineral deposits on concrete walls) to standing water after rain events. If you notice water seeping through floor-wall joints, through cracks in the slab, or welling up through the floor itself, subsurface water pressure—called hydrostatic pressure—is pushing against your foundation. A sump pump paired with a perimeter drain system is the standard remedy.
High or Seasonally Fluctuating Water Table
The water table is the underground boundary below which soil is fully saturated. In many regions, this level fluctuates seasonally—rising in spring with snowmelt and heavy rains, and falling in late summer. If your water table rises to within a few feet of your basement slab during wet seasons, you're at risk. You can check the approximate water table depth for your area using the NRCS Web Soil Survey, which provides soil profiles including seasonal high water table data for virtually every parcel in the country.
Poor Soil Drainage (Hydrologic Soil Groups C and D)
Soils are classified into four hydrologic groups (A through D) based on their infiltration and drainage characteristics. Group A soils (sands and gravels) drain quickly, while Group C and D soils (clay-heavy and silty clay) drain very slowly, causing water to accumulate around foundations. If your property sits on poorly draining soil, water has nowhere to go but against your foundation walls and under your slab.
Negative Grading or Low-Lying Lot Position
If the terrain around your home slopes toward the foundation rather than away from it, surface water will collect against the structure. Similarly, homes situated at topographic low points—at the bottom of a hill, in a natural swale, or in a depression—receive concentrated runoff from surrounding higher ground. These properties are prime candidates for sump pump systems. A topographic drainage analysis can reveal these patterns even when they aren't obvious to the naked eye.
History of Basement Flooding in the Neighborhood
If your neighbors have sump pumps or have experienced basement flooding, there's a strong chance the underlying conditions—soil type, water table, regional drainage patterns—affect your property too. Shared geological and hydrological conditions don't stop at property lines.
Building Code Requirements
Many jurisdictions now require sump pumps in new construction, particularly in areas with known high water tables or flood-prone soils. The International Residential Code (IRC) Section R405.2.3 requires a sump pump when a gravity drain to daylight is not feasible for foundation drainage. If your home was built before these codes were adopted, you may be living without protection that modern standards consider mandatory.
Types of Sump Pumps: Choosing the Right System
Selecting the right sump pump involves more than picking one off the shelf at a home improvement store. The type of pump, its capacity, and its backup systems must match your property's water volume and risk profile.
Submersible Sump Pumps
Submersible pumps sit inside the sump pit, fully submerged in water during operation. They're sealed to prevent electrical shorts and are generally quieter than pedestal models because the water muffles motor noise. Submersible pumps are the most popular choice for finished basements where noise matters and where the pit can be covered with a sealed lid to prevent moisture and radon from entering the living space.
Most residential submersible pumps range from 1/3 to 1/2 horsepower, capable of moving 2,500 to 4,500 gallons per hour at a typical 10-foot vertical lift (called "head"). For properties with aggressive water intrusion or deep pits requiring higher lift, 3/4 HP or 1 HP models are available. Submersible pumps typically last 7 to 10 years, though lifespan depends heavily on duty cycle—a pump that runs every few minutes during wet seasons will wear out faster than one that activates a few times per month.
Pedestal Sump Pumps
Pedestal pumps mount the motor above the pit on a tall stand, with only the impeller and intake submerged. Because the motor stays dry, pedestal pumps can last 25 to 30 years—significantly longer than submersible models. However, they're louder, less powerful, and take up more vertical space. They're best suited for unfinished basements or crawl spaces where noise isn't a concern and where the sump pit is too narrow for a submersible unit.
Battery Backup Sump Pumps
Power outages and severe storms often coincide—which means your primary pump may lose power exactly when water volume peaks. A battery backup sump pump is a secondary unit (usually with its own float switch set slightly higher than the primary) that kicks in when the main pump fails or can't keep up. Battery backup systems typically provide 5 to 12 hours of pumping on a full charge, depending on cycle frequency. For high-risk properties, this is not optional—it's essential.
Water-Powered Backup Pumps
These ingenious devices use municipal water pressure to create suction and pump out sump water without any electricity. They're slower than electric pumps and increase your water bill during operation, but they never run out of charge. Water-powered backups are an excellent complement to battery systems, providing truly indefinite backup capacity as long as your municipal water supply is functioning.
Combination Systems
The gold standard for high-risk properties is a combination system: a primary submersible pump, a battery backup pump, and optionally a water-powered backup. Many manufacturers sell these as integrated packages with unified alarm systems that alert you to high water levels, pump failures, or low battery charge.
Sump Pump Installation Cost: A Complete Breakdown
Understanding sump pump installation cost requires looking beyond the price of the pump itself. The total investment depends on whether you're replacing an existing pump, installing a new system from scratch, or adding a complete perimeter drain system.
Pump Replacement Only
If you already have a functioning sump pit and discharge line and simply need a new pump, costs are relatively modest:
- Submersible pump (1/3 HP): $150–$350 for the unit; $200–$400 for professional installation
- Submersible pump (1/2 HP): $200–$500 for the unit; $200–$400 for professional installation
- Pedestal pump: $100–$250 for the unit; $150–$300 for professional installation
- Battery backup pump: $200–$600 for the unit; $150–$350 for professional installation
Total cost for a straightforward pump swap typically falls between $400 and $900, including labor.
New Sump Pit and Pump Installation
Installing a sump pump where none existed before requires cutting into the basement slab, excavating the pit, setting the basin, running a discharge line through the foundation wall, and connecting the pump to power. This is significantly more involved:
- Sump pit excavation and basin installation: $500–$1,500
- Discharge line routing (interior and exterior): $300–$800
- Pump and float switch: $200–$500
- Electrical work (dedicated GFCI outlet): $150–$400
- Concrete patching and finishing: $100–$300
Total cost for a new sump pump installation without a perimeter drain system typically ranges from $1,200 to $3,500, depending on regional labor rates, accessibility, and discharge routing complexity.
Full Interior Drainage System with Sump Pump
For properties with systemic water intrusion, a sump pump alone isn't enough. A complete interior perimeter drain system (often branded as systems like WaterGuard, DryTrak, or similar) involves installing drain channels along the interior perimeter of the foundation footing, routing them to one or more sump pits. This is the most comprehensive—and most expensive—solution:
- Interior perimeter drain (per linear foot): $40–$85
- Average basement perimeter (120–160 linear feet): $4,800–$13,600
- Sump pump system (primary + backup): $800–$2,000
- Vapor barrier (crawl spaces): $1,500–$5,000
Total cost for a full interior drainage system with sump pump typically ranges from $6,000 to $15,000 for an average-sized basement. Larger homes, difficult access conditions, or high water volume can push costs above $20,000.
Factors That Influence Cost
Several variables can shift your sump pump installation cost significantly:
- Geographic location: Labor rates vary widely. Installation in a major metro area may cost 30–50% more than in a rural area.
- Soil conditions: Rocky soil or hardpan clay makes excavation slower and more expensive.
- Discharge routing: If the discharge line must travel a long distance, go uphill, or navigate landscaping, costs increase.
- Permits: Some municipalities require permits for sump pump installations, adding $50–$300.
- Number of pits: Large basements or L-shaped foundations may require two or more sump pits for adequate coverage.
- Finishing work: If your basement is finished, contractors must remove and replace flooring, drywall, or built-ins along the perimeter, adding substantial cost.
Sump Pump Sizing and Capacity: Getting It Right
An undersized sump pump is arguably worse than no pump at all—it gives you false confidence while failing to keep up with water volume during critical events. Proper sizing requires understanding three key specifications.
Gallons Per Hour (GPH) and Gallons Per Minute (GPM)
Pump capacity is rated in GPH or GPM at various head heights (the vertical distance water must be lifted). A pump rated at 3,000 GPH at zero head might only deliver 2,000 GPH at 10 feet of head. Always check the performance curve at your actual lift height, which includes the vertical distance from the pit bottom to the discharge point plus friction losses in the pipe.
Determining Your Water Volume
The best way to size a pump is to measure actual water inflow during a heavy rain event. Fill the pit, mark the water level, then measure how quickly it rises over a set period (say, one minute). Calculate the volume based on pit diameter and rise rate. A common rule of thumb: if your pit fills from empty to the float switch level (typically 8–12 inches of water) in under four minutes during heavy rain, you need at least a 1/2 HP pump.
For new installations where you can't measure inflow, a drainage professional can estimate volume based on soil permeability, water table data, lot size, and impervious surface area. This is where topographic drainage intelligence becomes invaluable—understanding where water flows across your lot tells you how much of it will end up at your foundation.
Duty Cycle and Runtime
A pump that runs continuously or cycles every few seconds is either undersized or dealing with a check valve problem. Healthy operation means the pump runs for 10–25 seconds per cycle with several minutes of rest between cycles during rain events. If your pump runs more frequently than this, it's time to upgrade capacity or investigate whether your drainage system is overwhelmed.
Head Pressure and Pipe Sizing
Most residential sump pumps discharge through 1.5-inch PVC pipe, though some higher-capacity systems use 2-inch pipe. Larger pipe reduces friction loss, effectively increasing the pump's delivered capacity. The total dynamic head—vertical lift plus friction losses—should be calculated to ensure the pump can move adequate volume. Every 90-degree elbow in the discharge line adds friction equivalent to roughly 3–5 feet of straight pipe.
Maintenance, Lifespan, and Common Failures
A sump pump is a mechanical device operating in a harsh environment—submerged in gritty, mineral-laden water, cycling on and off thousands of times per year. Regular maintenance is the difference between a system that protects you for a decade and one that fails catastrophically during the storm of the season.
Routine Maintenance Checklist
Perform these tasks quarterly, or at minimum twice per year (spring and fall):
- Test the pump by pouring 5 gallons of water into the pit and confirming the float switch activates the pump and water discharges properly.
- Inspect the discharge line for clogs, ice dams (in winter), or disconnections. Walk the exterior discharge point to ensure water flows freely away from the foundation.
- Clean the inlet screen on the pump to remove sediment, gravel, and debris that can restrict flow or jam the impeller.
- Check the check valve on the discharge pipe. A failed check valve allows discharged water to flow back into the pit, causing the pump to short-cycle and burn out prematurely.
- Test the backup system. Disconnect the primary pump and verify the battery backup activates. Check battery charge level and replace batteries every 2–3 years (or per manufacturer recommendation).
- Inspect the pit for excessive sediment accumulation. Over time, silt and fine soil particles settle in the basin and can clog the pump. Remove sediment when it reaches 2–3 inches deep.
- Listen for unusual sounds. Grinding, rattling, or humming without pumping indicates bearing wear, impeller damage, or a stuck float switch.
Common Failure Modes
- Float switch failure: The most common cause of sump pump failure. Switches can stick, corrode, or become tangled on the discharge pipe. Tethered float switches are more reliable than vertical switches in most applications.
- Power loss: No electricity means no pump. This is why battery backup systems are critical. Consider a whole-house generator for properties with severe water risk.
- Check valve failure: A stuck-open check valve means the pump re-pumps the same water repeatedly, dramatically increasing wear and reducing effective capacity.
- Frozen or blocked discharge: In cold climates, discharge lines can freeze if they don't have proper slope or a freeze guard (a pop-off fitting near the foundation that allows water to escape if the line freezes).
- Overwhelmed capacity: During extreme precipitation events, even a properly sized pump can be overwhelmed. Dual-pump systems or larger pits provide additional buffer capacity.
- Sediment and debris: Iron ochre (a reddish-orange bacterial slime common in iron-rich groundwater) can clog perimeter drains and pump intakes, requiring periodic chemical treatment or system flushing.
Expected Lifespan
Submersible pumps typically last 7–10 years with regular maintenance. Pedestal pumps can last 25–30 years because the motor stays dry. Battery backup pumps last 5–7 years. Budget for pump replacement as a routine homeownership cost rather than an emergency expense—proactive replacement before failure is always cheaper than water damage remediation.
The Role of Exterior Drainage in Reducing Sump Pump Dependence
A sump pump should be your safety net, not your primary drainage strategy. The most effective approach to basement water management addresses water before it reaches your foundation through proper exterior grading, gutter management, and surface drainage.
Grading and Slope
The single most impactful drainage improvement for any property is ensuring the ground slopes away from the foundation at a minimum of 2% grade (approximately 1 inch of fall per foot) for at least the first 6 to 10 feet. This simple principle diverts thousands of gallons of surface water away from the foundation during each rain event. Many homes—especially older ones where soil has settled—have negative grading that funnels water directly to the foundation.
Gutter and Downspout Management
A 1,000-square-foot roof section generates approximately 620 gallons of water from just 1 inch of rainfall. If that water is dumped at the foundation via short downspout extensions or disconnected gutters, it saturates the soil directly adjacent to your basement walls. Downspouts should discharge at least 6 feet from the foundation—10 feet or more is better—via extensions, underground drain pipes, or pop-up emitters.
Exterior French Drains and Swales
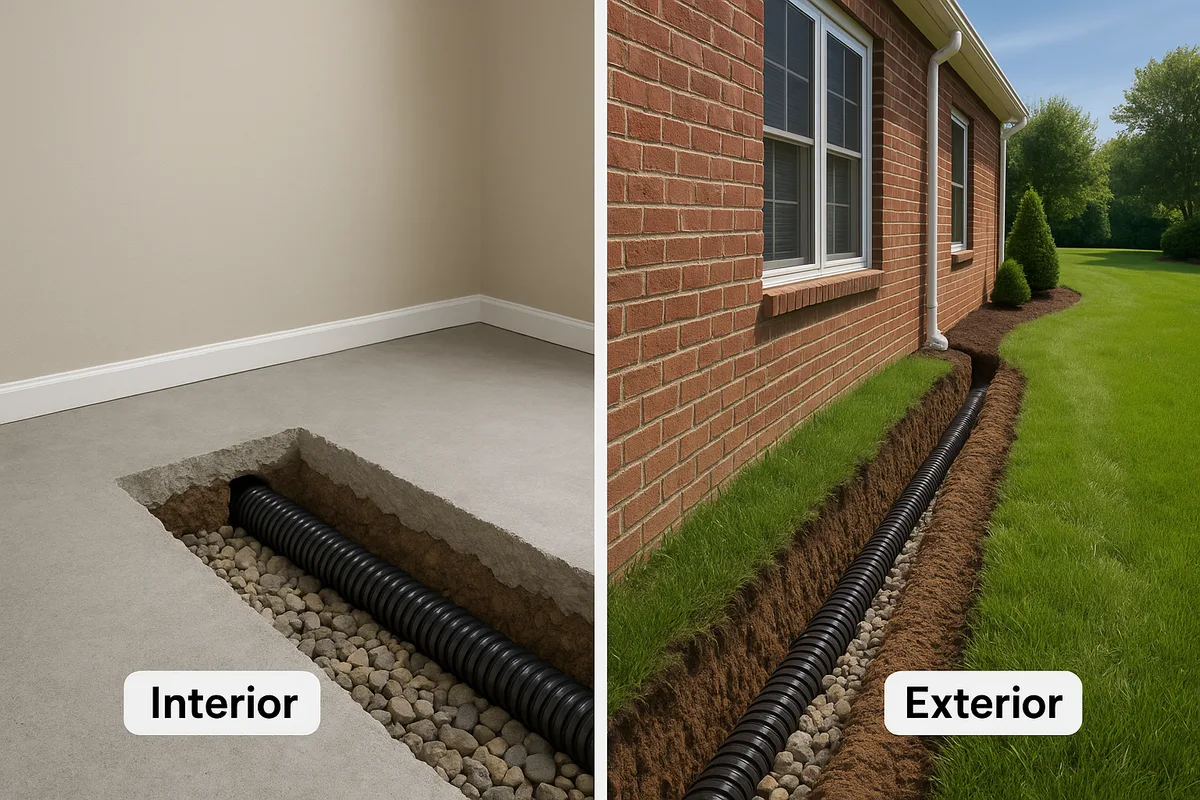
For properties that receive concentrated runoff from neighboring lots or hillsides, exterior French drains (gravel-filled trenches with perforated pipe) and graded swales can intercept and redirect water before it reaches the foundation. These systems work with gravity and require no electricity, making them a reliable complement to any sump pump system.
How Topographic Analysis Informs the Solution
The most effective drainage strategies begin with understanding how water moves across your entire lot—not just at the foundation. Topographic drainage analysis reveals overland flow paths, catchment areas, and accumulation zones that aren't visible during a casual site visit. A property might have perfect grading immediately around the foundation but receive concentrated flow from an uphill neighbor's driveway or a natural swale that crosses the lot. Without understanding the full topographic picture, you're solving symptoms rather than root causes.
DIY vs. Professional Installation: Making the Right Call
The internet is full of tutorials showing homeowners installing sump pumps over a weekend. While pump replacement in an existing pit is a reasonable DIY project for handy homeowners, new installations involve complexities that warrant professional expertise.
When DIY Makes Sense
Replacing a failed pump in an existing, properly constructed sump pit is straightforward. If the pit, discharge line, and electrical supply are all in good condition, swapping the pump involves disconnecting the old unit, lowering the new one, connecting the discharge pipe, and testing. Total time: 1–2 hours. Total savings over professional installation: $200–$400.
When to Hire a Professional
New installations require cutting concrete, excavating soil, potentially dealing with rebar, routing discharge lines through foundation walls, ensuring proper slope on all pipes, and connecting to a dedicated GFCI-protected electrical circuit. Mistakes at any stage can lead to:
- Structural concerns from cutting too close to footings
- Improper pit sizing that leads to premature pump cycling or inadequate capacity
- Code violations that create liability and complicate future home sales
- Discharge problems where water pools near the foundation or flows onto neighboring properties
- Electrical hazards from improper wiring in a wet environment
For full perimeter drain systems, professional installation is essentially mandatory. These systems require precise grading of the drain channel, proper aggregate selection, and careful integration with the sump pit. A poorly installed perimeter drain can actually make water problems worse by creating new pathways for water to enter without adequate capacity to remove it.
Choosing a Contractor
Look for contractors who specialize in waterproofing and drainage rather than general contractors or plumbers. Key qualifications include:
- Specific experience with interior and exterior drainage systems
- Willingness to perform a thorough site assessment before quoting
- Transferable warranty on both labor and materials (minimum 5 years, ideally lifetime on drainage components)
- Proper licensing and insurance for your jurisdiction
- References from completed projects in your area
Be wary of contractors who quote a price without inspecting the property or who recommend a full perimeter system without first evaluating whether targeted repairs (grading correction, downspout extension, spot waterproofing) might solve the problem at lower cost.
Permits, Codes, and Discharge Regulations
Sump pump installation and discharge are regulated in most jurisdictions, and ignoring these requirements can result in fines, failed inspections, and liability for damage to neighboring properties.
Building Permits
Many municipalities require a building permit for new sump pump installations, particularly when the work involves cutting into the foundation slab, running new electrical circuits, or modifying exterior drainage. Permit requirements vary widely—some cities require permits for any plumbing or electrical modification, while rural areas may have no requirements at all. Always check with your local building department before beginning work.
Discharge Regulations
This is where homeowners most frequently run afoul of local codes. Common regulations include:
- No discharge to sanitary sewer: Most municipalities prohibit connecting sump pump discharge to the sanitary sewer system because it overwhelms wastewater treatment plants during storms. Violations can result in significant fines.
- Storm sewer connections: Some cities allow sump pump discharge to the storm sewer system; others prohibit it. Where allowed, a permit and backflow preventer are typically required.
- Surface discharge requirements: When discharging to the surface, water must be directed so it doesn't flow onto neighboring properties, across sidewalks, or into roadways where it could create ice hazards.
- Setback requirements: Many codes specify minimum distances between the discharge point and property lines, septic systems, wells, and structures.
The EPA's NPDES program governs stormwater discharges more broadly, and while individual residential sump pumps are generally exempt from federal permitting, the principles of responsible stormwater management apply. Your discharge should not introduce pollutants into waterways or cause erosion on your property or your neighbors'.
Inspection Requirements
Where permits are required, expect at least one inspection—typically after the pit is excavated and the pump is installed but before concrete is patched. Some jurisdictions also inspect the discharge line and electrical connections. Having your installation inspected, even where not required, provides documentation that the work was done properly—valuable when selling your home.
Protecting Your Investment: Insurance, Resale Value, and Peace of Mind
A sump pump system is an investment in your property's long-term health and value. Understanding the financial implications beyond installation cost helps frame the decision properly.
Insurance Considerations
Standard homeowner's insurance policies typically do not cover flood damage from groundwater intrusion or rising water tables. Separate flood insurance, available through the FEMA National Flood Insurance Program, covers flooding from external sources but may not cover sump pump failure. Many insurers offer a "sump pump failure" or "water backup" endorsement for $40–$100 per year that covers damage from sump pump failure, sewer backup, or drain overflow. This endorsement is well worth the cost for any home with a sump pump.
Some insurance companies offer premium discounts for homes with battery backup sump pumps or water alarm systems, recognizing the reduced risk of water damage claims.
Impact on Home Resale Value
A properly installed sump pump system is a selling point in areas prone to water intrusion. Home inspectors routinely check for sump pumps in basements and crawl spaces, and the absence of one in a high-risk area will be flagged. Conversely, a well-maintained system with battery backup signals to buyers that the home has been properly cared for.
However, a sump pump can also raise questions. Buyers may wonder why the home needs one, so having documentation of the installation—including the drainage assessment that informed the decision, permit records, and maintenance logs—helps frame the system as proactive protection rather than evidence of a chronic problem.
The True Cost of Not Having One
The average cost of basement water damage remediation ranges from $3,000 to $10,000 for minor flooding and can exceed $25,000 for significant events involving mold remediation, structural repair, and replacement of finished materials. A single flooding event typically costs more than the most comprehensive sump pump installation. When you factor in the emotional toll, displacement during repairs, and potential health impacts of mold exposure, the case for proactive installation becomes overwhelming.
At Low Point Labs, we believe the best drainage decisions start with data. Our topographic drainage assessments reveal exactly how water moves across your property—where it accumulates, where it flows, and where it threatens your foundation. Whether you're evaluating whether your home needs a sump pump, sizing a system for a new installation, or troubleshooting a system that can't keep up, understanding your property's unique drainage profile is the essential first step. Explore our drainage intelligence services to get the topographic clarity your property deserves.
See Drainage Intelligence in Practice
Talk with our team or request an invitation to the platform.
Frequently Asked Questions
Sump pump installation cost ranges from $400–$900 for a simple pump replacement in an existing pit to $1,200–$3,500 for a new pit and pump installation. A full interior perimeter drainage system with sump pump typically costs $6,000–$15,000 depending on basement size and local labor rates.
Your home likely needs a sump pump if you see water in your basement or crawl space, have a high or seasonally fluctuating water table, live on clay-heavy soil (hydrologic soil groups C or D), or your lot sits at a topographic low point. Neighbors with sump pumps or a history of basement flooding in your area are also strong indicators.
Submersible sump pumps typically last 7–10 years, while pedestal pumps can last 25–30 years because the motor stays above water. Battery backup pumps last 5–7 years. Lifespan depends on how frequently the pump cycles—homes with high water tables that cause constant running will see shorter pump life.
A battery backup sump pump is strongly recommended for any home that relies on a sump pump for basement flood protection. Power outages frequently coincide with severe storms when water volume is highest. Battery backups provide 5–12 hours of pumping capacity and activate automatically when the primary pump loses power or is overwhelmed.
Replacing an existing pump in a functioning sump pit is a reasonable DIY project that takes 1–2 hours. However, new installations requiring concrete cutting, pit excavation, discharge line routing, and electrical work are best handled by a professional to ensure proper sizing, code compliance, and structural safety.
Sump pump discharge should be directed at least 10–20 feet away from your foundation onto a surface that slopes away from the home. Most municipalities prohibit discharge into sanitary sewers. Check local codes for rules about storm sewer connections, surface discharge setbacks, and requirements for preventing water from flowing onto neighboring properties.
Related Articles
Interior vs. Exterior French Drains: Which One Solves Your Problem?
Catch Basins vs. Channel Drains: Choosing the Right Surface Drainage