Window Well Drainage: How to Stop Basement Window Leaks for Good
Few things alarm a homeowner faster than watching a basement window well fill with water during a heavy rainstorm. That rising pool of murky water pressing against the glass isn't just unsettling—it's a direct threat to your foundation, your finished basement, and your home's structural integrity. A properly functioning window well drain is the critical line of defense between a dry basement and thousands of dollars in water damage, yet it remains one of the most overlooked components of residential drainage design.
The problem is remarkably common. Window wells are, by their very nature, depressions in the ground adjacent to your foundation wall. Without deliberate engineering to move water away from these low points, they become collection basins for runoff, snowmelt, and saturated soil moisture. Understanding why your window well is filling with water—and knowing exactly how to fix it—requires a closer look at the topographic, hydrological, and structural factors at play around your home's perimeter.
Why Window Wells Fill With Water
To solve a window well drainage problem, you first need to understand the mechanisms that cause water accumulation. There are typically four primary culprits, and most homes with chronic window well flooding are dealing with a combination of them.
Surface Runoff and Improper Grading
The most frequent cause of a window well filling with water is surface runoff flowing toward the foundation rather than away from it. The International Residential Code (IRC) specifies that finished grade should slope a minimum of 6 inches within the first 10 feet from the foundation wall—a roughly 5% grade. When this slope is insufficient, reversed, or has settled over time, rainwater sheets directly into window wells. Even a subtle depression in the soil near a window well can channel significant volumes of water during moderate rainfall events.
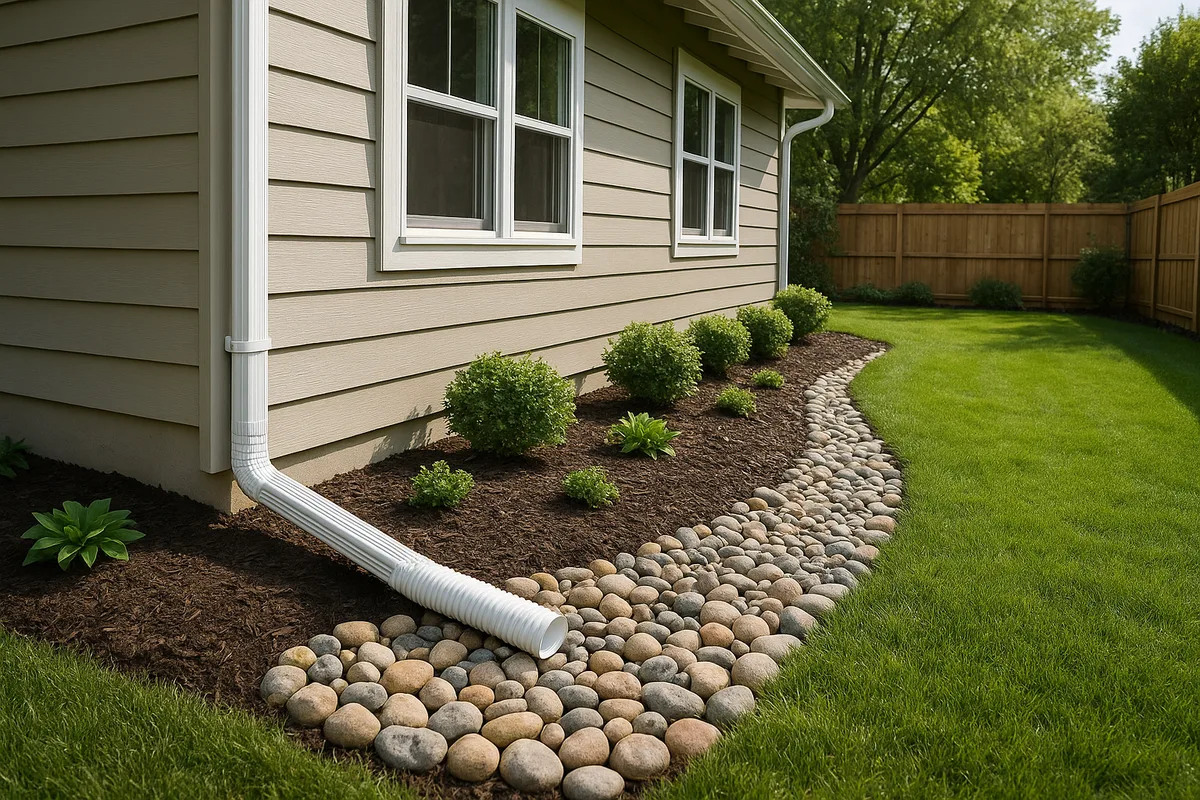
Landscaping changes compound the problem. Mulch beds built up against the house, flower borders that create berms trapping water against the foundation, and downspout extensions that discharge too close to window wells all redirect water into these vulnerable collection points. A single downspout discharging 12 gallons per minute during a moderate storm can overwhelm a window well in minutes if the water has nowhere to go.
Failed or Missing Window Well Drains
Many window wells were installed with a drain at the bottom—a vertical pipe that connects to the home's footing drain (perimeter drain tile) system. Over time, these drains clog with sediment, root intrusion, or mineral deposits. In older homes, the drain may have been a simple gravel-filled pit with no pipe connection at all, relying on soil percolation that eventually fails as the surrounding soil compacts.
In some construction, particularly homes built before the 1970s, window well drains were never installed in the first place. The builder may have relied on the assumption that gravel backfill alone would handle drainage—an assumption that rarely holds up over decades as fine soil particles migrate into the gravel voids through a process called soil migration or piping.
High Water Table Conditions
In areas with seasonally high water tables, hydrostatic pressure can push groundwater up through the bottom of a window well. This is particularly common in spring when snowmelt saturates the soil and the water table rises to within a few feet of the surface. In these conditions, even a perfectly graded yard and a functional drain may not prevent water accumulation if the footing drain system itself is overwhelmed or if the sump pump cannot keep pace with the inflow.
You can research your local soil conditions and water table characteristics using the NRCS Web Soil Survey, which provides detailed hydrologic soil group data for any property in the United States. Soils classified as Group C or Group D have slow infiltration rates and are particularly prone to creating saturated conditions around window wells.
Condensation and Wall Seepage
Sometimes the water in a window well isn't arriving from above or below—it's seeping through the foundation wall itself. Porous concrete block, deteriorated mortar joints, or cracks in poured concrete walls can allow moisture to migrate through the wall and collect in the well. While this typically produces smaller volumes of water than surface runoff or groundwater intrusion, it can be persistent and damaging, particularly in humid climates where condensation on the interior wall surface adds to the moisture load.
Anatomy of a Proper Window Well Drain System
A well-engineered window well drainage system is more than just a hole in the ground with some gravel. It's a layered assembly designed to intercept water from multiple sources and route it away from the foundation before it can cause damage.
The Drain Pipe Connection
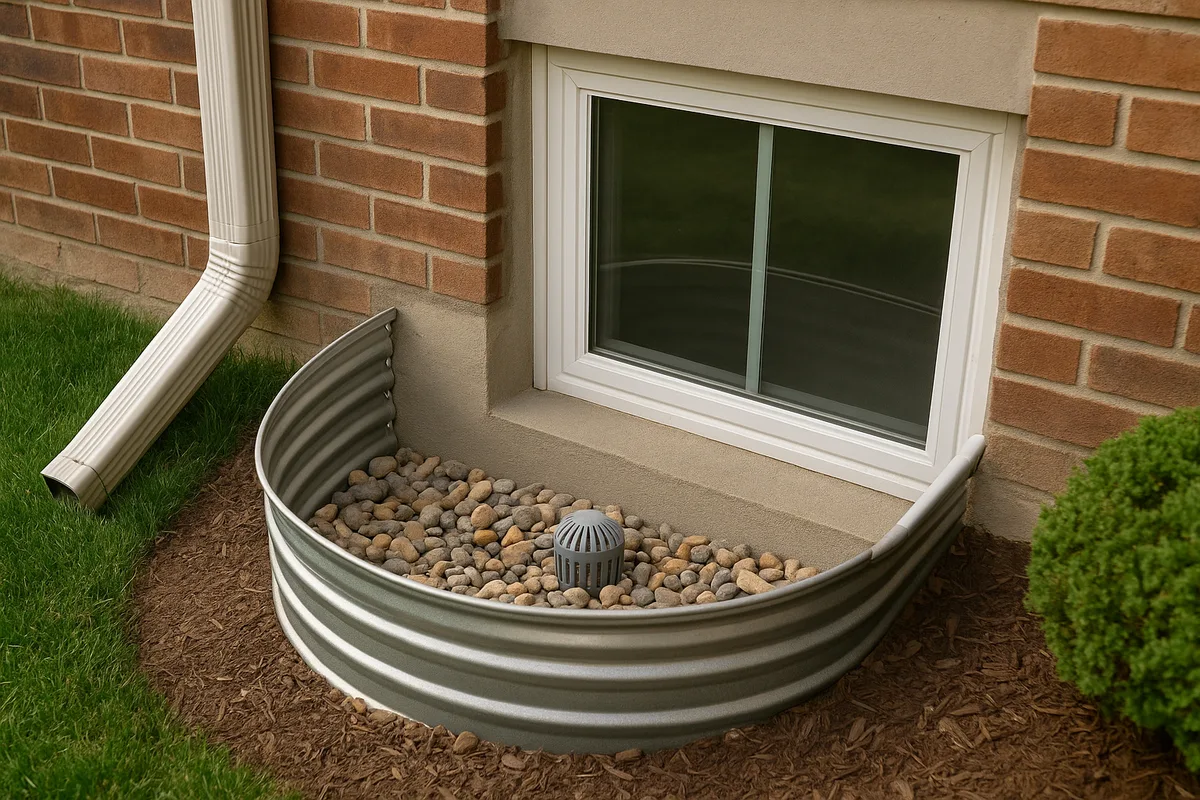
At the heart of every effective window well drain is a vertical drainpipe—typically 4-inch PVC or corrugated HDPE—installed at the lowest point of the window well excavation. This pipe should extend down to the level of the footing drain tile and connect directly to it, providing a gravity-fed pathway for water to flow from the window well into the perimeter drainage system and ultimately to the sump pit or daylight outlet.
The top of the drain pipe should sit approximately 2 to 3 inches above the bottom of the window well excavation, surrounded by a bed of clean, washed gravel. A removable cap or debris screen at the top prevents gravel and sediment from entering the pipe while still allowing water to flow freely. Some installers use a "drain pot" or catch basin insert—a small perforated plastic container that fits over the pipe opening and can be periodically cleaned.
Gravel Fill and Filter Fabric
The gravel fill inside a window well serves a dual purpose: it provides rapid drainage of surface water that enters the well, and it reduces hydrostatic pressure against the foundation wall by creating a zone of high permeability adjacent to the concrete. The ideal fill is clean, washed 3/4-inch to 1-inch crushed stone—not pea gravel, which can compact and reduce permeability over time, and never river rock mixed with sand or fines.
The gravel column should extend from the drain pipe connection at the bottom to within 2 to 3 inches of the finished grade at the top. A layer of non-woven geotextile filter fabric should wrap the gravel on the soil side (the sides and bottom of the excavation) to prevent fine soil particles from migrating into the gravel voids and reducing drainage capacity. This filter fabric is arguably the most important component of the system—without it, the gravel fill will eventually clog and the window well drain will fail.
The Window Well Liner
The corrugated metal or plastic liner that forms the visible wall of the window well is more than an aesthetic element. It serves as a retaining structure that holds back the surrounding soil and creates the air space necessary for the basement window to function. Liners should extend at least 8 inches above the surrounding grade to prevent surface runoff from flowing over the top and into the well.
For egress windows—which are required by code in all habitable basement rooms and must provide a minimum clear opening of 5.7 square feet with a maximum sill height of 44 inches from the floor—the window well must be large enough to allow a person to escape. The IRC requires that egress window wells with a depth greater than 44 inches include a permanently attached ladder or steps. These larger wells require proportionally more robust drainage systems because of their greater surface area for collecting rainfall.
How to Install or Repair a Window Well Drain
Whether you're retrofitting drainage into an existing window well or repairing a failed system, the process follows a logical sequence. While experienced DIY homeowners can handle some of these tasks, connecting to an existing footing drain system typically requires professional excavation.
Step 1: Excavate and Assess
Remove all existing gravel, soil, and debris from the window well down to the foundation footing level. This is the most labor-intensive part of the project and may require excavating 3 to 5 feet below grade, depending on the depth of the basement windows. During excavation, inspect the foundation wall for cracks, deteriorated mortar joints, or signs of previous water infiltration. This is your best opportunity to address wall defects before they're buried again.
Also assess the condition of the existing footing drain tile, if present. Clay tile drains common in pre-1980 construction are prone to root intrusion, joint separation, and collapse. If the footing drain is compromised, installing a window well drain that connects to it will simply move water from one failed system to another.
Step 2: Install the Drain Pipe
Set a 4-inch diameter PVC or Schedule 35 drainpipe vertically in the excavation, positioned at the lowest point of the window well footprint. The pipe should connect to the footing drain tile via a tee or wye fitting. If no footing drain exists, the vertical pipe can terminate in a dry well or gravel sump pit beneath the window well—a column of gravel at least 24 inches in diameter and 24 inches deep below the pipe terminus, wrapped in filter fabric.
For homes with sump pump systems, the window well drain pipe should ultimately route water to the sump pit, either through the footing drain connection or through a dedicated lateral pipe run along the exterior of the footing. Ensure the pipe has a minimum slope of 1/8 inch per foot (approximately 1% grade) on any horizontal runs to maintain gravity flow.
Step 3: Wrap and Backfill with Gravel
Line the excavation with non-woven geotextile filter fabric, leaving enough excess at the top to fold over the gravel fill. Backfill around and above the drain pipe with clean, washed 3/4-inch crushed stone. Compact the gravel in 6-inch lifts to prevent future settling, but avoid over-compacting, which can crush the drain pipe or reduce gravel porosity.
Fill the gravel to within 2 to 3 inches of the top of the window well liner. Fold the excess filter fabric over the top of the gravel to create a complete envelope that prevents soil intrusion from any direction. Some installers add a thin layer of decorative stone on top of the fabric for aesthetics, but this is optional.
Step 4: Address Surface Grading
With the drain system installed, re-establish proper surface grading around the window well. The soil surface should slope away from the well liner at a minimum of 5% (approximately 6 inches of fall in 10 feet). If the window well is located on a slope where uphill runoff flows toward it, consider installing a shallow swale or French drain upslope to intercept and redirect surface water before it reaches the well.
Compact the backfilled soil in 4-inch lifts using a hand tamper to minimize future settling. Settling around window wells is one of the primary reasons that initially good drainage grades reverse over time—the disturbed soil from the original construction compacts unevenly, creating depressions that funnel water back toward the foundation.
Window Well Covers: Protection From Above
A window well cover is one of the simplest and most cost-effective measures for preventing water accumulation, yet many homeowners either don't install them or install the wrong type.
Choosing the Right Cover
Effective window well covers are made from clear polycarbonate or heavy-gauge plastic that allows natural light to reach the basement window while shedding rain and snow. They should be custom-fitted or adjustable to match the exact dimensions of the window well liner, with minimal gaps at the edges where water could enter. A properly fitted cover can reduce the volume of water entering a window well by 90% or more during rainfall events.
Avoid flat covers that sit level with the surrounding grade. These collect standing water, debris, and snow, adding weight that can cause the cover to sag or collapse into the well. Instead, choose domed or angled covers that shed water and debris naturally. The cover should extend at least 2 inches beyond the edge of the window well liner on all sides to prevent water from dripping down the inside of the liner.
Egress Window Cover Considerations
Building codes require that egress window well covers be operable from the inside without tools, keys, or special knowledge. This means the cover cannot be screwed down, locked, or otherwise secured in a way that would prevent a person from pushing it open during an emergency. Spring-loaded hinges or simple gravity-held covers that can be pushed up and aside are the standard solutions.
This egress requirement creates a tension between drainage protection and life safety. A cover that's easy to push open is also more susceptible to being displaced by wind, heavy snow loads, or animal activity. High-quality egress-compliant covers use a combination of weight, friction-fit edges, and spring-loaded supports to stay in place under normal conditions while remaining operable in an emergency.
Connecting Window Well Drains to Your Home's Drainage System
A window well drain doesn't work in isolation—it's one component of a larger drainage network that must function as an integrated system. Understanding how these components connect is essential for effective water management.
Footing Drains and Sump Systems
The standard residential drainage configuration routes water from window well drains into the perimeter footing drain (also called drain tile), which collects water from around the entire foundation perimeter and conveys it to a sump pit. A sump pump then discharges the collected water to a surface outlet, storm drain, or dry well at a safe distance from the foundation.
For this system to work, every component must be functional. A clogged footing drain will cause water to back up into the window well drain pipe, effectively making the drain useless. A failed sump pump will allow the sump pit to overflow, raising the water level in the entire footing drain system and potentially pushing water back up through the window well drain. Regular maintenance of the sump pump—including testing the float switch, cleaning the intake screen, and verifying the discharge line is clear—is essential for window well drainage to function.
Interior vs. Exterior Drain Connections
In retrofit situations where connecting to the exterior footing drain is impractical or too expensive, an interior drain connection may be viable. This involves routing the window well drain pipe through the foundation wall (using a core-drilled hole sealed with hydraulic cement) and connecting it to an interior perimeter drain channel or directly to the sump pit.
Interior connections are common in basement waterproofing retrofits and can be effective, but they require careful sealing at the wall penetration to prevent the pipe itself from becoming a water entry point. The pipe penetration should be sealed with hydraulic cement on both sides of the wall and wrapped with a flexible waterproof membrane to accommodate minor foundation movement.
Discharge Point Requirements
Wherever your drainage system ultimately discharges water, it must do so at a point where the water will flow away from the home and not create problems for neighboring properties. Many municipalities have specific regulations about stormwater discharge, including prohibitions on connecting foundation drains to sanitary sewer systems and requirements for minimum setback distances from property lines.
The discharge point should be at least 10 feet from the foundation, on a downhill slope, and directed toward a suitable drainage pathway such as a swale, storm drain inlet, or natural drainage course. Extending the discharge line further—20 feet or more—provides additional protection against water cycling back toward the foundation through the soil.
Common Window Well Drainage Mistakes
Even well-intentioned drainage improvements can fail if common mistakes aren't avoided. Here are the errors we see most frequently in the field.
Using the Wrong Gravel
Filling a window well with pea gravel, river rock, or—worst of all—the same soil that was excavated from the hole is a recipe for drainage failure. Round pea gravel compacts more readily than angular crushed stone and provides less interstitial space for water flow. River rock mixed with sand or clay fines will clog within a few years. Native soil backfill essentially recreates the same impermeable conditions that existed before the window well was installed.
Always use clean, washed, angular crushed stone in the 3/4-inch to 1-inch size range. "Clean" and "washed" are the critical specifications—unwashed quarry stone contains fine dust and particles that will fill the voids between stones and dramatically reduce permeability. The difference in cost between washed and unwashed stone is minimal compared to the cost of re-excavating a failed window well.
Neglecting Filter Fabric
Omitting geotextile filter fabric is perhaps the single most common mistake in window well drainage installation. Without the fabric barrier, fine soil particles from the surrounding native soil will gradually migrate into the gravel fill through a process called soil piping. This process is accelerated by the repeated wetting and drying cycles that occur around a window well, and it can reduce gravel permeability by 80% or more within 5 to 10 years.
Use non-woven geotextile fabric rated for subsurface drainage applications. Woven landscape fabric—the type sold for weed control in garden beds—is not an adequate substitute. Its pore structure is different and it can clog more readily when used in below-grade drainage applications.
Ignoring Downspout Proximity
A downspout that discharges within 4 feet of a window well can deliver hundreds of gallons of water directly into the well during a single storm event. This is an astonishingly common configuration, particularly on homes where window wells are located near corners of the building where downspouts are typically positioned.
Reroute downspouts to discharge at least 6 feet from any window well, and preferably 10 feet or more. Use rigid PVC extensions rather than flexible corrugated pipe, which sags, clogs, and disconnects over time. Better yet, connect downspouts to an underground solid pipe that carries roof water to a discharge point well away from the foundation.
Setting the Liner Too Low
A window well liner that sits flush with or below the surrounding grade provides zero protection against surface runoff. The top of the liner should extend a minimum of 4 inches—and preferably 6 to 8 inches—above the finished grade on all sides. This creates a barrier that prevents sheet flow from entering the well during rain events.
When re-grading around a window well, resist the temptation to build the soil up to the top of the liner. Instead, maintain the height differential by adjusting the grade to slope away from the liner at the proper gradient. If the liner is too short to provide adequate above-grade height after proper grading is established, replace it with a taller liner.
Seasonal Maintenance for Window Well Drainage
Even a perfectly installed window well drain system requires periodic maintenance to continue functioning. Seasonal attention prevents the gradual accumulation of problems that lead to sudden failures during the storms when you need drainage most.
Spring Inspection Protocol
After winter, inspect each window well for signs of settling, frost heave, or damage. Check that the gravel level hasn't dropped significantly—settling of more than 2 inches indicates that fine soil is migrating into the gravel or that the gravel is compacting into voids below. Top off with additional washed crushed stone as needed.
Test the drain by slowly pouring 5 gallons of water into the window well and observing how quickly it drains. Water should disappear within a few minutes. If it takes more than 10 minutes to drain 5 gallons, the drain pipe or footing drain connection is likely partially obstructed and should be investigated.
Fall Preparation
Before winter, clear all leaves, debris, and organic matter from window wells. Decomposing leaves create a mat of material that blocks water from reaching the gravel and can clog drain pipe openings. Trim any vegetation growing within 12 inches of the window well liner to prevent root intrusion into the gravel fill and drain system.
Verify that window well covers are properly seated and in good condition. Replace any covers that are cracked, warped, or no longer fit snugly. Check that the surrounding grade still slopes away from the well—settling during the summer months can alter drainage patterns.
After Major Storms
Following any rainfall event that produces standing water in window wells, investigate the cause before the next storm arrives. Check for clogged drain pipe screens, displaced covers, gutter overflow, or grade changes caused by erosion. Document the conditions with photos and measurements to track whether the problem is worsening over time.
Pay particular attention to window wells on the uphill side of a sloped lot. These wells receive the greatest volume of surface runoff and are the most likely to be overwhelmed during intense rainfall. If a specific window well consistently fills during storms despite having a functional drain, the solution may require intercepting runoff upslope with a curtain drain or regrading a larger area of the yard.
When to Call a Professional
While basic window well maintenance and minor improvements are within the capability of most homeowners, certain situations require professional expertise and equipment.
Signs You Need Professional Help
If water appears in a window well during dry weather, you may be dealing with a high water table or a broken underground pipe—conditions that require professional diagnosis. If the foundation wall visible inside the window well shows horizontal cracks, bowing, or significant displacement, these are structural issues that demand immediate evaluation by a structural engineer before any drainage work begins.
Persistent water problems despite a seemingly functional drain system often indicate a failure in the footing drain or sump system downstream of the window well drain. Diagnosing these issues typically requires camera inspection of the drain pipes, which is a specialized service. Connecting a new window well drain to an existing footing drain system involves excavation to footing depth—often 7 to 8 feet below grade—which requires proper shoring, safety equipment, and experience.
Choosing the Right Contractor
For window well drainage work, look for contractors who specialize in foundation waterproofing or drainage systems rather than general landscapers or handymen. Ask specifically about their experience with footing drain connections, their gravel and filter fabric specifications, and whether they test the drain system after installation.
Request a detailed written scope of work that specifies the type and size of drain pipe, the gravel specification (clean, washed, angular crushed stone with a specific size range), the filter fabric type, and the connection method to the existing drainage system. A contractor who can't or won't provide these details may not have the expertise to deliver a lasting solution.
The Bigger Picture: Window Wells in Your Property's Drainage Plan
Window well drainage doesn't exist in isolation. It's one element of a comprehensive property drainage strategy that includes surface grading, gutter and downspout management, subsurface drain systems, and stormwater conveyance. Fixing a window well drain while ignoring a failed gutter system or reversed yard grade is treating a symptom rather than the disease.
The most effective approach begins with understanding the topographic context of your entire property—where water comes from, how it moves across the surface, and where it goes. Properties with complex drainage patterns, multiple low points, or challenging soil conditions benefit from a comprehensive drainage assessment that maps water flow paths and identifies all vulnerable points, including but not limited to window wells.
For homeowners dealing with chronic window well flooding, the investment in proper drainage infrastructure pays dividends far beyond a dry basement. It protects foundation integrity, preserves finished basement investments, prevents mold and indoor air quality problems, and maintains property value. A window well drain that costs a few hundred dollars to install or repair can prevent water damage that runs into the tens of thousands.
The key takeaway is simple: a window well filling with water is never normal and should never be ignored. Whether the solution is as straightforward as installing a cover and regrading the surrounding soil or as involved as excavating to the footing and installing a complete drain system, the problem has a solution. The cost of that solution is always less than the cost of the water damage it prevents.
See Drainage Intelligence in Practice
Talk with our team or request an invitation to the platform.
Frequently Asked Questions
The most common causes are improper grading that directs surface runoff toward the window well, a clogged or missing window well drain pipe, downspouts discharging too close to the well, or a missing window well cover. Often it's a combination of these factors working together.
A window well drain is a vertical pipe installed at the bottom of the window well that connects to the home's footing drain (perimeter drain tile) system. Water that enters the window well flows down through a gravel fill, enters the drain pipe, and is conveyed to the sump pit or a daylight outlet away from the foundation.
Use clean, washed, angular crushed stone in the 3/4-inch to 1-inch size range. Avoid pea gravel, river rock, or unwashed quarry stone, as these compact more easily or contain fine particles that clog the drainage system over time.
Basic maintenance like adding gravel, installing covers, and improving surface grading are DIY-friendly tasks. However, installing a drain pipe that connects to the footing drain system requires excavating to footing depth (often 7-8 feet), which typically requires professional equipment, safety shoring, and expertise.
Window well covers can reduce the volume of water entering a window well by 90% or more by shedding rain and snow. However, they don't address groundwater intrusion or surface runoff that flows under the cover edges, so they work best as part of a complete drainage system that includes a functional drain pipe and proper grading.
Inspect window wells at least twice a year—in spring after snowmelt and in fall before winter. Additionally, check them after any major storm that produces heavy rainfall. Test drainage by pouring 5 gallons of water into the well; it should drain within a few minutes.
Related Articles
Where Should Your Sump Pump Discharge? Rules, Distances, and Mistakes
How Long Should Standing Water Last After Rain? A Drainage Guide