Drainage Around Patios, Pools, and Hardscaping: A Complete Guide
Every homeowner who has watched rainwater sheet across a patio, puddle on a pool deck, or creep toward a foundation understands the importance of patio drainage. Hardscaped surfaces — patios, pool decks, walkways, driveways, and retaining wall areas — are fundamentally different from natural ground. They don't absorb water. Every drop that falls on them has to go somewhere, and if you haven't planned for that somewhere, the water will find its own path — usually toward the most expensive thing nearby.
Proper drainage around patios, pools, and other hardscaping isn't an afterthought or a luxury upgrade. It is a structural necessity. Poor pool deck drainage leads to slip-and-fall hazards, accelerated surface deterioration, mosquito breeding, foundation damage, and soil erosion that can undermine the very structures you've invested in. This guide covers everything you need to know about designing, installing, and maintaining drainage systems that protect your hardscaped spaces for decades.
Why Hardscaping Changes Your Property's Drainage
Natural ground is remarkably good at managing water. Soil absorbs rainfall, plant roots channel moisture downward, organic matter acts as a sponge, and microtopography distributes flow across broad areas. When you replace that natural ground with concrete, pavers, natural stone, or composite decking, you eliminate the absorption capacity entirely. A 400-square-foot patio receiving one inch of rain must shed approximately 250 gallons of water — and it must do so within minutes, not hours.
This transformation has a cascading effect on the surrounding landscape. Runoff volume increases, flow velocity accelerates on smooth surfaces, and water concentrates at edges and low points rather than dispersing gradually. The International Code Council's residential building standards recognize this reality by requiring positive drainage away from all structures, with specific slope minimums for impervious surfaces.
The challenge is compounded when multiple hardscaped elements interact. A patio adjacent to a pool deck, bounded by a retaining wall, and connected to a walkway creates a complex drainage puzzle. Water flowing off the patio may conflict with water draining from the pool deck. A retaining wall may block the natural drainage path. Each element must be designed not just for its own drainage, but as part of an integrated system.
Understanding your property's existing topography is the critical first step. Before any hardscaping project begins, you need to know where water currently flows during a storm, where the natural low points are, and how the proposed impervious surfaces will alter those patterns. Tools like the USGS 3DEP (3D Elevation Program) provide high-resolution elevation data that can help you understand the broader topographic context of your property, though site-specific grading decisions will require on-the-ground measurements.
Patio Drainage Fundamentals: Slopes, Materials, and Design
The foundation of effective patio drainage is proper slope — also called fall, pitch, or grade. The universally accepted minimum slope for a patio surface is 1/4 inch per linear foot, which translates to roughly a 2% grade. This means a 12-foot-deep patio should be approximately 3 inches lower at its far edge than where it meets the house. This slope is subtle enough that it's barely perceptible to the eye or underfoot, yet steep enough to move water reliably across the surface.
Slope Direction Matters More Than Slope Degree
The direction of slope is arguably more important than the degree. The cardinal rule is that water must always flow away from the foundation. For a patio attached to a house, this typically means sloping away from the structure toward the yard. But the slope direction must also account for where the water will go once it leaves the patio edge. Directing hundreds of gallons of runoff toward a neighbor's property, a garden bed against the house, or a low area with no outlet creates new problems.
Ideal patio drainage design considers the entire flow path: from the surface where rain lands, across the patio, off the edge, across the transition zone, and into a final destination — whether that's a swale, a dry well, a storm drain, or a rain garden. Each segment of this path must maintain positive slope.
Material Selection Affects Drainage Performance
Different patio materials have different drainage characteristics. Smooth, sealed concrete sheds water quickly but can become dangerously slippery when wet. Textured or broom-finished concrete provides better traction and slightly slower sheet flow. Natural stone with irregular surfaces and wider joints allows some water infiltration between pieces. Brick pavers with polymeric sand joints shed most water from the surface. Permeable pavers with open-graded aggregate joints are specifically designed to allow water through.
The material choice influences how much slope you need and what supplemental drainage systems are required. A smooth stamped concrete patio can function adequately with a 1/8-inch-per-foot slope in some conditions, while a rough flagstone patio with wide, mortared joints may need the full 1/4-inch-per-foot slope because water moves more slowly across the irregular surface.
Common Patio Drainage Configurations
Most patios fall into one of four drainage configurations:
- Single-direction slope: The entire patio tilts in one direction, typically away from the house. This is the simplest and most common approach for rectangular patios.
- Crown slope: The patio is highest along a central ridge and slopes to both sides. This works well for patios that extend far from the house and need to shed water to multiple edges.
- Valley slope: The opposite of a crown — the patio slopes inward toward a central channel drain. This is used when site constraints prevent draining to the edges.
- Multi-directional slope: The patio slopes in different directions across different zones, directing water to specific collection points. This is common for L-shaped patios or patios that wrap around structures.
Each configuration has trade-offs. Single-direction slopes are easy to build but can create a waterfall effect at the low edge. Crown slopes distribute flow but create two drainage paths to manage. Valley slopes require a drain that must be maintained. The right choice depends on the patio's size, shape, relationship to the house, and the surrounding landscape.
Pool Deck Drainage: Unique Challenges and Solutions
Pool deck drainage presents a paradox: the surface must drain effectively to prevent standing water and slip hazards, but the water must not drain into the pool. Deck wash water, rainwater, and splash-out carry dirt, debris, fertilizer residue, sunscreen, and other contaminants that degrade pool water quality and increase chemical demand. For this reason, pool deck drainage design must direct water away from the pool while also directing it away from the house — creating a dual-directional challenge.
Slope Requirements for Pool Decks
Most building codes and pool industry standards require pool decks to slope away from the pool at a minimum of 1/4 inch per foot. The deck typically slopes from the pool coping outward toward the deck perimeter, where water is collected by drains or allowed to flow onto adjacent landscaping. In practice, many pool decks use a slope of 1/4 to 3/8 inch per foot to ensure reliable drainage given the frequent presence of water from splashing.
The critical zone is the 3-to-4-foot band immediately surrounding the pool. This area receives the most splash-out and foot traffic, and it must drain quickly to prevent slip hazards. Many pool builders install a subtle roll or lip at the coping edge that prevents deck water from flowing back into the pool, combined with a consistent outward slope.
Channel Drains and Strip Drains for Pool Decks
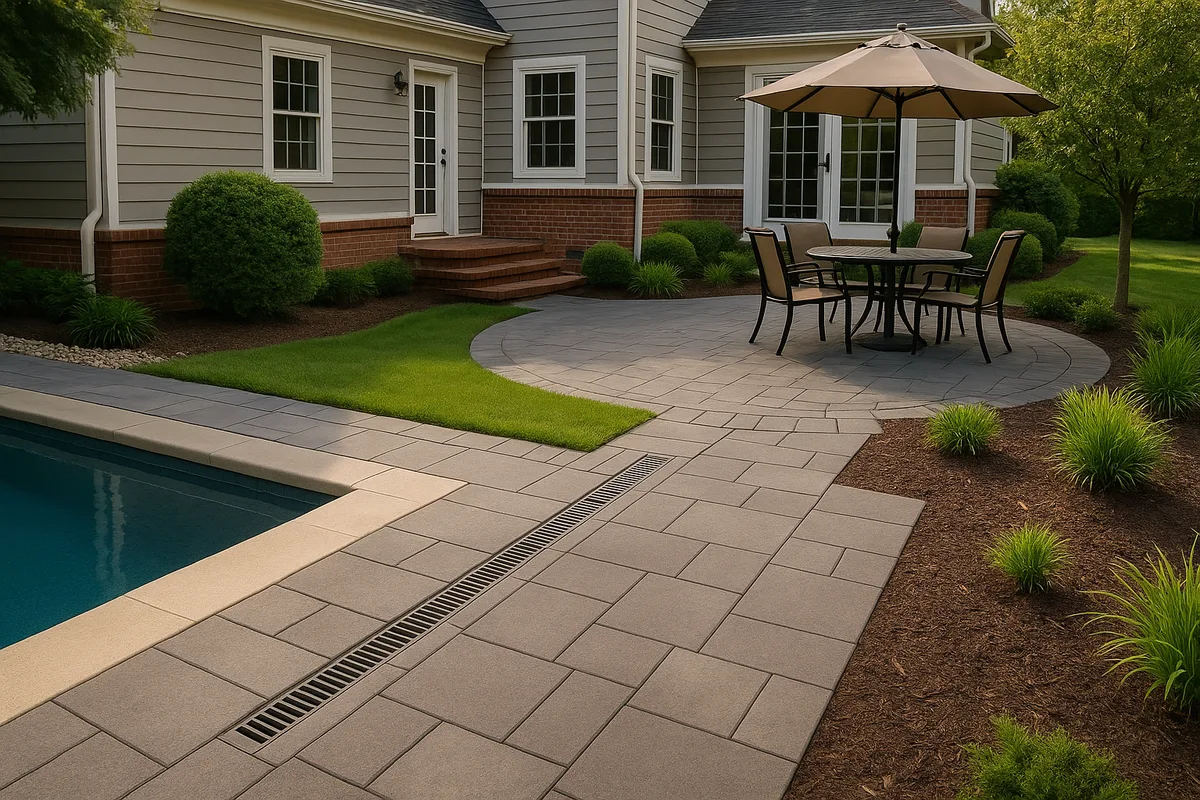
For larger pool decks or decks constrained by walls, fences, or structures, surface slope alone may not be sufficient. Channel drains (also called trench drains or strip drains) are the most common supplemental drainage solution for pool decks. These linear drains are installed flush with the deck surface and collect water along their entire length, channeling it to an underground pipe system.
Common channel drain placements on pool decks include:
- Around the pool perimeter, 2–4 feet from the coping, to intercept splash-out and deck wash before it reaches the outer deck area
- At the deck-to-landscape transition, to prevent runoff from eroding adjacent beds or lawns
- At the base of any wall or structure that borders the deck, to prevent water from pooling against vertical surfaces
- Across doorway thresholds, to intercept water before it can enter the house
Channel drains for pool decks should be specified with slip-resistant grates rated for pedestrian traffic and bare feet. Stainless steel, fiberglass, and polymer concrete are common channel body materials. The grate pattern should be narrow enough to prevent toes and small objects from entering while still allowing adequate flow.
Subsurface Drainage Around Pools
Beneath the visible deck surface, pools often need subsurface drainage systems to manage groundwater and prevent hydrostatic pressure from building against the pool shell. A perforated pipe system — essentially a French drain — installed around the pool's outer perimeter intercepts rising groundwater and directs it to a discharge point. This is particularly critical in areas with high water tables, clay soils, or seasonal groundwater fluctuations.
Without adequate subsurface drainage, an empty or partially drained pool can actually be pushed upward out of the ground by hydrostatic pressure — a phenomenon called pool pop-up. Even pools that remain full can experience structural stress from unmanaged groundwater pressure against the shell walls. The subsurface drainage system works in concert with the surface drainage to create a complete water management solution.
Hardscape Drainage Systems: Types, Applications, and Selection
Beyond basic slope, several engineered drainage systems can be integrated into hardscaping projects to manage water more effectively. Understanding the strengths and limitations of each helps you select the right solution for your specific situation.
French Drains
A French drain is a gravel-filled trench containing a perforated pipe that collects and redirects subsurface water. In hardscape applications, French drains are typically installed at the perimeter of patios and pool decks, at the base of retaining walls, or along the uphill side of any hardscaped area that might be affected by subsurface water flow.
The standard French drain specification calls for a trench 12–18 inches wide and 18–24 inches deep, lined with filter fabric, filled with clean, washed gravel (typically 3/4-inch to 1-1/2-inch stone), and containing a 4-inch perforated pipe with the perforations facing down. The pipe should maintain a minimum slope of 1% (1/8 inch per foot) toward the discharge point.
French drains are excellent for managing subsurface water but do not effectively handle surface runoff unless combined with a surface collection system. They are the workhorse of retaining wall drainage, where hydrostatic pressure behind the wall must be relieved to prevent structural failure.
Channel and Trench Drains
Channel drains are surface-mounted linear collection systems that intercept sheet flow across hardscaped surfaces. They consist of a channel body (U-shaped or V-shaped) set into the paved surface and covered by a removable grate. Water enters through the grate, flows along the channel, and exits through an outlet connected to an underground pipe.
Channel drains are the preferred solution for patio drainage in situations where slope alone cannot direct water to a safe discharge point. They are particularly valuable at the junction between a patio and a house foundation, where they act as a last line of defense against water intrusion. Standard residential channel drains are available in widths from 4 to 12 inches and can handle flow rates from 10 to over 100 gallons per minute per linear foot, depending on the channel size and slope.
Catch Basins and Area Drains
Catch basins are box-shaped collection points with grated tops that gather water from a surrounding area and direct it into an underground pipe system. They are used at low points in hardscaped surfaces, at the bottom of slopes, and wherever water naturally concentrates. A standard residential catch basin is 9x9 inches or 12x12 inches square, with a sump below the outlet pipe to trap sediment and debris.
Area drains are smaller, simpler versions of catch basins — typically 4 to 6 inches in diameter — used for localized water collection. They work well in small patio depressions, planter drain-outs, and other confined areas.
Permeable Paving Systems
Permeable pavers represent a fundamentally different approach to hardscape drainage. Instead of shedding water from the surface, they allow water to pass through the paver joints (or through the paver material itself) and into a specially designed aggregate base that stores and slowly releases the water into the subgrade soil.
A typical permeable paver system consists of:
- Permeable pavers with widened joints (3/8 inch or wider) or porous material
- Jointing aggregate: Small, open-graded stone (typically ASTM No. 8 or No. 9) that fills the joints and allows water passage
- Bedding layer: 1.5–2 inches of ASTM No. 8 stone
- Base reservoir: 6–12+ inches of open-graded ASTM No. 57 stone that provides structural support and water storage
- Subbase (optional): Additional aggregate for deeper storage in low-permeability soils
- Underdrain (if needed): A perforated pipe at the base of the reservoir for sites where soil infiltration alone cannot handle the design storm volume
Permeable paving can reduce or eliminate the need for separate drainage infrastructure, but it requires careful design, proper soil assessment, and regular maintenance (vacuuming or pressure washing the joints to prevent clogging). It is not appropriate for every site — particularly those with contaminated soils, very high water tables, or steep slopes. Checking your property's soil type through the NRCS Web Soil Survey can help determine whether permeable pavers are a viable option based on your soil's infiltration rate and hydrologic soil group.
Retaining Walls, Steps, and Transitions: Drainage at Grade Changes
Hardscaping frequently involves grade changes — retaining walls that hold back slopes, steps that transition between levels, and raised patios that sit above the surrounding grade. Each of these elements creates a potential drainage problem if water management isn't integrated into the design.
Retaining Wall Drainage
Water is the number one cause of retaining wall failure. When water saturates the soil behind a retaining wall, it dramatically increases the lateral pressure against the wall — a force called hydrostatic pressure. A wall designed to hold back dry soil may not be strong enough to resist the same soil when saturated. Additionally, freeze-thaw cycles in saturated soil behind a wall can heave and crack even well-built structures.
Effective retaining wall drainage requires three components:
- Drainage aggregate: A 12-inch-wide zone of clean, free-draining gravel immediately behind the wall, extending from the base to within 6 inches of the top. This zone allows water to migrate downward rather than building pressure against the wall face.
- Perforated drain pipe: A 4-inch perforated pipe at the base of the gravel zone, sloped to daylight or a collection point. This pipe collects water that reaches the base and carries it away.
- Filter fabric: Geotextile fabric separating the drainage gravel from the native soil behind it, preventing fine soil particles from migrating into the gravel and clogging the system.
Many retaining walls also incorporate weep holes — small openings through the wall face that allow water to pass through rather than building up behind the wall. Weep holes are typically spaced every 4–6 feet along the wall length and positioned just above grade level.
Steps and Level Transitions
Steps between patio levels or between a patio and the yard are natural water collection points. The horizontal surface of each tread catches rain, and the vertical face of each riser can act as a small dam. Proper step drainage requires each tread to slope slightly forward (1/8 to 1/4 inch) so water runs off the front edge rather than pooling on the step.
At the base of a stairway, water from all the treads above converges into a concentrated flow. A catch basin or channel drain at the bottom of the stairs prevents this water from eroding the landing area or flowing toward the foundation.
Raised Patio Drainage
Raised patios — those built above the surrounding grade on a compacted fill or structural base — present unique drainage considerations. The patio surface must slope away from the house as usual, but the edges of the raised patio also need to manage the transition from the elevated surface to the lower surrounding grade. Without edge drainage, water flowing off the raised patio can erode the fill material supporting the patio, eventually undermining the structure.
Edge treatments for raised patios include:
- Drip edges with gravel strips: A small overhang at the patio edge with a gravel-filled channel below to absorb drip-line erosion
- Integrated retaining walls: Low walls at the patio perimeter with proper wall drainage
- Gradual slope transitions: Tapering the fill material at a 3:1 or gentler slope with erosion-resistant ground cover
Common Patio and Pool Deck Drainage Mistakes
Drainage failures around hardscaping are frustratingly common, and most stem from a handful of recurring mistakes. Recognizing these patterns can help you avoid them in new construction or diagnose problems with existing installations.
Mistake #1: Flat or Reverse-Sloped Surfaces
The most common patio drainage failure is a surface that doesn't slope enough — or worse, slopes toward the house. This often happens when a contractor eyeballs the slope rather than measuring it, when soil settlement beneath the patio changes the original grade, or when a homeowner adds a patio surface (like tile over concrete) without accounting for the added thickness at the house end.
A patio that slopes even 1/8 inch per foot toward the house will channel water directly against the foundation during every rain event. Over months and years, this leads to basement moisture, foundation cracking, and mold growth. Always verify slope with a level and tape measure — never trust visual assessment alone.
Mistake #2: No Drainage Plan for Collected Water
Installing a channel drain or catch basin is only half the solution. The water collected by these devices must be piped to an appropriate discharge point — a storm drain, a dry well, a drainage swale, or a rain garden. Too often, drains are installed with pipes that terminate in a shallow hole filled with gravel, which quickly becomes overwhelmed. Or worse, the pipe simply ends a few feet away, depositing concentrated flow right next to the foundation.
A proper discharge point should be at least 10 feet from any structure, downhill from the collection point, and sized to handle the expected flow volume. For most residential patios, a 4-inch solid PVC pipe with a minimum 1% slope provides adequate conveyance.
Mistake #3: Ignoring the Patio-to-Landscape Transition
The edge where a patio meets the adjacent lawn or garden bed is a critical drainage zone that is frequently neglected. If the lawn or bed is higher than the patio edge, water will flow onto the patio rather than away from it. If the patio edge is higher but has no transition management, concentrated runoff from the patio can erode a channel along the edge.
The ideal transition maintains the patio edge at least 1–2 inches above the adjacent landscape surface, with a gravel strip, ground cover, or shallow swale to receive and distribute runoff from the patio without erosion.
Mistake #4: Clogged or Undermaintained Drains
Every drain is only as good as its maintenance. Channel drains fill with leaves, sediment, and debris. Catch basin sumps accumulate silt. French drain filter fabric can clog with fine particles over years. Permeable paver joints seal shut with organic matter and compacted fines. Without regular cleaning — at least twice per year and after major storms — even well-designed drainage systems degrade to the point of failure.
Mistake #5: Failing to Account for Roof Runoff
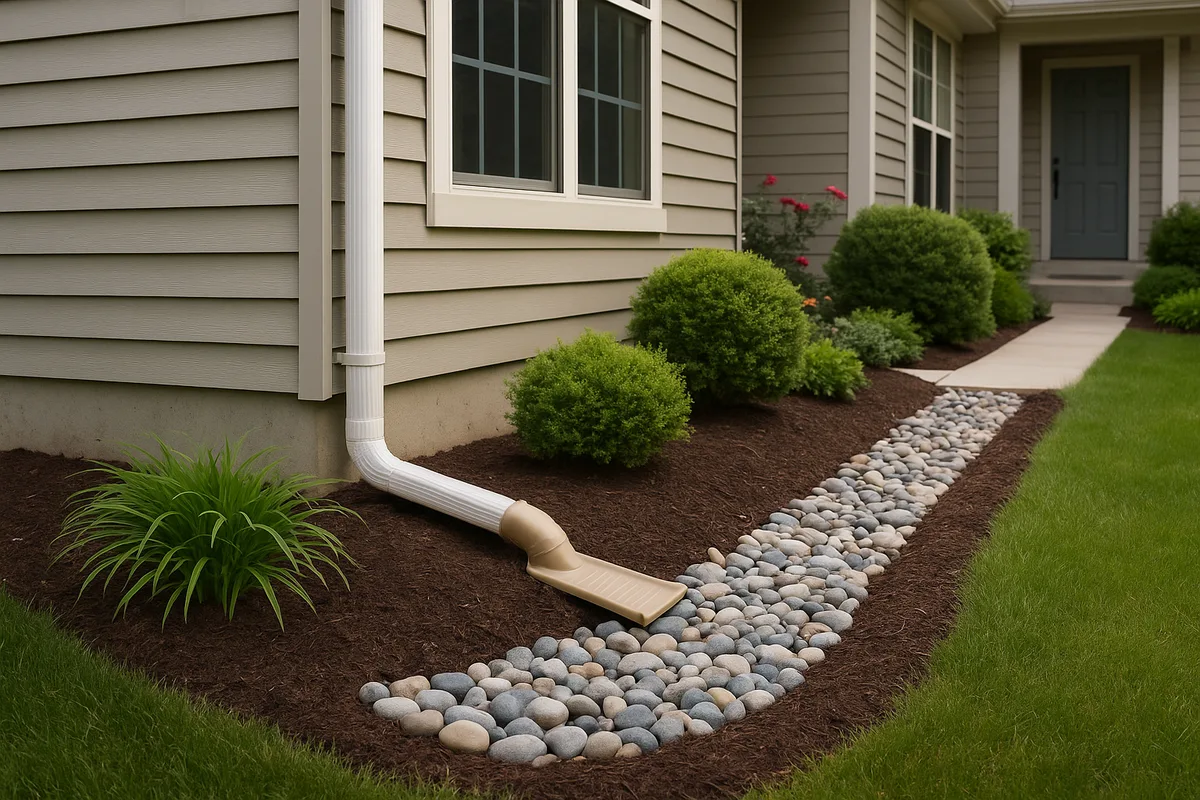
A patio adjacent to a house often sits directly below a roof edge or gutter downspout. If downspout discharge is not directed away from the patio, the concentrated roof runoff — which can be enormous during heavy rain — overwhelms the patio's drainage capacity. A single downspout can deliver 10–15 gallons per minute during a moderate storm. Downspout extensions, underground piping, or dedicated catch basins should handle roof runoff separately from patio surface drainage.
Designing an Integrated Drainage Plan for Hardscaped Areas
The most effective drainage around patios, pools, and hardscaping comes from an integrated plan that considers all water sources, flow paths, and discharge points as a unified system. Here's a step-by-step approach to developing that plan.
Step 1: Map Existing Conditions
Before designing anything, document the existing site conditions. Note the current slope and drainage patterns, the location of downspouts and existing drains, the soil type (clay, sand, loam), the depth to the water table if known, and any existing drainage problems like ponding, erosion, or foundation moisture. Walk the property during a rainstorm if possible — there is no better way to understand how water actually moves across your site.
Step 2: Calculate Impervious Area and Runoff Volume
Add up the total square footage of all impervious surfaces in the project area — patio, pool deck, walkways, and any existing impervious surfaces that drain toward the project area. Use local rainfall data to estimate runoff volumes. As a rule of thumb, one inch of rain on 1,000 square feet of impervious surface generates approximately 623 gallons of runoff. Your local rainfall intensity for a 10-year, 1-hour storm event is a common design standard for residential drainage.
Step 3: Establish Slope and Flow Direction
Determine the slope direction for every hardscaped surface. Map the flow path from each surface to its discharge point. Identify any conflicts — places where flows from different surfaces converge, where flow paths cross, or where water would need to flow uphill to reach a discharge point. Resolve these conflicts with additional drains, regrading, or alternative flow routing.
Step 4: Size and Place Drainage Infrastructure
Based on the runoff calculations and flow paths, select and size the drainage components. Channel drains should be long enough to intercept the full width of flow. Pipes should be large enough to carry the peak flow without surcharging. Catch basins should be placed at every low point and flow convergence. Dry wells or infiltration areas should be sized to store the design storm volume.
Step 5: Specify Materials and Construction Details
Document the exact materials, dimensions, slopes, and connections for every component. This level of detail ensures that the installer builds the system as designed rather than improvising in the field. Key specifications include pipe diameter and material (Schedule 40 PVC is standard for residential), channel drain width and grate type, aggregate type and depth for French drains and permeable paver bases, and filter fabric weight and permeability.
Step 6: Plan for Maintenance Access
Every drain, cleanout, and collection point should be accessible for maintenance. Cleanout fittings should be installed at every change in pipe direction and at maximum 50-foot intervals on straight runs. Catch basin grates should be removable without tools. Channel drain sections should be accessible for flushing. Design for maintenance from the beginning — systems that are difficult to maintain will inevitably fail.
Long-Term Maintenance and Seasonal Considerations
Installing a drainage system is not a one-time event. Ongoing maintenance is essential to keep the system functioning as designed, and seasonal changes bring specific challenges that require attention.
Routine Maintenance Tasks
A basic maintenance schedule for hardscape drainage includes:
- Monthly during active seasons: Visual inspection of all grates and surface drains for debris accumulation. Remove leaves, mulch, and sediment from channel drain grates and catch basin tops.
- Twice per year (spring and fall): Clean out catch basin sumps by removing accumulated sediment. Flush channel drains with a garden hose to clear internal buildup. Inspect pipe outlets for blockage or erosion at the discharge point.
- Annually: Check all paved surfaces for settlement, heaving, or cracking that could alter drainage patterns. Re-level any pavers that have shifted. Inspect French drain outlets for flow — if water doesn't flow from the outlet during wet conditions, the system may be clogged.
- Every 2–3 years: Vacuum or pressure-wash permeable paver joints to restore infiltration capacity. Inspect and replace any damaged grates, pipe sections, or fittings.
Seasonal Challenges
In cold climates, freeze-thaw cycles can heave pavers, crack concrete, and shift drain components. Water that remains in pipes can freeze and cause pipe failure. Ensuring that all pipes drain completely (no standing water in low spots) and that catch basin sumps don't retain water above the outlet pipe helps prevent freeze damage.
In hot, dry climates, soil shrinkage during drought can create gaps between hardscaped surfaces and the surrounding soil, opening pathways for concentrated water flow during the next rain. These gaps should be filled with appropriate material before the rainy season.
Fall leaf drop is the most common cause of drain clogging. Properties with significant tree canopy over hardscaped areas should increase drain cleaning frequency during autumn and consider installing leaf guards or screens over drain grates.
When to Call a Professional
Some drainage problems can be resolved with DIY maintenance, but others require professional assessment. Signs that you need expert help include persistent ponding that doesn't respond to drain cleaning, water appearing in the basement or crawlspace after rain, visible settlement or cracking in patio or pool deck surfaces, erosion undermining hardscape edges, and water flowing toward the foundation despite apparent positive slope. A drainage professional can perform a thorough grade analysis, camera-inspect underground pipes, and design remedial solutions that address the root cause rather than just the symptoms.
Bringing It All Together: Drainage as Design
Effective patio drainage and pool deck drainage aren't just technical requirements — they're design elements that should be integrated from the very first sketch of a hardscaping project. The best drainage systems are invisible in daily use: water disappears from surfaces quickly, no puddles form, no erosion occurs at edges, and the foundation stays dry. Achieving this invisibility requires careful planning, proper construction, and consistent maintenance.
The key principles are straightforward: slope every surface at a minimum of 1/4 inch per foot away from structures, provide a clear flow path from every point on every surface to a safe discharge location, install collection devices at every low point and transition, size all components for your local design storm, and maintain the system regularly. When these principles are followed, your patio, pool deck, and hardscaping will perform beautifully for decades — shedding water as efficiently as they shed the stresses of daily life.
See Drainage Intelligence in Practice
Talk with our team or request an invitation to the platform.
Frequently Asked Questions
A patio should have a minimum slope of 1/4 inch per linear foot (approximately a 2% grade) away from the house foundation. For smoother surfaces like stamped concrete, some contractors recommend 1/8 inch per foot as a minimum, though 1/4 inch is the safer standard for reliable water shedding.
Inground pools typically use a combination of pool deck drains (channel drains or strip drains installed at the deck perimeter), proper deck slope directing water away from the pool and toward collection points, and a subsurface drainage system like a French drain around the pool's outer perimeter. The deck should slope away from the pool edge at a minimum of 1/4 inch per foot.
Permeable pavers can significantly reduce surface runoff by allowing water to infiltrate through joints into a gravel base below. However, they are not a universal fix. They require a well-designed aggregate base, proper subgrade preparation, and soils with adequate permeability. In areas with heavy clay soils or high water tables, permeable pavers may still need supplemental underdrain systems.
If your patio slopes toward your house or if the junction between the patio and foundation creates a channel where water collects, a drain is strongly recommended. A channel drain or trench drain installed at the patio-foundation junction intercepts water before it can pool against the foundation wall, preventing moisture intrusion and structural damage.
Basic patio drainage solutions like a single channel drain run $500–$1,500 installed. More comprehensive systems involving French drains, multiple catch basins, and underground piping typically cost $2,000–$6,000 depending on the length and complexity. Permeable paver installations cost $12–$30 per square foot, which is higher than conventional pavers but includes built-in drainage.
Water pooling on a pool deck is usually caused by insufficient slope, settled or heaved deck sections that have created low spots, or clogged or undersized drains. Over time, concrete pool decks can also develop surface depressions from soil compaction underneath. A professional can identify low points using a level or laser and recommend re-grading, mudjacking, or adding supplemental drains.
Related Articles
How Long Should Standing Water Last After Rain? A Drainage Guide
Preparing Your Property's Drainage Before Rainy Season: A Complete Guide