Dry Wells Explained: When They Work and When They Fail
A dry well is one of the most commonly recommended stormwater solutions for residential properties—and one of the most commonly misunderstood. When conditions are right and installation is done properly, a dry well quietly absorbs thousands of gallons of runoff, protecting foundations, preventing yard erosion, and keeping your property dry. When conditions are wrong, that same dry well becomes an expensive hole in the ground that fills up, overflows, and creates more problems than it solves.
The difference between a dry well that works for decades and one that fails within a year almost always comes down to three factors: soil conditions, sizing, and installation quality. At Low Point Labs, we analyze the topographic and drainage characteristics of residential properties every day, and we've seen both outcomes more times than we can count. This guide will give you the complete picture—what a dry well is, how it works, when it's the right choice, and the specific conditions that cause failure.
What Is a Dry Well and How Does It Work?
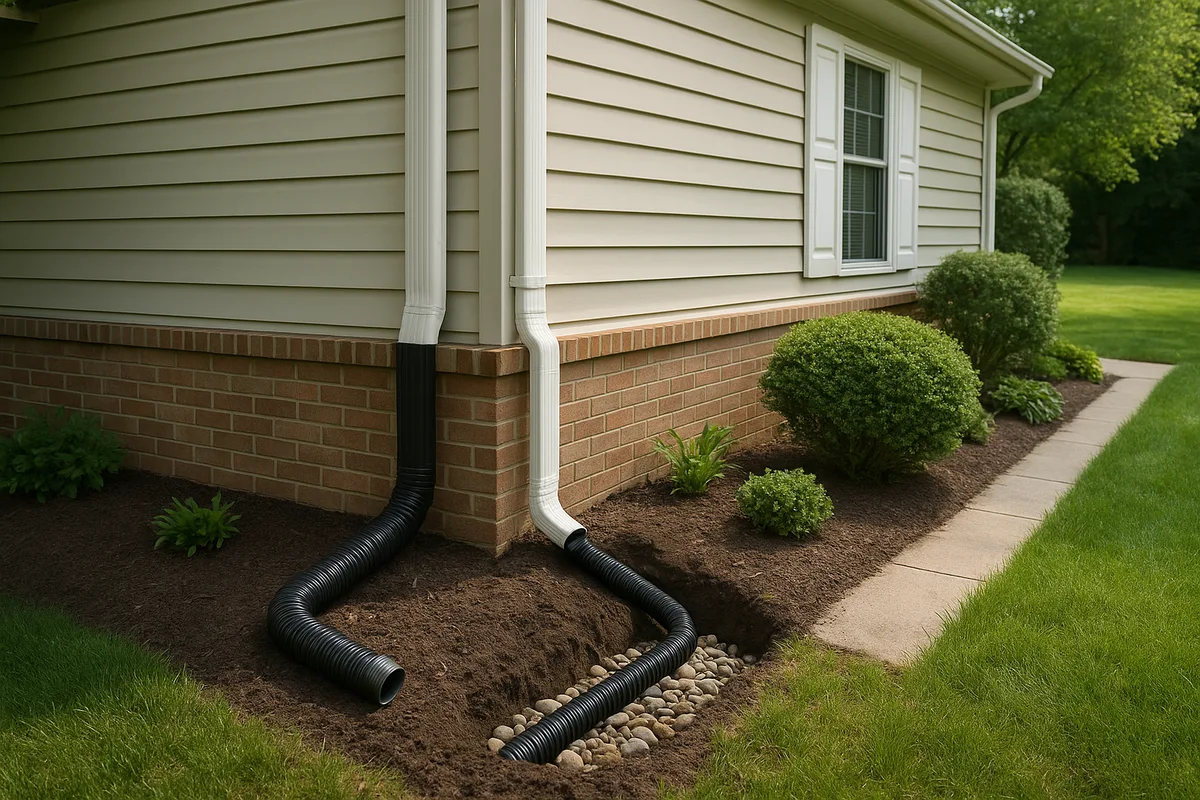
A dry well is an underground structure designed to collect stormwater runoff and slowly disperse it into the surrounding soil. Think of it as a temporary holding tank that gives water time to percolate into the ground rather than pooling on the surface, flooding a basement, or overwhelming municipal storm drains.
The basic mechanics are straightforward. Stormwater—typically from roof downspouts, driveway runoff, or yard drains—is routed through pipes into the dry well. The well holds that water temporarily while it seeps out through holes or porous walls into the surrounding soil. Over time, usually hours to a couple of days depending on soil type, the well empties and is ready for the next rain event.
Types of Dry Wells
Modern dry wells come in several forms, each suited to different situations:
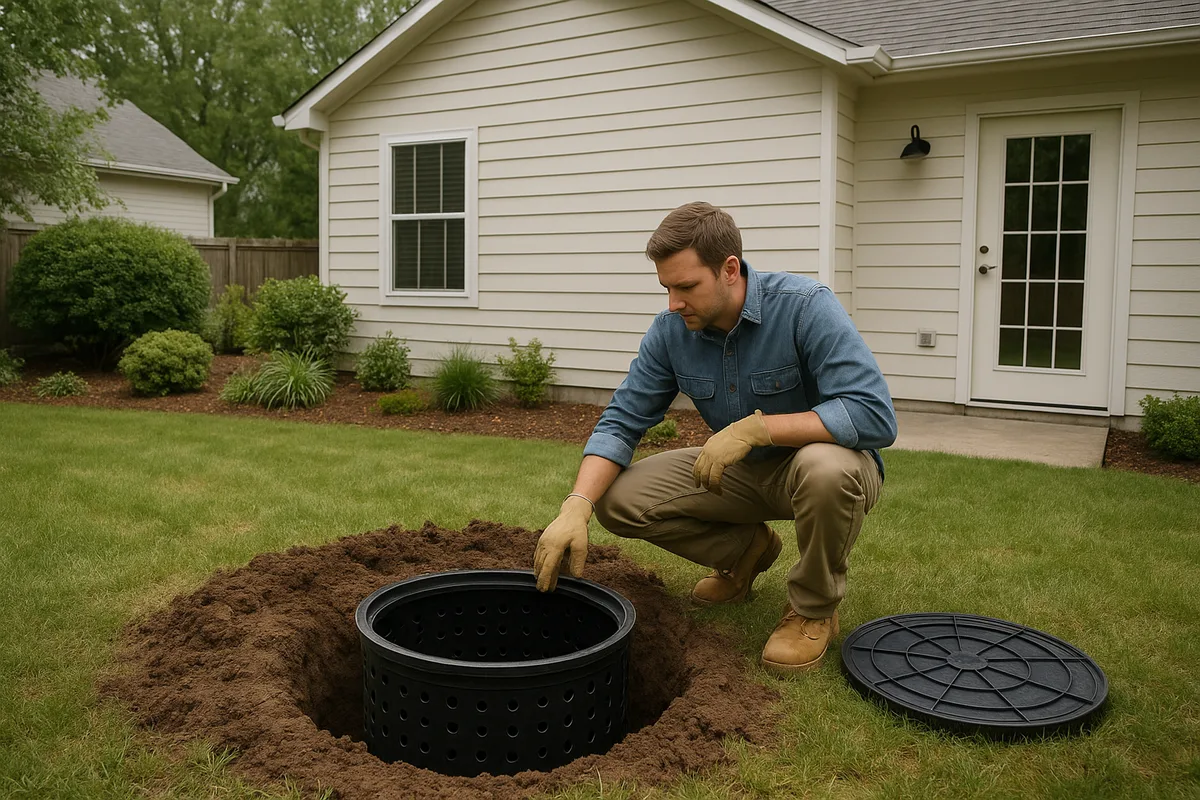
Prefabricated plastic chambers: These are the most common residential option. Manufacturers like NDS, Flo-Well, and StormTech produce modular plastic chambers with perforated walls that can be stacked or connected in series. A typical single unit holds 30–50 gallons, and multiple units can be linked for greater capacity.
Gravel-filled pits: The traditional approach involves excavating a large hole (typically 4–6 feet in diameter and 4–6 feet deep), lining it with filter fabric, and filling it with clean, washed stone—usually 1.5-inch to 3-inch aggregate. The void space between the stones provides storage volume, typically about 30–40% of the total pit volume.
Concrete dry wells: Precast concrete rings or vaults with perforated walls offer maximum durability and are common in commercial applications or areas with heavy loads. These are more expensive but can last 50+ years with minimal maintenance.
Hybrid systems: Many installations combine a plastic chamber surrounded by a gravel envelope, wrapped in filter fabric. This approach maximizes storage volume while providing filtration and structural support.
Regardless of type, every dry well operates on the same principle: temporarily store water and release it slowly into permeable soil.
The Critical Role of Soil in Dry Well Performance
If there is one factor that determines whether a dry well succeeds or fails, it is the soil surrounding it. A dry well is only as effective as the soil's ability to absorb water—a property known as the percolation rate or infiltration rate. Install a dry well in the wrong soil, and you've essentially built an underground swimming pool.
Understanding Soil Percolation Rates
Percolation rate measures how quickly water drains through soil, typically expressed in inches per hour or minutes per inch. Here's how common soil types compare:
| Soil Type | Percolation Rate | Dry Well Suitability |
|---|---|---|
| Coarse sand/gravel | 6–12+ inches/hour | Excellent |
| Sandy loam | 2–6 inches/hour | Good |
| Loam | 1–2 inches/hour | Moderate |
| Silt loam | 0.5–1 inch/hour | Marginal |
| Clay loam | 0.1–0.5 inch/hour | Poor |
| Heavy clay | <0.1 inch/hour | Not suitable |
As a general rule, soil must have a percolation rate of at least 1 inch per hour for a standard residential dry well to function reliably. Below that threshold, the well simply cannot empty fast enough between storm events, leading to chronic overflow.
How to Test Your Soil
Before investing in dry well installation, you should perform a percolation test at the planned location and depth. Here's the standard procedure:
- Dig a test hole to the depth where the bottom of the dry well will sit—typically 3–5 feet below grade.
- Fill the hole with water and let it drain completely. This pre-saturates the soil to simulate worst-case conditions.
- Refill the hole with 12 inches of water.
- Measure how long it takes for the water level to drop 1 inch.
- Repeat at least three times and average the results.
If water takes more than 60 minutes to drop 1 inch, a conventional dry well is likely a poor choice for that location. If it takes more than 30 minutes per inch, you'll need to oversize the well significantly or consider alternative solutions.
The NRCS Web Soil Survey is an excellent free resource for getting preliminary soil data for your property. It provides hydrologic soil group classifications (A through D, with A being the most permeable) and detailed soil composition data that can help you estimate percolation rates before you start digging.
The Water Table Factor
Even in permeable soil, a high water table can render a dry well useless. If the seasonal high water table reaches the bottom of the dry well, there's simply nowhere for the water to go—the surrounding soil is already saturated.
Best practice requires a minimum of 2 feet of clearance between the bottom of the dry well and the seasonal high water table. In many jurisdictions, this is a code requirement. Some areas require 4 feet of separation, particularly where dry wells are used for roof runoff that might carry pollutants.
Determining your seasonal high water table can be tricky because it fluctuates throughout the year. Soil borings performed during the wet season give the most accurate picture. Look for soil mottling—patches of gray, orange, or rust coloring in the soil profile—which indicates where the water table periodically reaches.
Sizing a Dry Well: The Math That Matters
Undersizing is the single most common reason for dry well failure in otherwise suitable soil. Many homeowners and even some contractors install a single off-the-shelf dry well unit without calculating whether it has adequate capacity for the drainage area it serves. The result is predictable: the well fills up during moderate storms and overflows during heavy ones.
Calculating Required Volume
Proper dry well sizing requires three pieces of information:
- Contributing drainage area: The total impervious area (roof, driveway, patio) draining to the well, measured in square feet.
- Design storm: The rainfall intensity you're designing for, typically the 10-year or 25-year storm event for your region. You can find precise rainfall data through NOAA Atlas 14, which provides precipitation frequency estimates for any location in the United States.
- Soil infiltration rate: How quickly the surrounding soil can absorb water, determined by your percolation test.
The basic formula is:
Required storage = (Rainfall depth × Drainage area) − (Infiltration rate × Well surface area × Storm duration)
Let's work through a real example. Suppose you have 1,500 square feet of roof draining to a single downspout, you're designing for a 1-hour storm that produces 2 inches of rain, and your soil percolates at 2 inches per hour.
- Inflow volume: 1,500 sq ft × (2 inches ÷ 12) = 250 cubic feet of water, or about 1,870 gallons
- Outflow during storm: Depends on the well's surface area in contact with soil. A 4-foot diameter, 4-foot deep cylindrical well has roughly 50 square feet of side wall area plus 12.5 square feet of bottom area = 62.5 square feet. At 2 inches/hour infiltration: 62.5 × (2 ÷ 12) = about 10.4 cubic feet drained during the 1-hour storm.
- Net storage needed: 250 − 10.4 = approximately 240 cubic feet, or about 1,795 gallons.
A single 50-gallon prefabricated dry well clearly isn't going to cut it. You'd need a system of multiple connected units or a large gravel-filled pit with sufficient void space. For a gravel pit with 35% void ratio, you'd need roughly 685 cubic feet of total pit volume—equivalent to a pit about 8 feet × 8 feet × 11 feet, or multiple smaller pits connected in series.
Safety Factors and Real-World Adjustments
The calculation above is simplified. In practice, you should apply a safety factor of 1.5–2.0 to account for:
- Soil compaction during installation reducing percolation
- Sediment accumulation over time reducing effective volume
- Back-to-back storm events where the well hasn't fully drained
- Seasonal variations in soil moisture and water table height
Many experienced contractors design dry wells to handle the design storm using storage volume alone, treating infiltration during the storm as a bonus. This conservative approach ensures the system works even in worst-case conditions.
Proper Dry Well Installation: Step by Step
Even with perfect soil and correct sizing, poor installation technique can doom a dry well. The details matter—from excavation to backfill, every step affects long-term performance.
Site Selection and Setback Requirements
Before breaking ground, verify that your chosen location meets all setback requirements. While codes vary by jurisdiction, common minimums include:
- 10 feet from the building foundation (some codes require 20 feet)
- 50–100 feet from private wells or water supply lines
- 10 feet from property lines
- 25 feet from septic system components
- Away from underground utilities (always call 811 before digging)
The dry well should be positioned at a natural low point relative to the drainage source, and the connecting pipe should maintain a minimum slope of 1% (1/8 inch per foot) for gravity flow. Ideally, aim for 2% slope in the conveyance pipe to prevent sediment accumulation.
Excavation and Preparation
Dig the hole 12–18 inches wider than the dry well on all sides to allow for a gravel envelope. The bottom of the excavation should be flat and level. If you encounter a layer of clay or hardpan during excavation that wasn't apparent in your test hole, stop and reassess—that impermeable layer will block drainage regardless of what the soil above or below it does.
Remove any roots from the excavation walls. Over time, roots will seek out the moisture in a dry well and can clog perforations, crush plastic chambers, or fill void spaces in gravel.
Installation Sequence
A proper dry well installation follows this sequence:
Line the excavation with filter fabric: Use non-woven geotextile fabric rated for drainage applications. The fabric should extend up and over all sides with enough excess to fold over the top. This prevents soil migration into the gravel envelope while allowing water to pass through.
Place a 6-inch base layer of washed stone: Use clean, angular aggregate (typically #2 or #57 stone). Do not use rounded river rock, which has less void space and can shift under load.
Set the dry well unit(s): Position prefabricated chambers on the gravel base. If using multiple units, connect them according to manufacturer specifications. Ensure inlet and outlet connections are properly oriented.
Connect the inlet pipe: Use solid (non-perforated) Schedule 40 PVC or corrugated HDPE pipe from the drainage source to the dry well. Install a debris screen or catch basin with a sediment trap upstream of the dry well to prevent clogging.
Install an overflow outlet: This is critical and often overlooked. Every dry well needs a plan for what happens when it's full. Options include a pipe that daylight to a lower area of the yard, a connection to a secondary dry well, or an overflow to the municipal storm system (where permitted). Without an overflow, a full dry well sends water backing up through the inlet pipe, potentially flooding the area it was supposed to protect.
Backfill with washed stone: Fill around and over the dry well with aggregate, leaving 6–12 inches of space below final grade.
Fold filter fabric over the top: Overlap the fabric by at least 12 inches to prevent soil from migrating down into the stone.
Backfill to grade with topsoil: The final layer of native soil or topsoil allows grass to grow over the installation, making it invisible.
Install an observation port: A 4-inch PVC pipe extending from the top of the dry well to the surface (capped with a removable cap) allows you to check water levels and verify the system is draining properly.
Common Installation Mistakes
These errors account for the majority of premature dry well failures:
Skipping the filter fabric: Without it, fine soil particles migrate into the gravel and dry well, clogging pore spaces and reducing capacity over time. This is called "soil piping" and is irreversible without excavating and rebuilding.
Using dirty or fine aggregate: Crusher run, road base, or unwashed stone contains fine particles that fill void spaces and reduce both storage capacity and percolation. Always use clean, washed stone.
Compacting the excavation walls: Heavy equipment or aggressive tamping can smear clay particles across the excavation walls, creating a nearly impermeable barrier. Excavate carefully and avoid compacting the sidewalls.
No sediment protection upstream: Roof grit, leaf debris, and soil particles will accumulate in a dry well over time. A catch basin or inline filter upstream dramatically extends the system's lifespan.
Forgetting the overflow: A dry well without an overflow is a liability. When it fills—and eventually it will, whether from an extreme storm or gradual capacity loss—the water needs somewhere safe to go.
When Dry Wells Work: Ideal Conditions
A dry well is an excellent drainage solution when the following conditions are met:
Permeable Soil at Depth
The ideal scenario is sandy or gravelly soil with a percolation rate above 2 inches per hour extending well below the bottom of the dry well. Sandy loam soils (Hydrologic Soil Group A or B) are the sweet spot—fast enough to drain reliably, but with enough structure to maintain the excavation walls.
Properties in coastal plains, glacial outwash areas, and alluvial valleys often have ideal soil profiles. If you're lucky enough to have deep, well-drained sand beneath your property, a properly sized dry well can handle enormous volumes of stormwater.
Low Water Table
A seasonal high water table that stays at least 3–4 feet below the bottom of the dry well gives the system room to work even during wet periods. Properties on elevated terrain or well-drained ridges typically have deep water tables.
Moderate Drainage Areas
Dry wells work best when the contributing drainage area is manageable—typically under 2,000 square feet of impervious surface per well. Larger areas require either multiple wells in series or alternative systems like infiltration trenches or detention basins.
Space for Proper Setbacks
You need enough room on your property to place the dry well at safe distances from the foundation, property lines, wells, and septic systems. Properties with generous side or rear yards are good candidates.
Supplemental Drainage Needs
Dry wells shine when used as part of a comprehensive drainage strategy rather than as the sole solution. They work particularly well for:
- Handling roof downspout discharge in areas where surface drainage isn't feasible
- Managing driveway runoff that can't be directed to the street
- Supplementing French drain systems by providing a discharge point
- Meeting local stormwater retention requirements for new construction or additions
When Dry Wells Fail: Warning Signs and Deal-Breakers
Understanding when a dry well will fail is just as important as knowing when it will work. Here are the conditions that should make you reconsider—or avoid—a dry well entirely.
Clay-Heavy Soils
This is the number one cause of dry well failure. Clay soils (Hydrologic Soil Group C and D) have percolation rates so slow that a dry well may take days or even weeks to drain after a single storm. In heavy clay, the well essentially becomes a sealed underground cistern.
The insidious part is that clay soils can sometimes feel deceptively permeable during dry weather. When clay dries out, it shrinks and cracks, allowing water to flow through temporarily. But once saturated, those cracks swell shut and percolation drops to near zero. A percolation test performed during dry conditions can give misleadingly optimistic results—always test during or shortly after a wet period.
High or Perched Water Tables
If the water table seasonally rises to within 2 feet of the dry well bottom, the system will fail during the times you need it most—during wet weather when the water table is highest and storms are most frequent. This creates a cruel irony: the dry well works fine during dry periods (when you don't need it) and fails during wet periods (when you do).
Perched water tables—where an impermeable layer traps water above the main water table—are particularly problematic because they may not show up in standard well data. Only soil borings at the actual installation depth will reveal them.
Impermeable Subsurface Layers
Some properties have a layer of hardpan, caliche, bedrock, or dense clay beneath a surface layer of permeable topsoil. If this impermeable layer sits at or near the depth of the dry well, water has nowhere to go. The permeable surface soil may pass a shallow percolation test, but the dry well—installed deeper—hits the impermeable barrier.
This is why percolation testing must be performed at the actual installation depth, not at the surface.
Insufficient Sizing for the Drainage Area
A single 30-gallon prefabricated dry well connected to a 2,000-square-foot roof will be overwhelmed by even a moderate rainstorm. Unfortunately, some big-box store marketing implies that a single unit can handle an entire home's runoff. It cannot. Undersized dry wells overflow during every significant rain event, creating erosion and ponding at the overflow point—often right next to the foundation.
Poor Maintenance Over Time
Dry wells are not install-and-forget systems. Over years, sediment accumulates, filter fabric can become clogged with fines, and organic matter can reduce effective volume. Without periodic inspection and occasional maintenance, even a well-designed system will gradually lose capacity.
Signs that a dry well is failing include:
- Water pooling at the surface above the dry well after rain
- Slow drainage observed through the inspection port
- Water backing up through inlet pipes
- Gurgling sounds from connected downspouts during rain
- Soggy ground around the dry well that persists for days after rain stops
Regulatory Restrictions
Some jurisdictions restrict or prohibit dry wells, particularly in areas with:
- Contaminated groundwater or superfund sites
- Sole-source aquifers where stormwater infiltration could introduce pollutants
- Karst terrain where sinkholes are a risk
- Combined sewer systems where infiltration affects system capacity
Always check with your local building department or stormwater authority before installing a dry well. Many areas require permits and inspections, and some mandate specific design standards.
Alternatives to Dry Wells When Conditions Don't Fit
When soil, water table, or site conditions rule out a dry well, several alternative approaches can achieve similar stormwater management goals.
French Drains
A French drain is a gravel-filled trench with a perforated pipe that collects and redirects water to a suitable discharge point—a lower area of the yard, a swale, a storm drain, or even a dry well located in better soil. French drains work well in clay soils because they don't rely on soil absorption; they physically transport water to another location.
The key advantage of a French drain over a dry well is that it moves water laterally rather than relying on vertical infiltration. This makes it effective in tight clay soils where a dry well would fail.
Rain Gardens and Bioretention Areas
A rain garden is a shallow, planted depression designed to capture and absorb stormwater runoff. The engineered soil mix (typically 60% sand, 20% compost, 20% topsoil) provides rapid infiltration even where native soil is poor. Rain gardens can handle moderate volumes of runoff while adding aesthetic value and supporting pollinators.
Rain gardens are essentially surface-level dry wells with the added benefit of biological filtration. They're particularly effective for managing sheet flow from lawns, patios, and driveways.
Infiltration Trenches
An infiltration trench is a narrow, gravel-filled trench that functions similarly to a dry well but distributes the infiltration area over a longer, linear footprint. Because the trench is shallower and wider than a dry well, it can work in soils with moderate percolation rates that wouldn't support a concentrated dry well.
Typical dimensions are 1–3 feet wide, 2–4 feet deep, and as long as needed to provide adequate surface area for infiltration.
Surface Grading and Swales
Sometimes the simplest solution is the best. Proper surface grading—maintaining a minimum 5% slope for the first 10 feet away from the foundation, then at least 2% beyond—can direct stormwater away from problem areas without any underground infrastructure. Swales (shallow, vegetated channels) can guide water across a property to a suitable discharge point.
Grading solutions are universally applicable regardless of soil type and should always be the first line of defense before considering underground systems.
Detention and Retention Systems
For properties with very large impervious areas or strict stormwater regulations, engineered detention systems (which temporarily hold water and release it slowly) or retention systems (which hold water permanently, like a pond) may be necessary. These are typically engineered solutions designed by civil engineers for specific site conditions.
Maintaining Your Dry Well for Long-Term Performance
A properly installed dry well in suitable soil should function for 15–30 years or more with appropriate maintenance. Neglect that maintenance, and the lifespan drops dramatically.
Annual Inspection Checklist
Perform these checks at least once a year, ideally in late spring after the wet season:
- Check the observation port: Remove the cap and look inside. If you see standing water more than 48 hours after the last rain, the well isn't draining properly.
- Inspect upstream catch basins: Remove and clean sediment traps, debris screens, and grate covers. This is the single most impactful maintenance task—keeping sediment out of the dry well prevents the most common mode of failure.
- Check inlet and overflow pipes: Look for blockages, root intrusion, or damage. Run water through the system with a garden hose to verify flow.
- Inspect the ground surface: Look for sinkholes, settling, or erosion around the dry well location. Settling may indicate internal collapse or soil migration.
- Test drainage rate: Fill the dry well through the observation port or inlet pipe and time how long it takes to drain. Compare to previous years. A significant slowdown indicates clogging.
Extending Dry Well Lifespan
Several practices can significantly extend the functional life of your system:
- Keep gutters clean: Leaf debris and roof granules are the primary source of sediment in dry wells connected to downspouts. Clean gutters twice a year and consider installing gutter guards.
- Maintain upstream filters: Replace or clean filter inserts in catch basins annually. A $20 filter replacement is far cheaper than a $3,000 dry well rebuild.
- Avoid routing surface runoff directly: Surface water carries far more sediment than roof runoff. If you must handle surface drainage, install a robust sediment trap upstream.
- Don't drive over the dry well: Vehicle loads can crush plastic chambers and compact the surrounding soil, reducing infiltration capacity.
- Keep trees at a distance: Tree roots are persistent and will find their way into any source of moisture. Maintain at least 10–15 feet between the dry well and large trees.
When to Replace or Rebuild
If your dry well consistently holds water for more than 72 hours after rain, it's time to investigate. Options include:
- Flushing: Some systems can be partially restored by jetting water through the observation port to break up sediment and biofilm on the chamber walls.
- Supplementing: Adding a second dry well in series can compensate for reduced capacity in the original.
- Rebuilding: If the filter fabric is clogged or the gravel envelope is filled with fines, the only real fix is excavation and reconstruction. Use this opportunity to upsize the system based on your real-world experience with its performance.
Making the Right Decision for Your Property
A dry well can be a highly effective, low-maintenance stormwater solution—but only when it's the right tool for the job. The decision to install one should be based on objective site data, not assumptions or convenience.
Before committing to dry well installation, invest in the upfront investigation that separates successful projects from expensive failures: perform percolation tests at the actual installation depth, research your seasonal water table, check local regulations, and run the sizing calculations for your specific drainage area and design storm. These steps cost a fraction of the installation price and can save you from a system that never works as intended.
At Low Point Labs, we specialize in analyzing the topographic and drainage characteristics of residential properties. Our drainage assessments can help you understand how water moves across your property, identify where stormwater concentrates, and determine whether a dry well—or an alternative solution—is the right approach for your specific conditions. Before you dig, get the data. Explore our drainage intelligence services to make informed decisions about your property's stormwater management.
See Drainage Intelligence in Practice
Talk with our team or request an invitation to the platform.
Frequently Asked Questions
A properly installed and maintained dry well typically lasts 15–30 years. Lifespan depends heavily on upstream sediment protection—systems with good catch basins and clean gutter runoff last longest. Without maintenance, clogging from sediment and fines can reduce a dry well's effectiveness within 5–10 years.
Most residential dry wells are installed 3–5 feet deep, though depth depends on soil conditions and water table height. The bottom of the dry well must be at least 2 feet above the seasonal high water table, and ideally 3–4 feet above it. Always perform a percolation test at the planned installation depth before digging.
Dry wells generally do not work well in heavy clay soil. Clay has a percolation rate below 0.5 inches per hour, meaning the well fills up faster than it can drain. In clay soils, alternatives like French drains, infiltration trenches with engineered soil, or surface grading solutions are usually more effective.
Permit requirements vary by jurisdiction. Many municipalities require a permit for dry well installation, especially for systems exceeding a certain size or those handling runoff from large impervious areas. Some areas prohibit dry wells entirely near wellhead protection zones or contaminated sites. Always check with your local building department before installation.
Most building codes require a minimum of 10 feet between a dry well and a building foundation, though some jurisdictions require 20 feet. This setback prevents infiltrated water from migrating toward the foundation and causing hydrostatic pressure or basement seepage. Greater distances are always better when space allows.
Sizing depends on the roof area draining to that downspout and your local rainfall intensity. As a rough guideline, every 500 square feet of roof area in a moderate rainfall region (2 inches per hour design storm) generates about 625 gallons of runoff. A single small prefabricated unit (30–50 gallons) is rarely sufficient; most downspout applications require multiple connected units or a large gravel-filled pit.
Related Articles
Catch Basins vs. Channel Drains: Choosing the Right Surface Drainage
What Is a Drainage Assessment and Why Do You Need One?