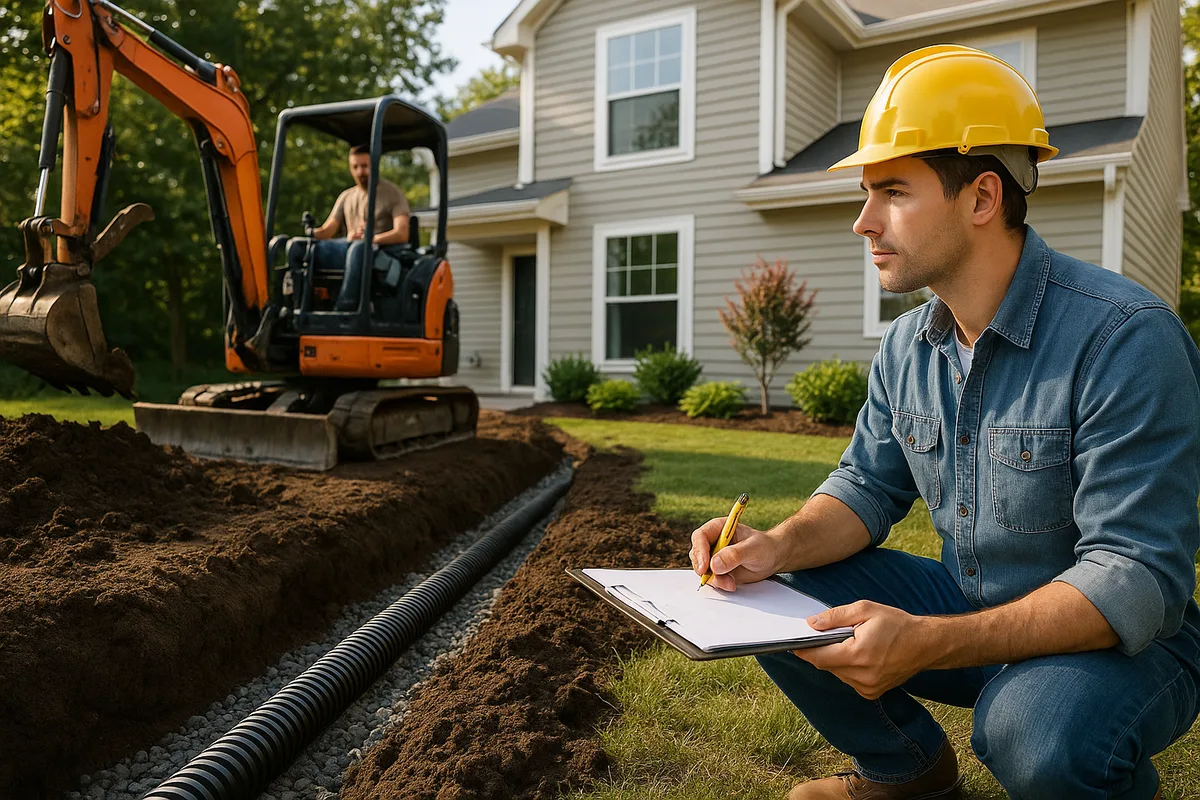
How to Use Landscaping Design Software to Justify a $15,000 Drainage Bid
When a homeowner sees a $15,000 drainage bid for the first time, their reaction is almost always the same: sticker shock. They look at their soggy backyard, mentally compare the number to a vacation or a used car, and wonder whether the contractor pulled the figure out of thin air. The truth is, a well-engineered residential drainage system genuinely costs that much — and often more — once you account for excavation, materials, labor, permitting, and restoration. The problem isn't the price. The problem is the presentation.
This is where landscaping design software becomes the most powerful sales and engineering tool in a drainage contractor's arsenal. By producing professional-grade visualizations, accurate grading calculations, and itemized material takeoffs, the right software transforms a one-page drainage bid from a mysterious lump sum into a transparent, data-backed proposal that homeowners can understand, trust, and approve. In this guide, we'll walk through exactly how to leverage these tools — from initial site assessment to final proposal delivery — so that your $15,000 bid doesn't just survive scrutiny, it wins the job.
Why a $15,000 Drainage Bid Needs Visual Proof
Residential drainage work is inherently invisible. Unlike a kitchen remodel or a new deck, most of the investment ends up underground — buried pipe, gravel beds, catch basins, and regraded soil. Homeowners can't see the value, so they question it. A 2024 survey by the National Association of Landscape Professionals found that proposals accompanied by visual plans and 3D renderings had a 38% higher close rate than text-only estimates. For high-ticket drainage projects, that gap is even wider.
A $15,000 drainage bid typically includes French drains, channel drains, downspout rerouting, grading corrections, possibly a dry well or rain garden, and full landscape restoration. Each of these components has engineering requirements — minimum slopes, pipe sizing, aggregate specifications, and discharge compliance. When you present all of this as a single line item, the homeowner has no way to evaluate whether the price is fair. When you present it as a detailed design package generated by professional landscaping design software, every dollar has a visual and mathematical justification.
The psychological shift matters too. A contractor who shows up with a clipboard and a handwritten number looks like a tradesperson guessing. A contractor who presents a color-coded grading plan, a 3D before-and-after rendering, and an itemized material list looks like an engineer solving a problem. The software doesn't change the scope of work — it changes the perception of competence and value.
Choosing the Right Landscaping Design Software for Drainage Work
Not all landscaping design software is created equal, and not every platform handles drainage engineering well. Some tools are built for planting plans and hardscape aesthetics; others include grading, hydrology, and civil engineering modules. For a contractor building a drainage bid, you need software that can do at least three things: model existing and proposed topography, calculate water flow and pipe sizing, and produce client-facing visuals that tell the story.
Professional-Grade Options
At the top of the market, platforms like Autodesk Civil 3D and Bentley OpenSite Designer offer full grading and hydrology modeling. These are overkill for most residential contractors, but if your firm handles large estates or commercial-residential crossover projects, the investment pays for itself. Civil 3D can import survey data, generate existing-condition surface models, and then let you design proposed grades with automatic cut/fill calculations — which directly feeds your drainage bid with accurate earthwork volumes.
For the majority of residential drainage contractors, mid-tier tools strike the best balance. Vectorworks Landmark includes integrated site modeling with grading tools, drainage area calculations, and presentation-quality renderings. Land F/X (which runs inside AutoCAD or Vectorworks) adds irrigation and drainage design modules. SketchUp Pro with site-grading plugins is another popular choice — it's more accessible and produces compelling 3D visuals, though it requires manual hydrology calculations.
Budget-Friendly and Hybrid Approaches
Smaller operations can combine free or low-cost tools effectively. QGIS — an open-source GIS platform available at qgis.org — can import elevation data, delineate drainage basins, and produce topographic maps that form the analytical backbone of your bid. Pair QGIS with a visual tool like Realtime Landscaping Architect or iScape for the client-facing renderings, and you have a two-tool workflow that covers both engineering and presentation without a massive software budget.
The key is matching the tool to the deliverable. Your drainage bid needs two types of output: technical documentation that proves the design works, and visual materials that help the homeowner understand what they're paying for. Some software does both; others require a combination.
Step 1: Capturing Existing Site Conditions with Precision
Every defensible drainage bid starts with accurate existing conditions. If your grading plan is based on guesswork, your cost estimate will be too — and the homeowner will sense it. Landscaping design software gives you the framework to capture, organize, and present site data in a way that establishes credibility from the first meeting.
Gathering Elevation Data
For residential drainage projects, you need elevation data at a resolution that reveals the subtle grade changes causing water problems. A 0.5% slope difference across a 40-foot backyard can be the difference between water flowing toward the street and water pooling against the foundation. There are several ways to capture this data:
- Total station or auto-level survey: The gold standard. Shoot 20-50 spot elevations across the property, focusing on foundation corners, low points, downspout discharge locations, property lines, and any existing drainage infrastructure. Import these points directly into your design software.
- RTK GPS: Faster than a total station for larger lots, with vertical accuracy of ±1 inch — more than sufficient for residential grading design.
- Drone photogrammetry: A drone flight with photogrammetric processing (using tools like DroneDeploy or Pix4D) can produce a digital elevation model of the entire property in under an hour. The resulting point cloud imports into Civil 3D, Vectorworks, or QGIS.
- LiDAR data from public sources: The USGS 3D Elevation Program provides free LiDAR-derived elevation data for much of the United States through the USGS 3DEP program. While the resolution (typically 1-2 meter horizontal) is coarser than a field survey, it's excellent for understanding broader watershed context — where does water come from before it reaches the property?
Once you have elevation data in your software, generate an existing-conditions surface model. This becomes the baseline against which all proposed grading changes are measured. It's also a powerful visual for the homeowner: "Here's your yard today. See this low point 8 feet from your foundation? That's where 1,200 square feet of roof runoff collects."
Documenting Problem Areas
Beyond topography, document everything that affects drainage: downspout locations and discharge points, impervious surface areas (roof, driveway, patio), soil types, existing drain locations, utility lines, trees with root zones that constrain excavation, and any visible erosion or standing water. Photograph each problem area and geolocate the photos. Many landscaping design software platforms let you pin photos to the site plan, creating an interactive record that the homeowner can review.
This documentation serves a dual purpose. First, it feeds the engineering design. Second, it builds the case for the drainage bid. When a homeowner can see a photo of their eroded swale pinned to the exact location on a topographic map, the problem feels real and measurable — not abstract.
Step 2: Designing the Drainage System in Software
With existing conditions modeled, you can design the proposed drainage system inside your landscaping design software. This is where the $15,000 drainage bid starts to take shape — not as a guess, but as a calculated response to measured problems.
Grading Design and Cut/Fill Calculations
The first design task is usually regrading. Most residential drainage problems stem from insufficient slope away from the foundation. The International Residential Code requires a minimum 6-inch drop over the first 10 feet from the foundation (approximately 5% slope), but many older homes have settled or were graded improperly from the start.
In your software, create a proposed surface that corrects the grade. Design swales with a minimum 2% longitudinal slope to carry water to discharge points. Model berms if you need to redirect sheet flow from neighboring properties. The software will automatically calculate cut and fill volumes — the exact cubic yards of soil that need to be excavated or added. This number directly translates to equipment hours, trucking costs, and labor, giving your drainage bid a defensible earthwork line item.
For example, regrading a 2,000-square-foot area with an average fill depth of 4 inches requires approximately 25 cubic yards of topsoil. At $35-50 per cubic yard delivered, that's $875-$1,250 in material alone, before labor and equipment. When the homeowner sees this calculation generated by software — not scribbled on a napkin — the number carries authority.
Pipe Sizing and Hydraulic Calculations
For French drains, curtain drains, and piped systems, the software (or supplementary calculation tools) should determine pipe diameter based on the drainage area served, local rainfall intensity, and soil infiltration rates. The standard approach uses the Rational Method: Q = CiA, where Q is peak runoff in cubic feet per second, C is the runoff coefficient, i is rainfall intensity (from NOAA Atlas 14 data), and A is the drainage area in acres.
Most residential drainage systems use 4-inch perforated or solid pipe, but larger properties or areas with heavy clay soils may require 6-inch pipe. Your software should document the drainage area calculations that justify the pipe sizing. This is another line item in your drainage bid that benefits from visual proof — show the homeowner a color-coded map of drainage basins on their property, with each basin's area and calculated peak flow labeled.
System Layout and Component Placement
Design the complete system in plan view: pipe runs with slopes annotated, catch basin locations, cleanout access points, French drain trenches with cross-section details, dry well locations with sizing calculations, and discharge points. Good landscaping design software lets you draw all of this on the site plan with proper symbology, creating a document that looks like an engineering drawing — because it is one.
Include cross-section views of trench construction. A typical French drain cross-section shows the trench width (12-18 inches), depth (18-24 inches), gravel bed, perforated pipe placement, filter fabric wrapping, and backfill layers. When the homeowner sees this level of detail, they understand that a French drain isn't just "a pipe in a ditch" — it's a layered system with specific material requirements.
Step 3: Building the Material Takeoff and Cost Justification
The material takeoff is where landscaping design software directly builds your drainage bid. Every component you've drawn on the plan has a quantity, and every quantity has a cost. The software automates much of this counting, eliminating the estimation errors that erode profit margins and undermine credibility.
Automated Quantity Extraction
From your completed design, extract the following quantities:
- Linear feet of pipe by type and diameter (4" perforated, 4" solid, 6" solid)
- Cubic yards of drainage gravel (typically #57 stone or #2 washed stone)
- Square feet of filter fabric
- Number of catch basins, grates, and fittings (elbows, tees, couplings, adapters)
- Number of cleanout risers
- Cubic yards of cut and fill (earthwork)
- Square yards of sod or seed for restoration
- Linear feet of channel drain with grate type
- Dry well units with sizing (gallons of storage capacity)
- Cubic yards of topsoil for final grading
Organize these into a material schedule — a table within your proposal that lists every item, its quantity, unit cost, and extended cost. This is the transparency that justifies the drainage bid. When a homeowner sees that 180 linear feet of 4-inch perforated pipe costs $1.85 per foot ($333), 22 cubic yards of #57 gravel costs $45 per yard ($990), and 16 hours of mini-excavator rental costs $125 per hour ($2,000), the $15,000 total stops feeling arbitrary.
Labor and Equipment Costing
Labor is typically the largest component of a residential drainage bid, often 40-50% of the total. Your software-generated plan helps justify labor costs because it shows the complexity and scope of the work. A plan that includes 200 linear feet of trenching through a backyard with three mature trees, two utility crossings, and a patio edge clearly communicates more labor intensity than a straight run through open lawn.
Break labor into categories: excavation and trenching, pipe installation, grading and compaction, landscape restoration (sod, mulch, plantings), and project management/cleanup. Assign hourly rates and estimated hours to each category. The software plan serves as the basis for these time estimates — you can measure distances, count components, and identify access constraints directly from the design.
Presenting the Cost Breakdown
Structure your drainage bid into sections that mirror the design:
- Site Preparation: Demolition, clearing, utility marking
- Earthwork: Excavation, grading, soil import/export
- Drainage Infrastructure: Pipe, gravel, fabric, basins, dry wells
- Surface Drainage: Channel drains, grading corrections, swale construction
- Landscape Restoration: Sod, seed, topsoil, mulch, replanting
- Permits and Engineering: If applicable
- Warranty and Maintenance: Post-installation support
Each section should reference the corresponding area on the design plan. "Section 3 covers the French drain system shown in blue on Sheet 2 of the attached plan." This cross-referencing between the bid document and the visual plan is what transforms a price list into a professional proposal.
Step 4: Creating Client-Facing Visuals That Sell the Project
The engineering is done. The numbers are solid. Now you need to make the homeowner feel confident about writing a $15,000 check. This is where the visual output of your landscaping design software earns its keep.
Before-and-After Renderings
Most homeowners think visually, not mathematically. A 3D rendering showing their current yard — with the low spot, the eroded path along the fence, the downspout dumping water against the foundation — next to a rendering of the proposed solution creates an emotional connection to the project. The "after" image should show the finished landscape: restored lawn, a subtle swale with decorative stone, a rain garden where the dry well sits, and clean channel drains along the patio edge.
Software like Vectorworks, Lumion (paired with SketchUp), or Realtime Landscaping Architect can produce photorealistic renderings. Even simpler tools like iScape generate before-and-after comparisons using photos of the actual property. The fidelity matters less than the clarity — the homeowner needs to see that the finished product will look good, not just function well.
Annotated Plan Views
Produce a clean, color-coded plan view that the homeowner can study. Use intuitive colors: blue for pipe runs, green for grading changes, red for problem areas, brown for excavation zones. Add callout labels in plain language — "French drain collects water from patio and directs it to dry well" rather than "4" HDPE perf. @ 1.5% to 50-gal infiltration chamber." You can include the technical specifications in a separate detail sheet for the permit file; the client-facing plan should prioritize comprehension.
Include a flow-direction overlay showing how water will move across the property after the system is installed. Arrows indicating flow direction, labeled with slopes, give the homeowner a clear mental model of the solution. This is one of the most persuasive visuals you can produce — it answers the fundamental question: "Where will the water go?"
Photo Documentation Integration
Embed your site photos into the proposal alongside the corresponding design elements. A split view showing a photo of the current ponding area next to the plan view of the proposed French drain at that location creates a powerful narrative: problem on the left, solution on the right, cost itemized below. This storytelling approach is far more effective than a generic bid letter.
Step 5: Addressing Homeowner Objections with Data
Even with a beautiful proposal, homeowners will have objections. The most common are: "Why does it cost so much?", "Can't I just extend my downspouts?", and "My neighbor had drainage work done for $5,000." Landscaping design software gives you the data to address each of these with specifics rather than generalities.
The "Why So Much?" Objection
Point to the material takeoff. Show the homeowner that the project requires 22 cubic yards of gravel, 180 feet of pipe, three catch basins, a dry well, 15 cubic yards of earthwork, and 800 square feet of sod. Then show them the labor breakdown: this is a 3-4 day project for a two-person crew with a mini-excavator. The software-generated quantities make the scope undeniable. You're not charging $15,000 for a "drainage fix" — you're charging for a specific, measurable system with dozens of components.
The "Can't I Just..." Objection
Use the topographic model to show why simpler solutions won't work. If the homeowner suggests extending downspouts, show them the grading plan that reveals the extended downspouts would discharge into another low point 20 feet away — creating a new problem. If they suggest a single French drain, show them the drainage basin analysis that demonstrates three separate collection areas feeding the problem, requiring a branched system. The software makes these engineering arguments visual and irrefutable.
The "My Neighbor Paid Less" Objection
Every property is different, and your site analysis proves it. Show the soil data — if the property has Group D hydrologic soils (heavy clay with infiltration rates below 0.05 inches per hour), the system needs more infrastructure than a property with sandy loam. Show the drainage area calculations — a 3,000-square-foot roof generates significantly more runoff than a 1,500-square-foot roof. Show the grade analysis — a flat lot requires more aggressive intervention than a lot with natural slope. The data makes the comparison to the neighbor's project irrelevant because the conditions are demonstrably different.
Integrating Regulatory and Environmental Data
A truly professional drainage bid addresses regulatory requirements proactively. Many municipalities require permits for grading work, stormwater discharge modifications, or connections to public storm sewers. Some jurisdictions mandate stormwater detention or retention for projects that increase impervious surface area. Your landscaping design software should help you document compliance.
Include a section in your proposal that addresses local stormwater regulations. Reference the applicable codes and show how your design meets them. If your municipality requires that post-construction runoff not exceed pre-construction levels, include the calculations. If you need to maintain a setback from wetlands or waterways, show the setback line on the plan. This regulatory awareness signals professionalism and protects both you and the homeowner from compliance issues.
For properties near flood zones, reference FEMA flood map data available through the FEMA National Flood Map Service Center to contextualize the drainage risk. If the property sits adjacent to a Zone AE or Zone X (shaded) area, this information strengthens the case for comprehensive drainage infrastructure — it's not just about convenience, it's about flood risk mitigation.
Delivering the Proposal: Presentation Best Practices
The final step is how you deliver the proposal. The format and setting matter almost as much as the content. A $15,000 drainage bid deserves a presentation, not an email attachment.
In-Person or Video Walkthrough
Schedule a 30-45 minute meeting to walk the homeowner through the proposal. Start with the existing-conditions analysis — show them their property's topography, the problem areas, and the drainage basins. Then reveal the proposed design, explaining each component and why it's necessary. Finally, present the cost breakdown, tying each line item back to the design. This narrative arc — problem, solution, investment — is the most effective structure for high-value proposals.
If an in-person meeting isn't possible, create a screen-recorded video walkthrough of the design in your landscaping design software. Narrate the tour, zooming into problem areas, rotating the 3D model, and highlighting the proposed improvements. This video becomes a shareable asset — the homeowner can show it to their spouse, their neighbor, or their insurance adjuster.
Digital and Print Deliverables
Provide the proposal in both digital and print formats. The digital version should be a PDF with hyperlinked sections, embedded images, and a clear table of contents. The print version — left behind after the meeting — should be bound or presented in a folder with your company branding. Include the site plan, the 3D renderings, the material schedule, the cost breakdown, your warranty terms, and your company credentials.
Add a timeline showing project milestones: permit application, excavation start, pipe installation, grading and compaction, landscape restoration, and final inspection. A timeline communicates that you've planned the project, not just priced it.
The Competitive Advantage of Software-Backed Bids
In a market where most drainage contractors still submit one-page bids with a single total, a software-backed proposal is a massive differentiator. You're not competing on price — you're competing on trust, transparency, and demonstrated competence. The homeowner who receives three bids will almost always choose the contractor who showed them exactly what they're getting, even if that contractor isn't the cheapest. The landscaping design software investment — whether it's $200 per year for a basic tool or $3,000 per year for a professional platform — pays for itself with a single won bid at this price point.
The drainage bid isn't just a number. It's a document that communicates your understanding of the problem, your expertise in solving it, and your respect for the homeowner's investment. Landscaping design software is the engine that produces that document — turning field observations into engineering, engineering into visuals, and visuals into signed contracts.
At Low Point Labs, we specialize in the topographic and drainage intelligence that forms the foundation of every great drainage design. Our assessments provide the precise elevation data, drainage basin analysis, and grading recommendations that contractors need to build software-backed proposals — and that homeowners need to make confident investment decisions. If you're a homeowner facing a drainage challenge or a contractor looking to elevate your bid process, explore our drainage assessment services and see how data-driven design changes the conversation.
See Drainage Intelligence in Practice
Talk with our team or request an invitation to the platform.
Frequently Asked Questions
For residential drainage contractors, Vectorworks Landmark and SketchUp Pro with grading plugins offer the best balance of drainage engineering tools and client-facing visuals. Larger firms may benefit from Autodesk Civil 3D for full hydrology modeling. Budget-conscious contractors can combine QGIS (free) for topographic analysis with a visual tool like Realtime Landscaping Architect.
Use landscaping design software to produce an itemized material takeoff, detailed grading plans, and before-and-after renderings. Break the bid into categories — earthwork, pipe and materials, labor, restoration, and permits — and tie each cost to a specific element on the design plan. Transparency and visual proof are the most effective tools for justifying high-value drainage bids.
A professional drainage bid should include an existing-conditions site analysis, a proposed drainage design plan with flow directions and slopes, cross-section details of drain construction, a complete material takeoff with quantities and unit costs, a labor and equipment breakdown, a project timeline, warranty terms, and 3D renderings or before-and-after visuals.
Costs range widely. Free tools like QGIS and SketchUp Free handle basic analysis and modeling. Mid-tier options like Realtime Landscaping Architect cost $100-$400 as a one-time purchase. Professional platforms like Vectorworks Landmark run $2,000-$3,500 per year. The investment typically pays for itself by improving bid win rates on just one or two projects.
Yes. QGIS is a free, open-source GIS platform that can import elevation data, delineate drainage basins, and produce topographic maps. Combined with free or low-cost visualization tools, it provides a solid foundation for professional drainage bids. However, paid software typically offers faster workflows, better rendering quality, and integrated material takeoff features.
Most drainage design software uses the Rational Method (Q = CiA) to calculate peak stormwater runoff based on the drainage area, rainfall intensity from local data like NOAA Atlas 14, and a runoff coefficient based on surface type. The calculated flow rate determines the minimum pipe diameter needed, typically 4-inch for most residential applications and 6-inch for larger drainage areas or clay soils.
Related Articles

Writing Contractor Proposals That Build Confidence and Close Drainage Deals
How to Price Drainage Projects Based on Real Site Conditions